Before creating the customer sync saved searches, it is important to understand how the NetSuite Customer record syncs with the Stripe Customer.
Sync to Stripe Logic
When the PayPack bundle is installed in NetSuite, there is a custom transaction body field, STRIPE CUSTOMER ID, which is added to store the Stripe Customer Id.
In order to see Stripe payment methods or process payments, a NetSuite Customer record must have a Stripe Customer Id populated.
If the field is populated, the NetSuite customer will use this Stripe customer to sync payment methods and process payments. Even when changing the NetSuite customer email address or custom sync field, it will still use the existing Stripe Customer Id if populated.
Note: When changing the NetSuite customer email address, manually process PayPack Sync to update the Stripe customer's email address.
Customer Sync Methods
- Single customer sync by pressing PayPack Sync button on Customer Record. This action will only sync the primary subsidiary of a NetSuite Customer.
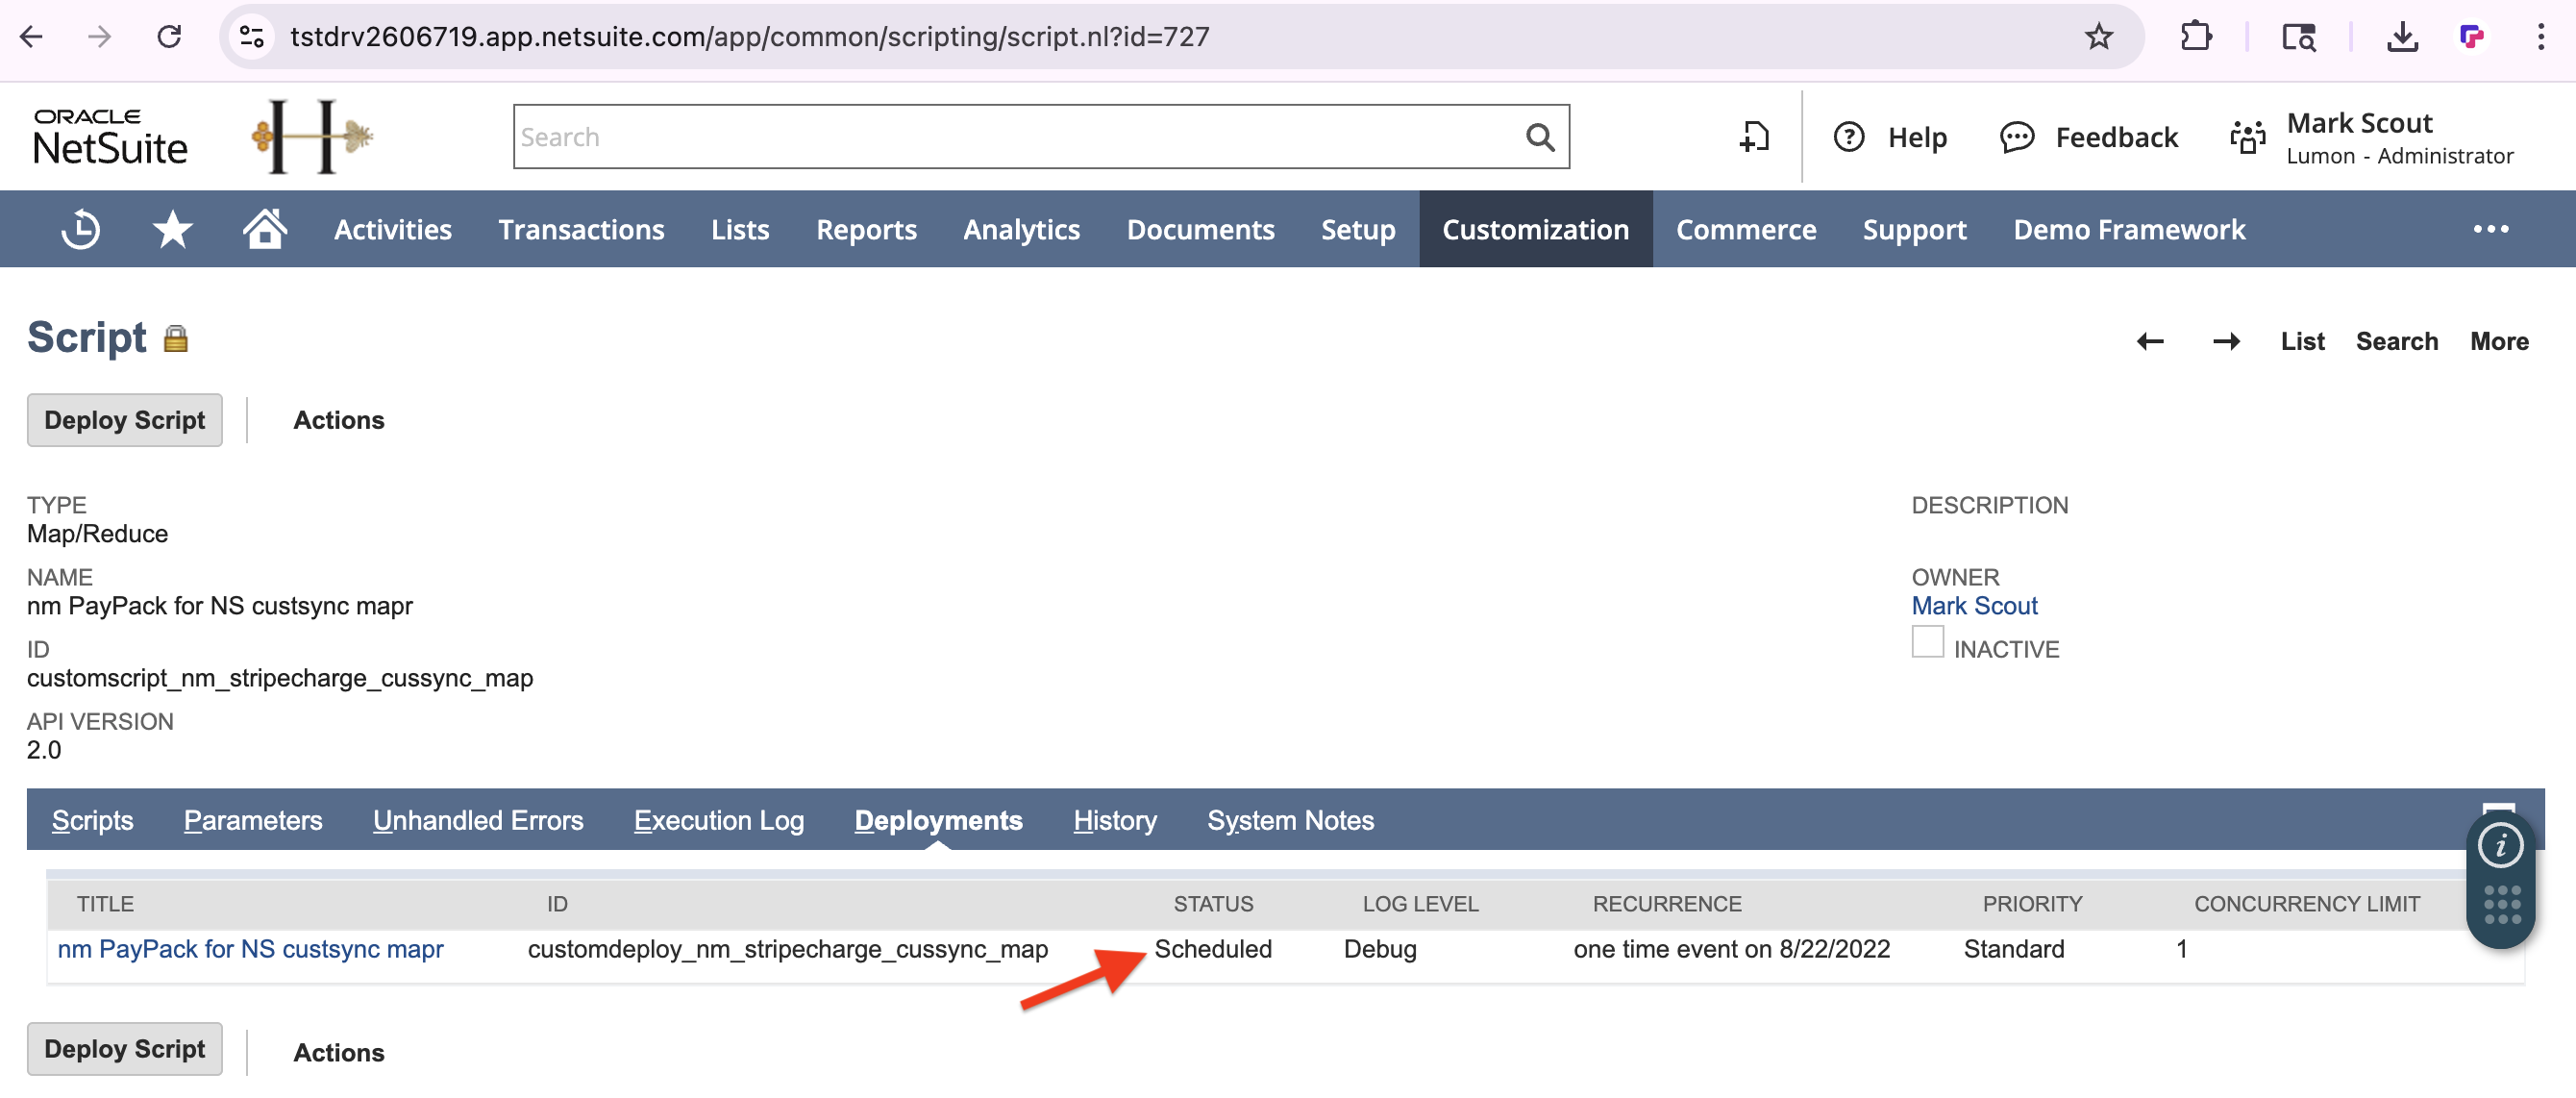
- For mass customer sync, we need to schedule our PayPack deployment script: nm PayPack for NS custsync mapr. This action will sync all subsidiaries of a NetSuite Customer.
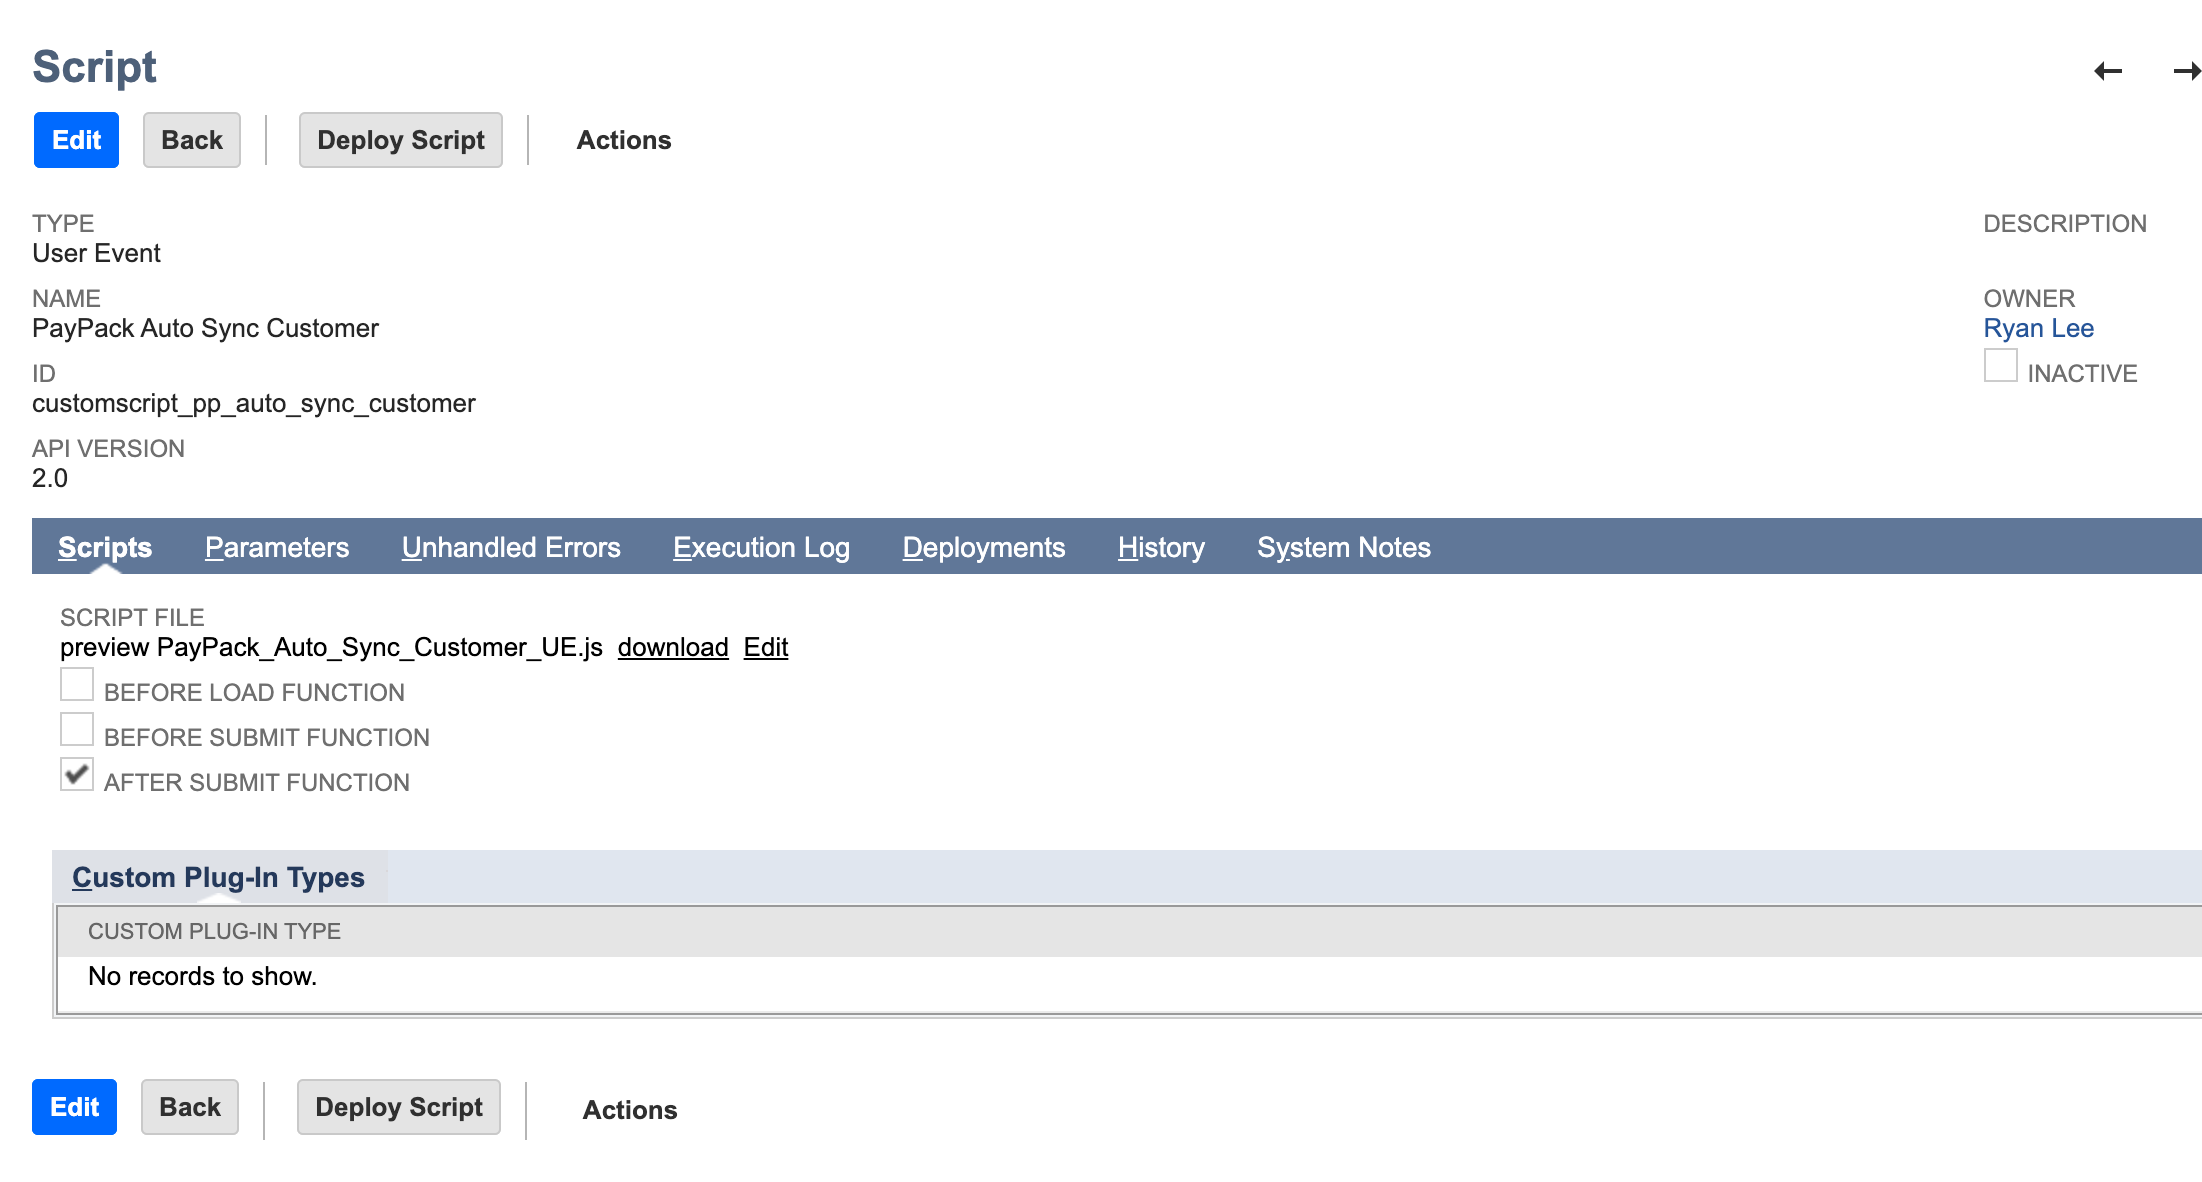
- For new customer sync, enable PayPack user event script: PayPack Auto Sync Customer. The script is enabled by default during initial bundle install.C

Configure Customer Sync Field
The NetSuite customer sync lookup parameter priority is listed below.
- STRIPE CUSTOMER ID
- EMAIL ADDRESS by default .
In order to change the email address default, select the appropriate NetSuite entity field in the PayPack configuration.
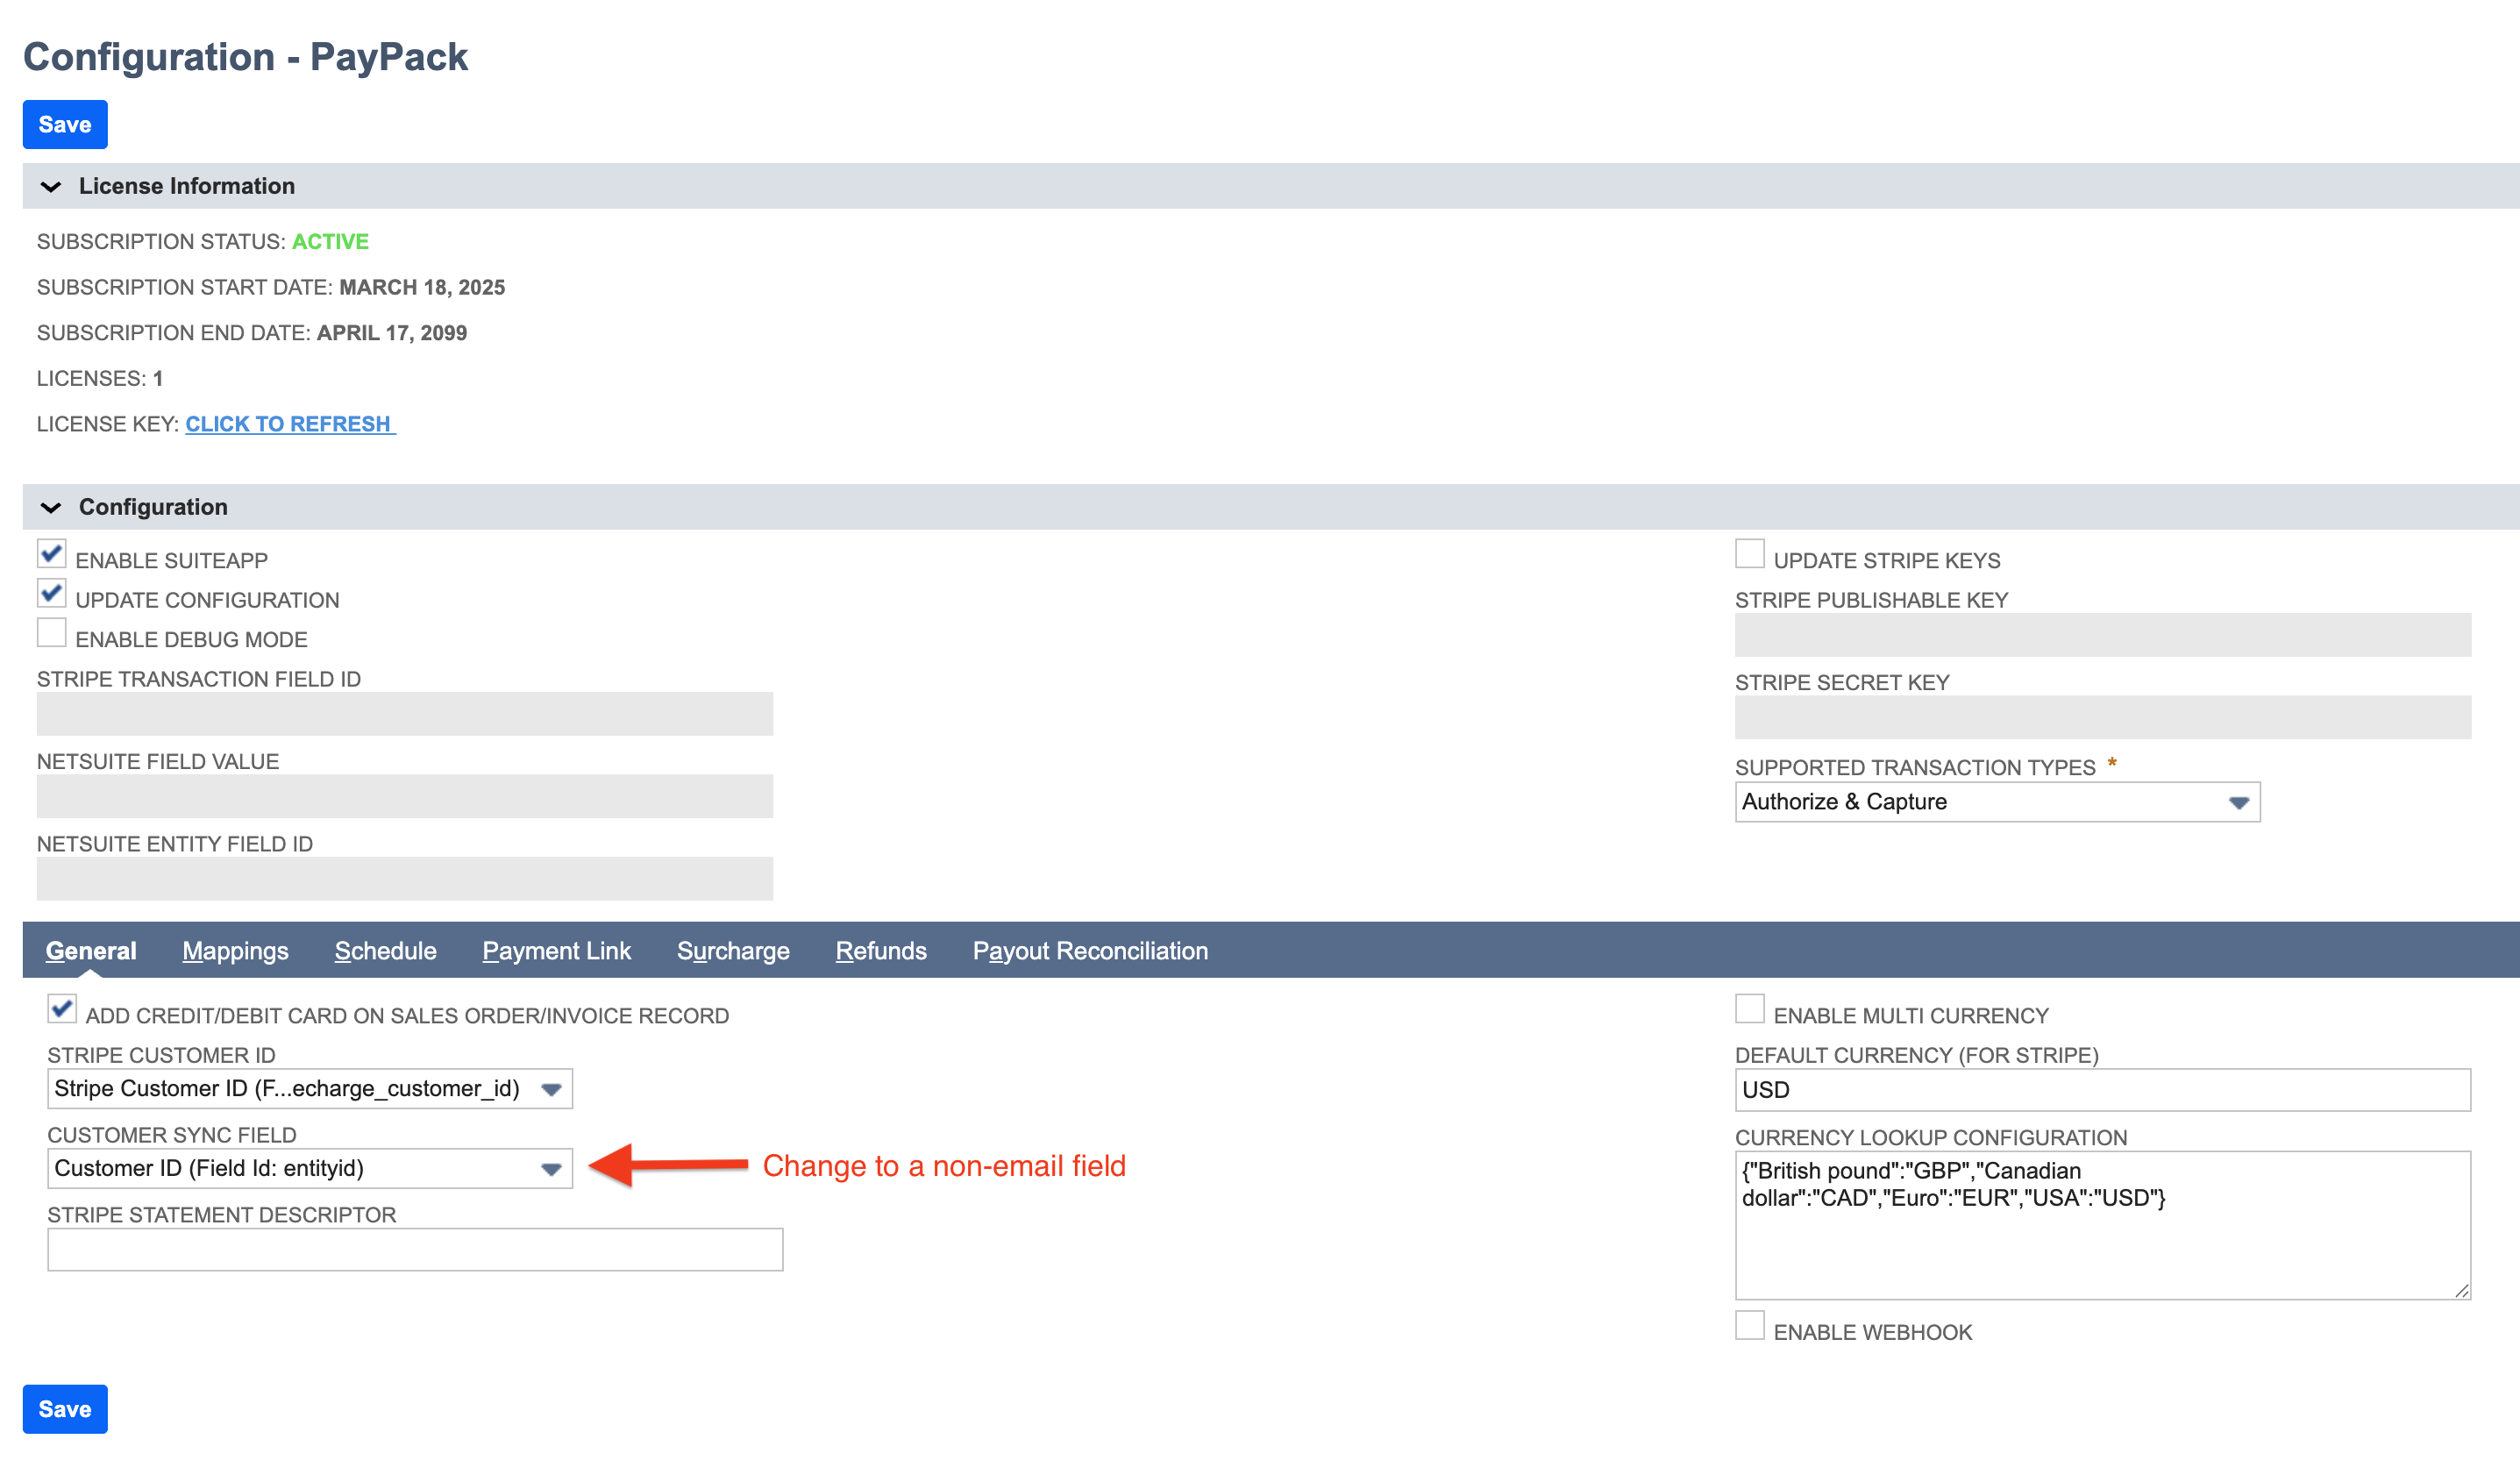
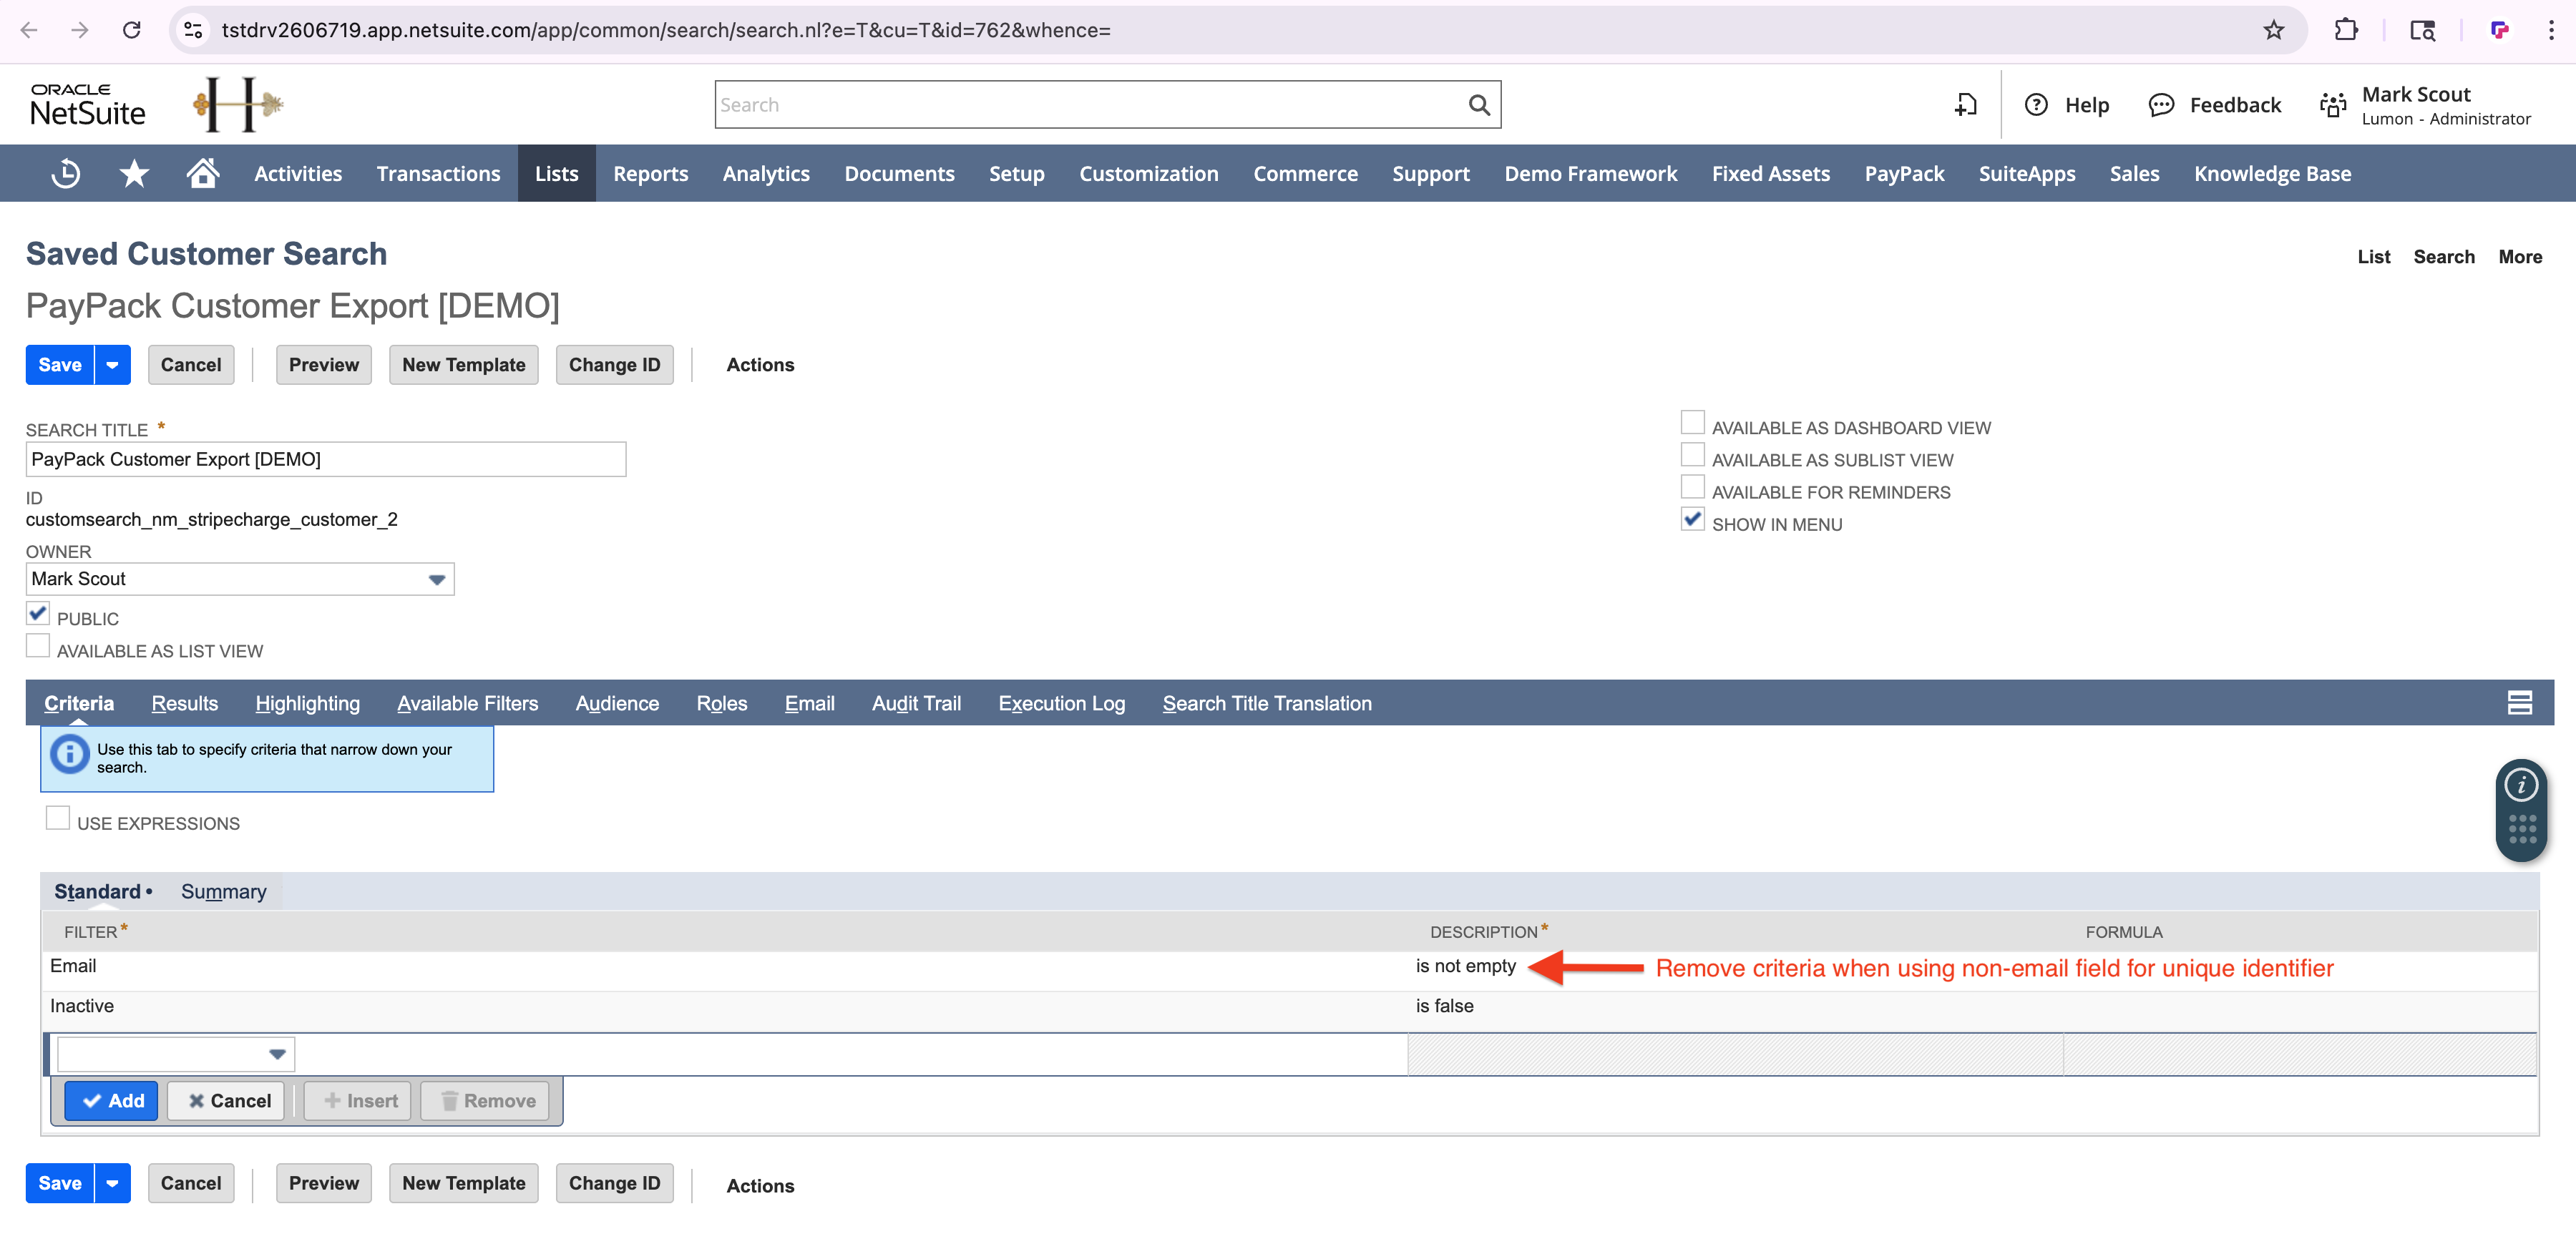
If using a non-email field for unique identifier, modify the saved search by removing the email criteria.
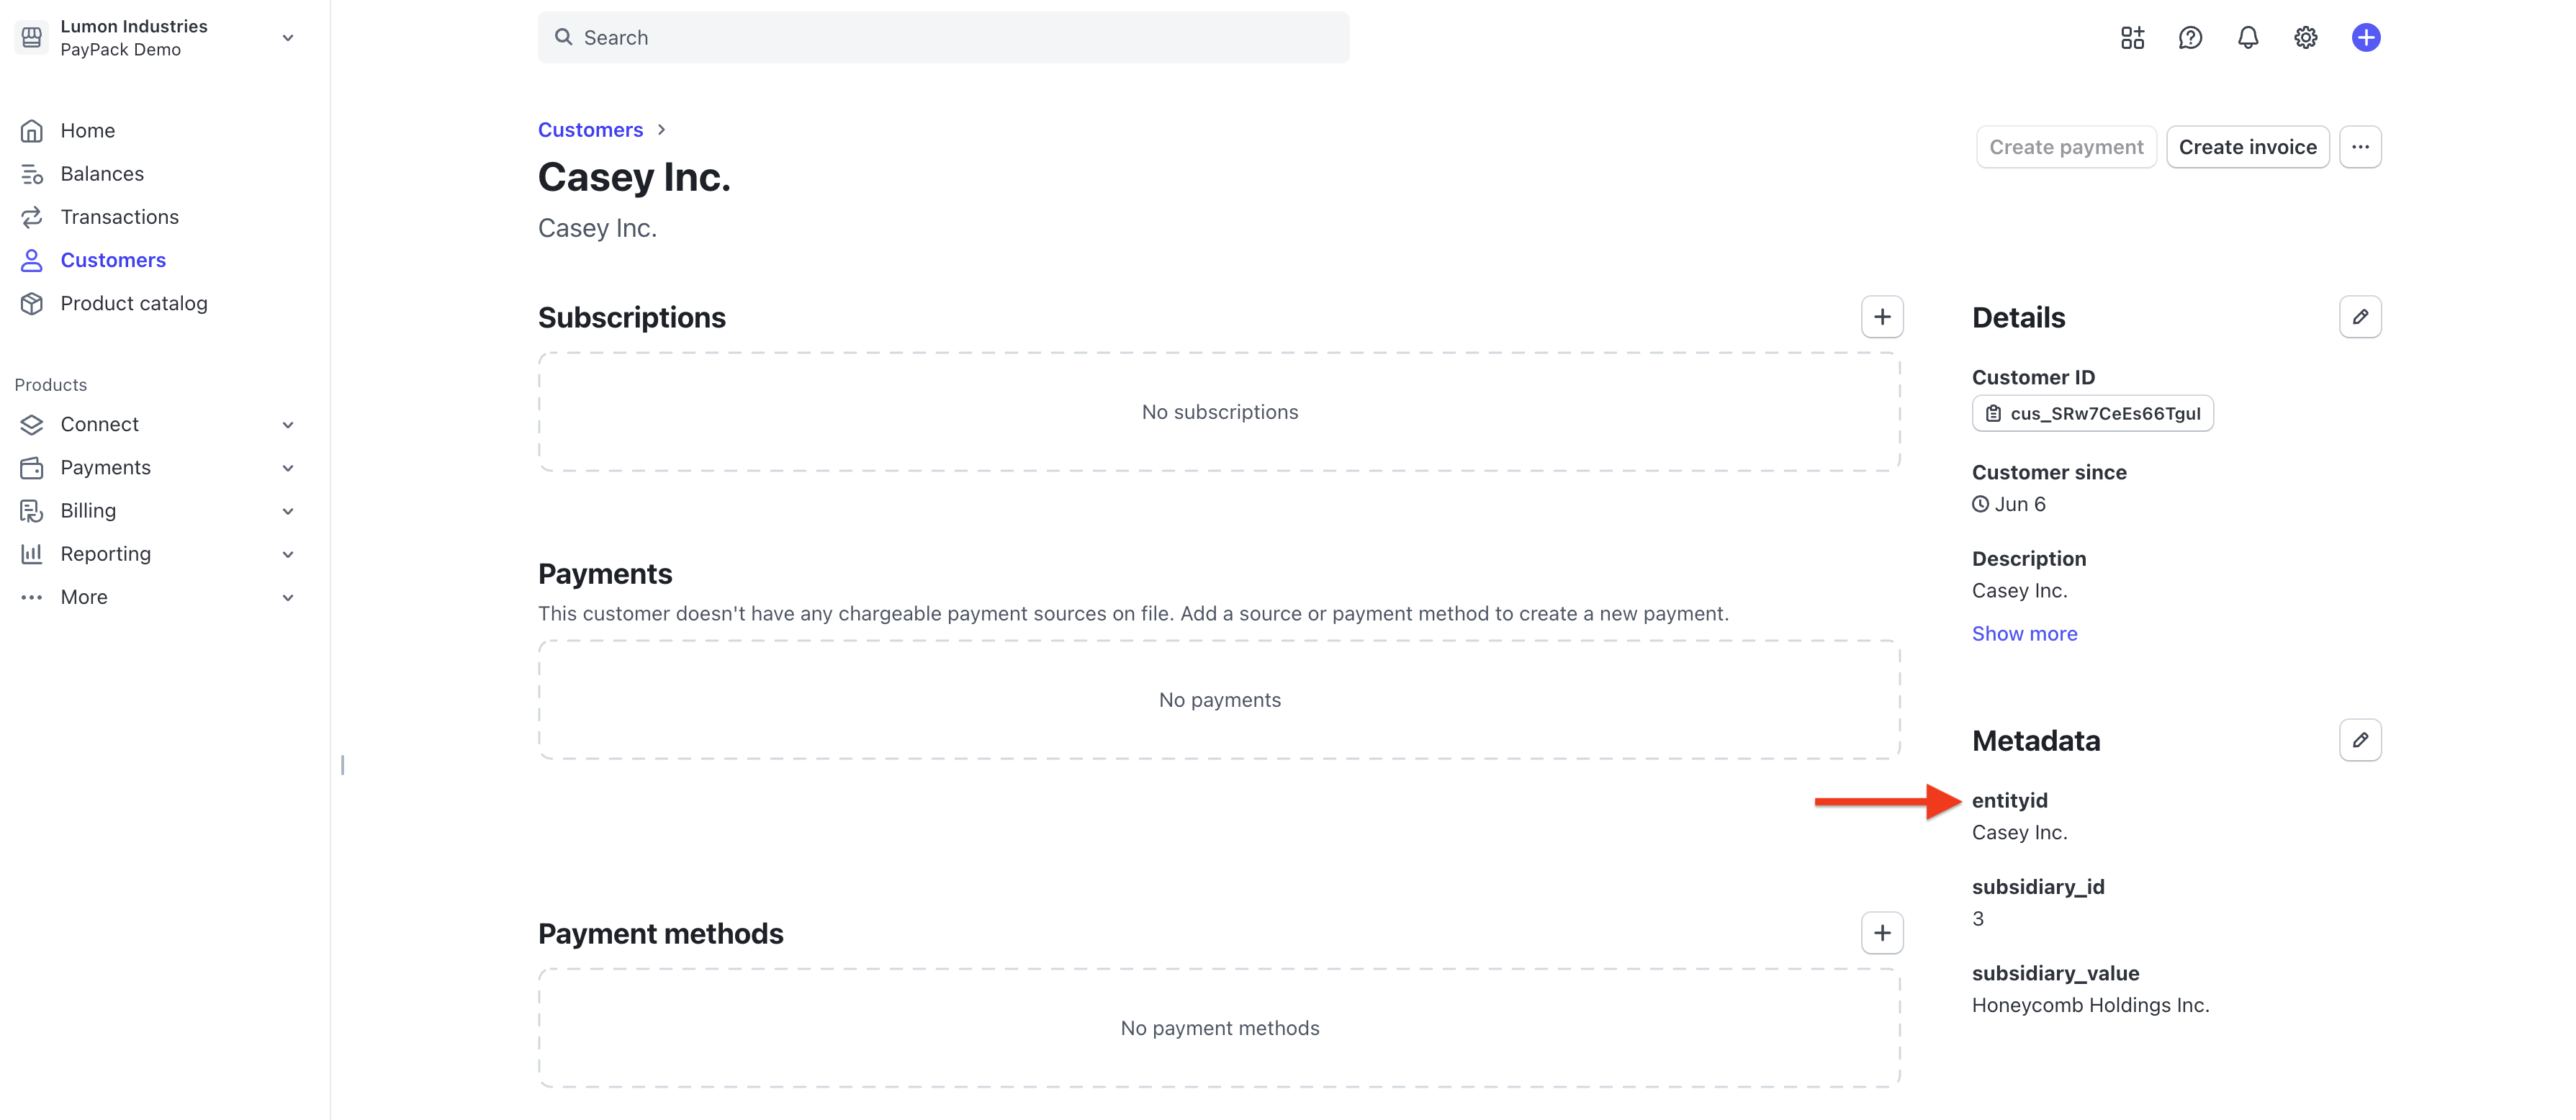
When using a non-email field, the value will automatically sync to the Stripe Customer Metadata using the NetSuite field ID and value.
Add Saved Searches to Configuration
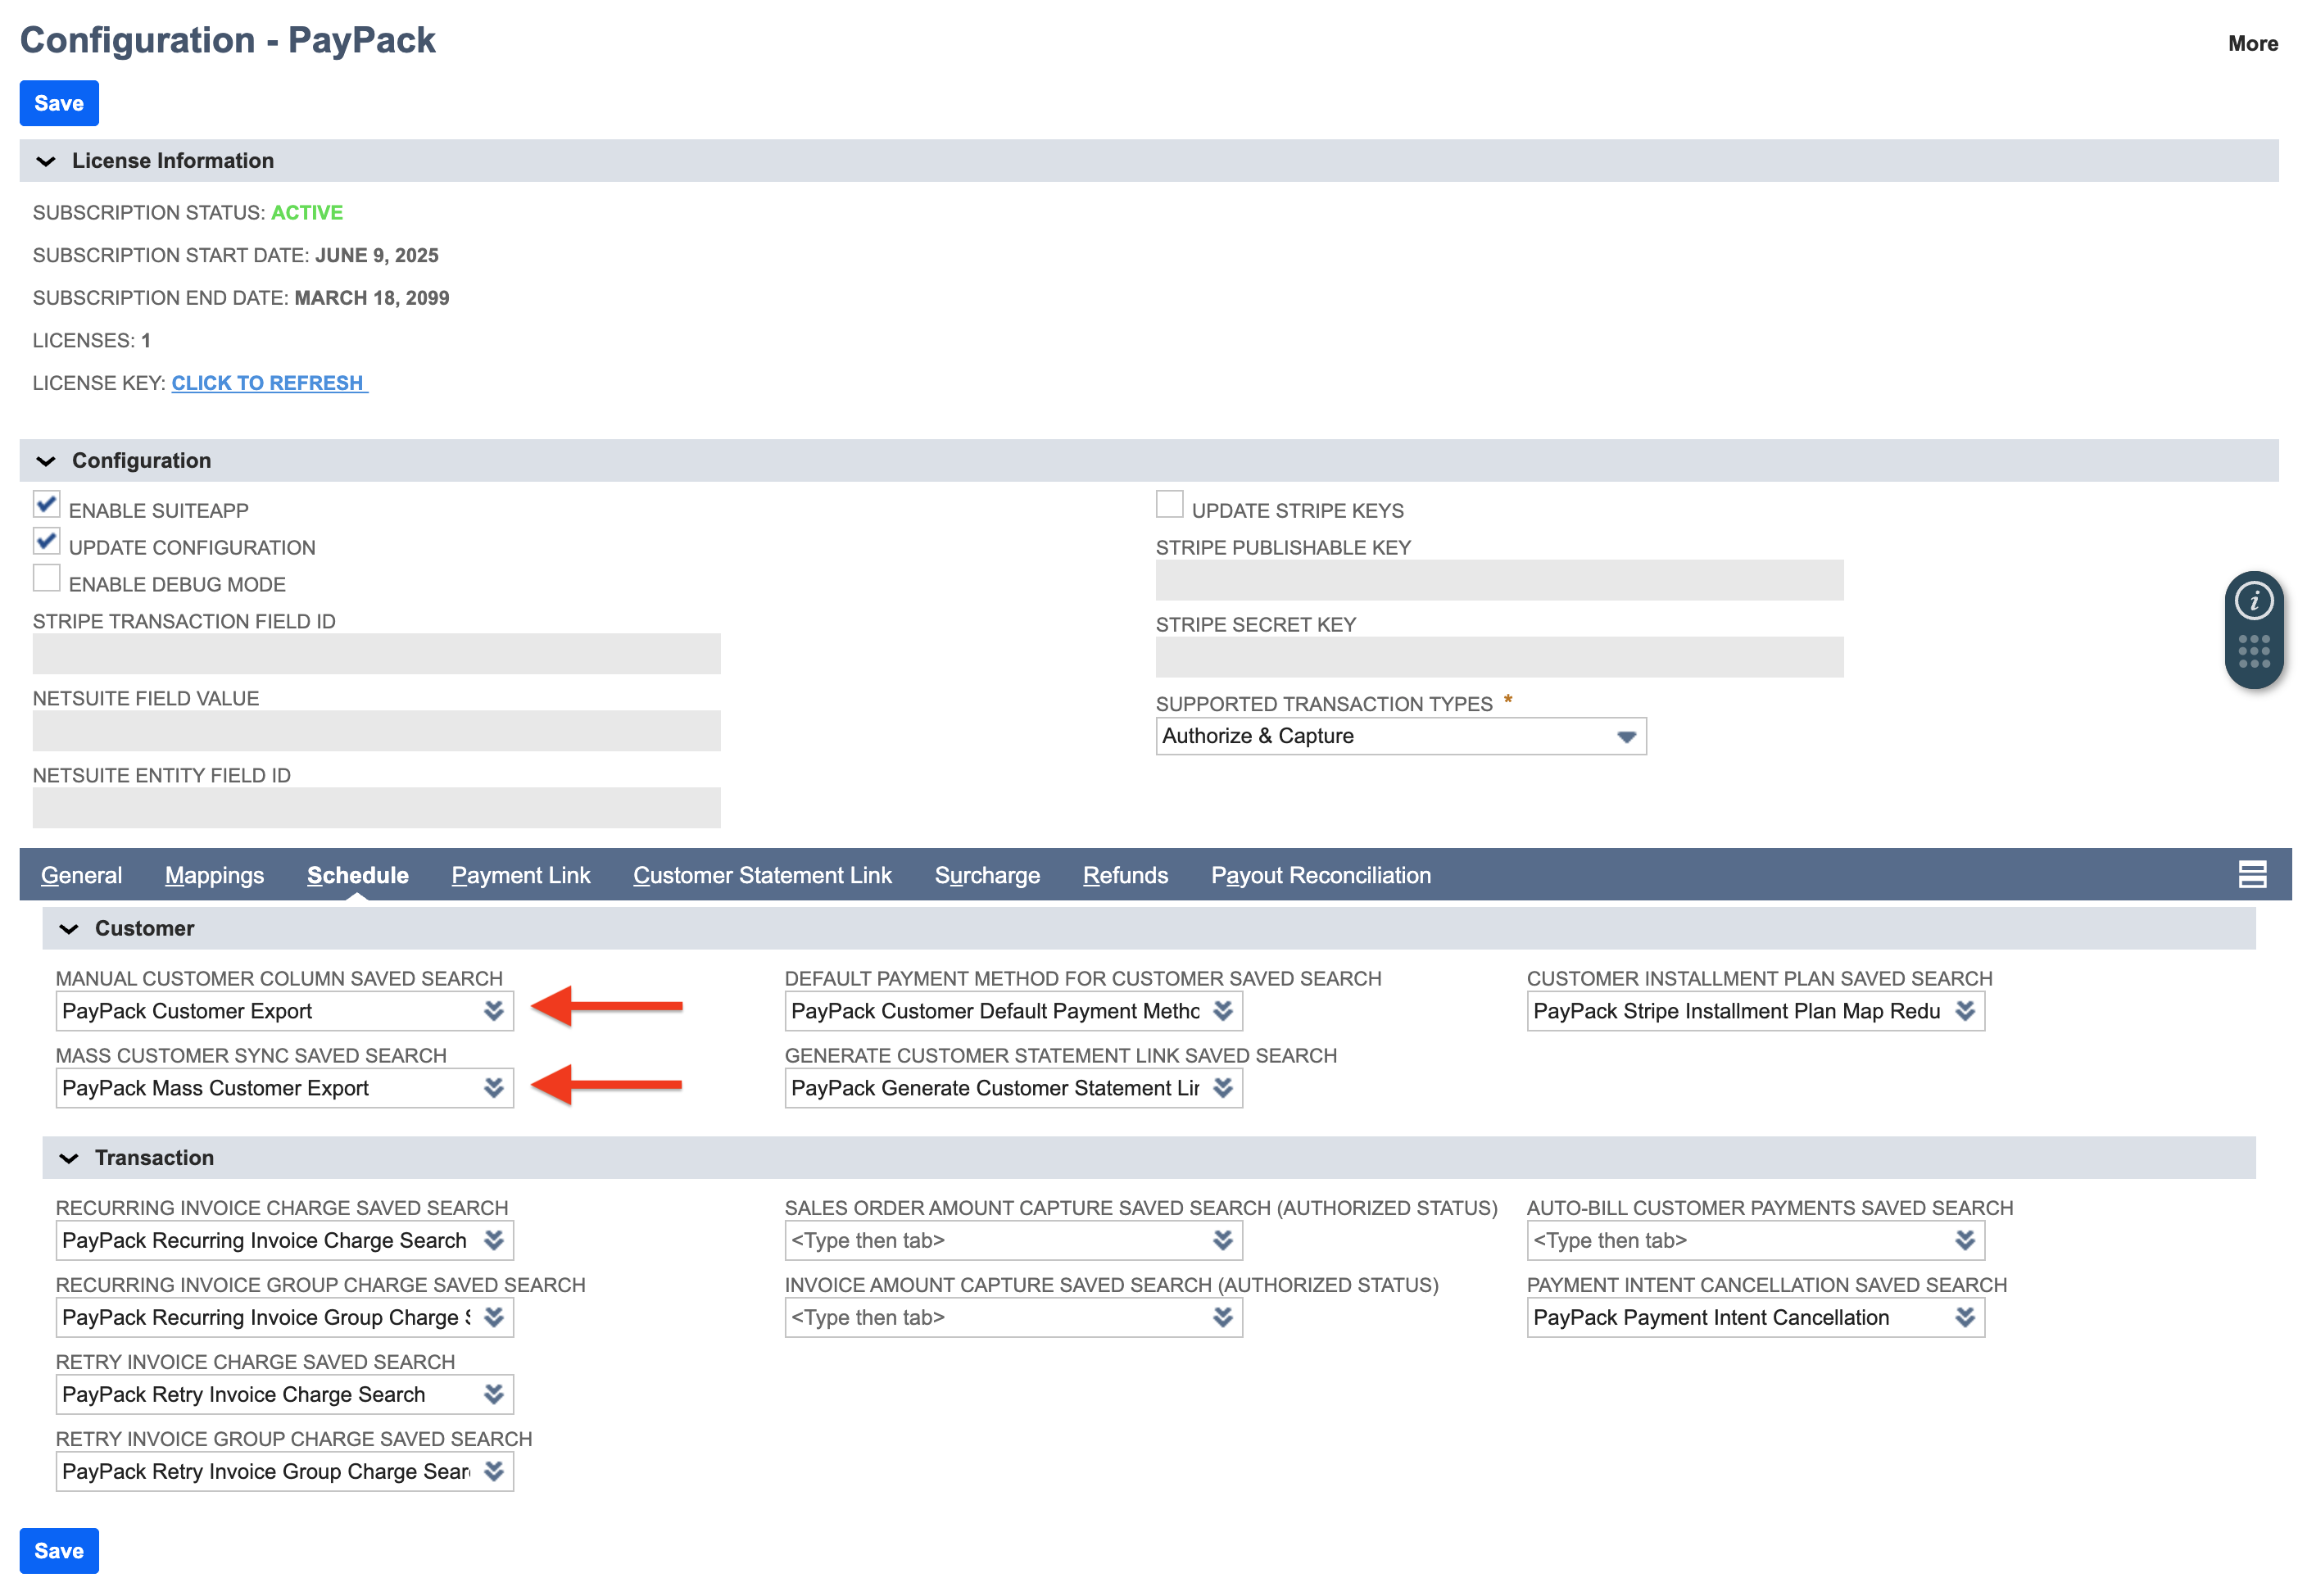
- Customer Sync Saved Search ID→ This saved search uses column headers for individual sync on the customer record.
- Use a pre-defined saved search template
- PayPack Customer Manual Export
- PayPack Customer Manual Multi-Subsidiary Export
- Use a pre-defined saved search template
- Mass Customer Sync Saved Search ID→ The mass saved search is used if the customer sync script schedule is deployed.
- Use a pre-defined saved search template
- PayPack Customer Mass Export
- Use a pre-defined saved search template
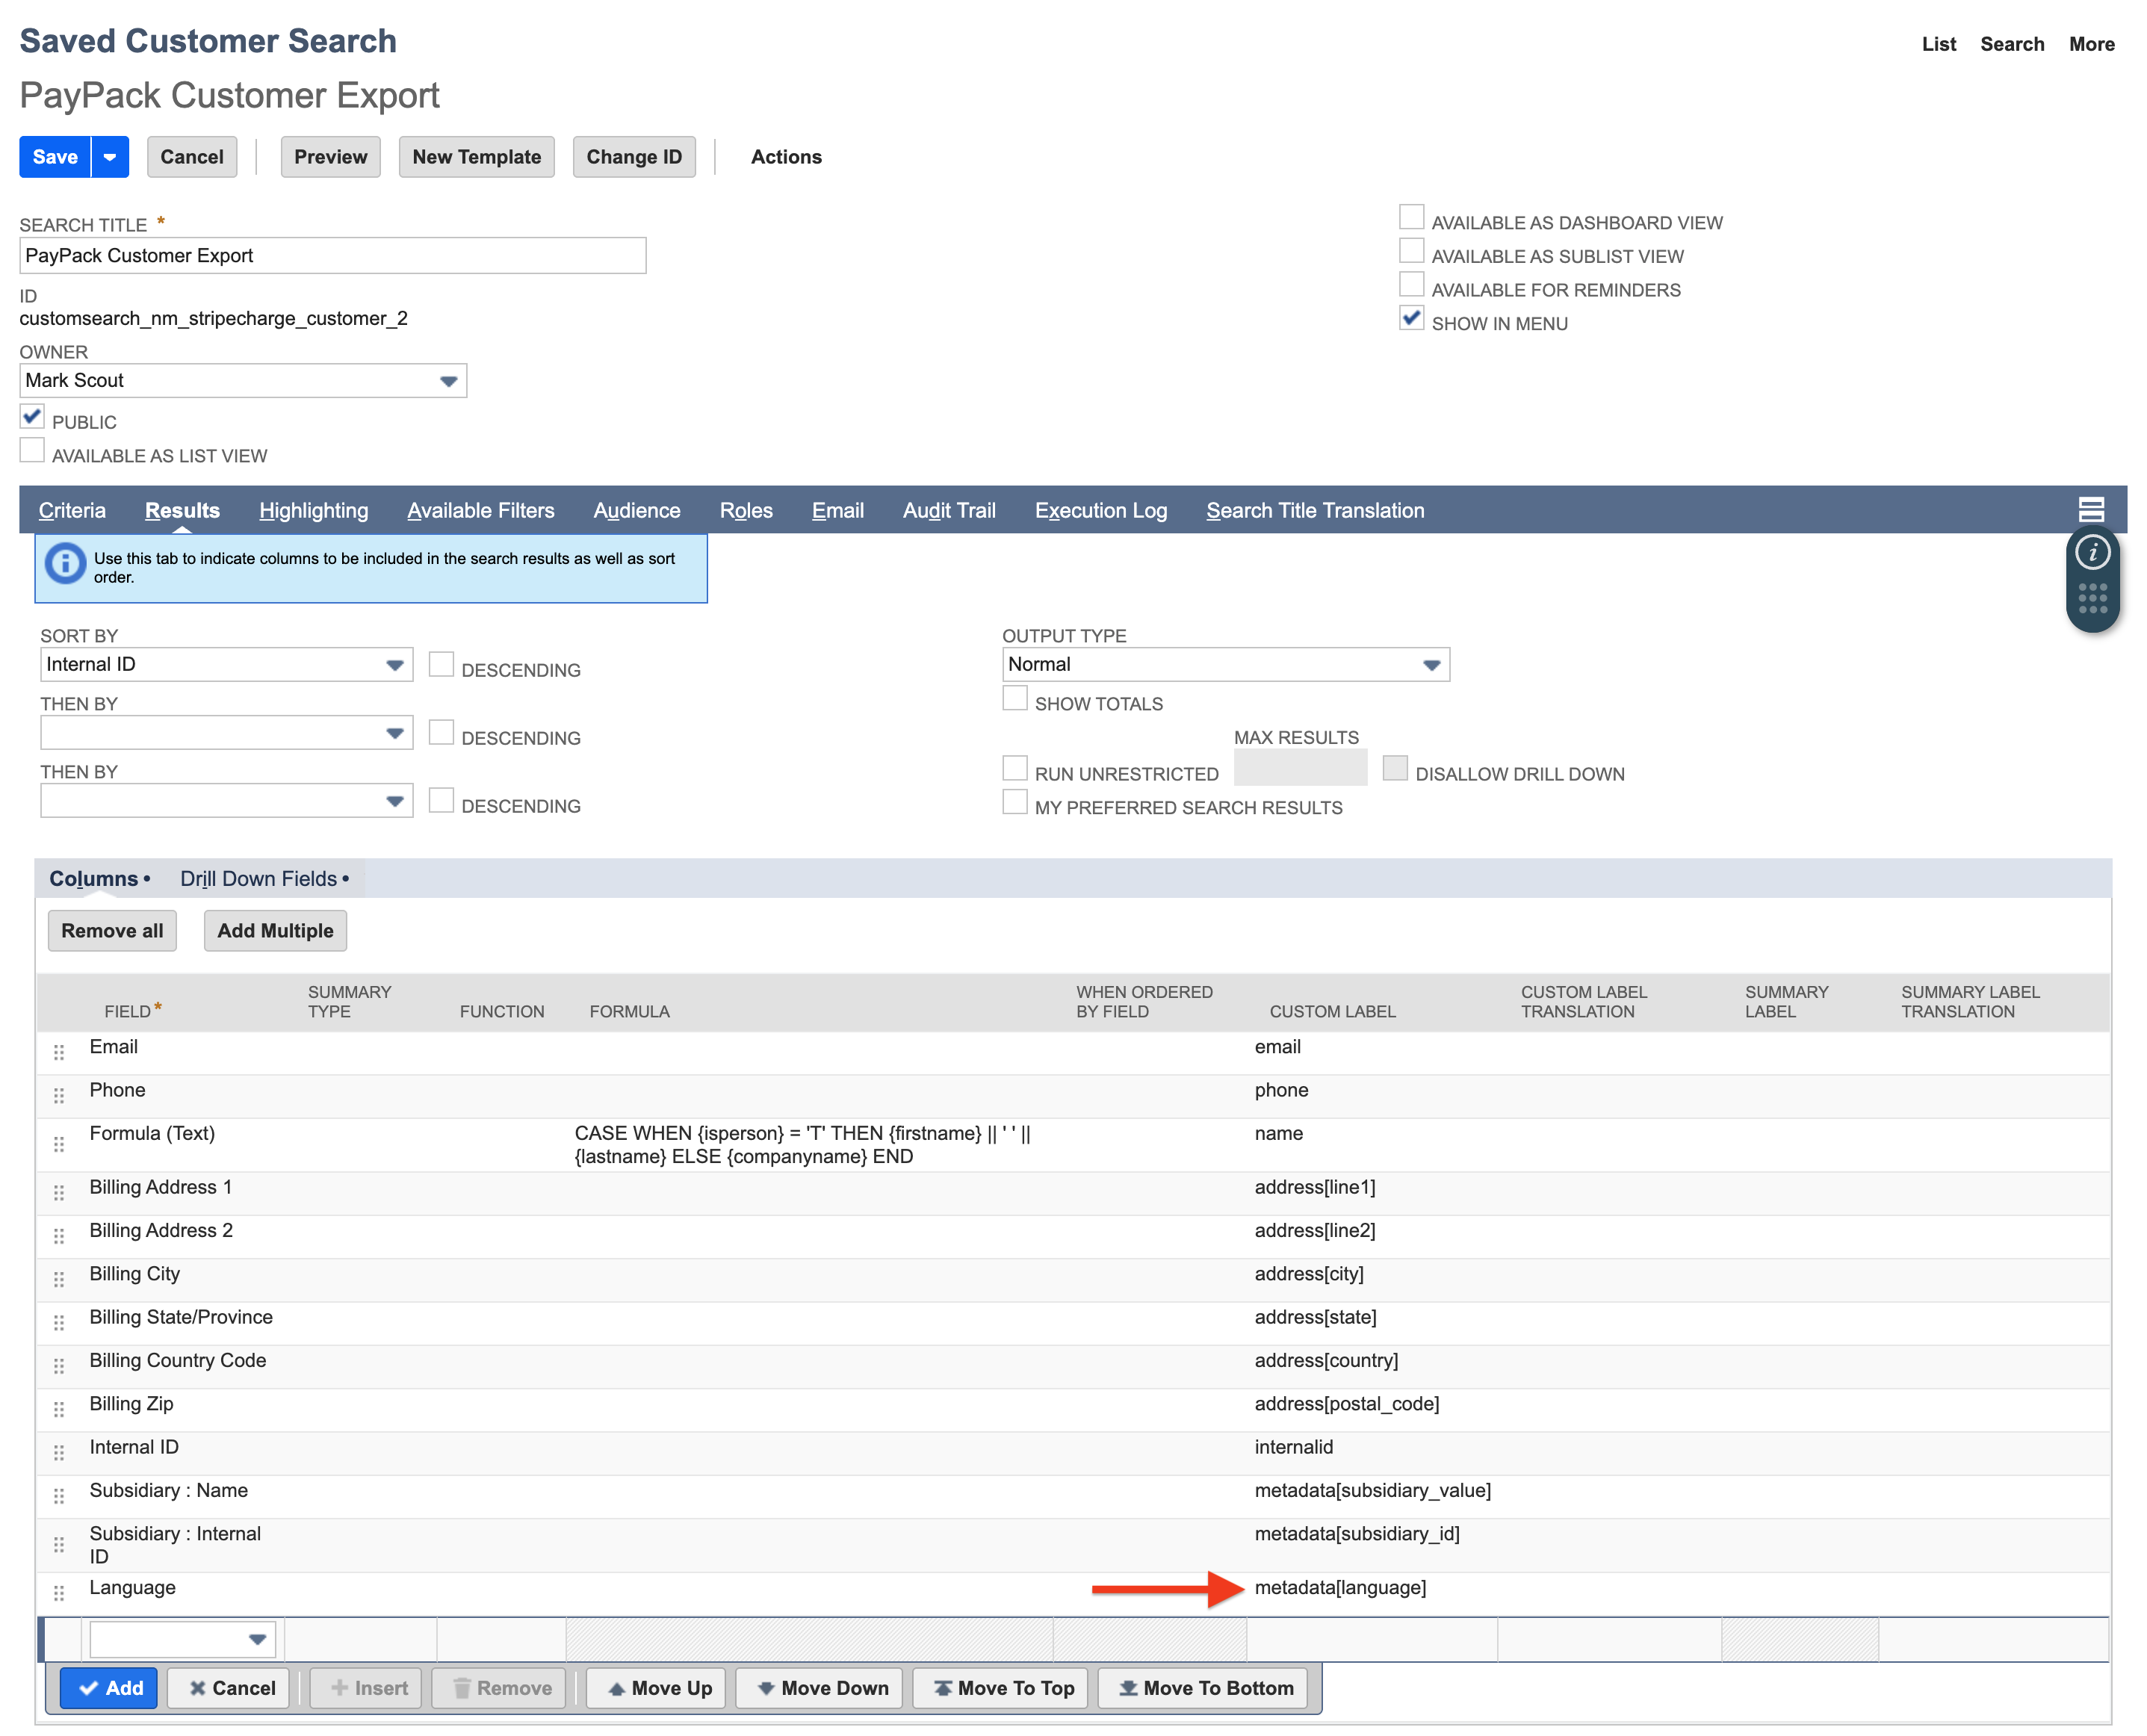
Include Metadata
Adding metadata provides a way to attach custom, non-sensitive information to the Stripe Customer object. This enables the ability to leverage NetSuite data within Stripe for enhanced search and filtering, automated workflows, and auditing requirements.
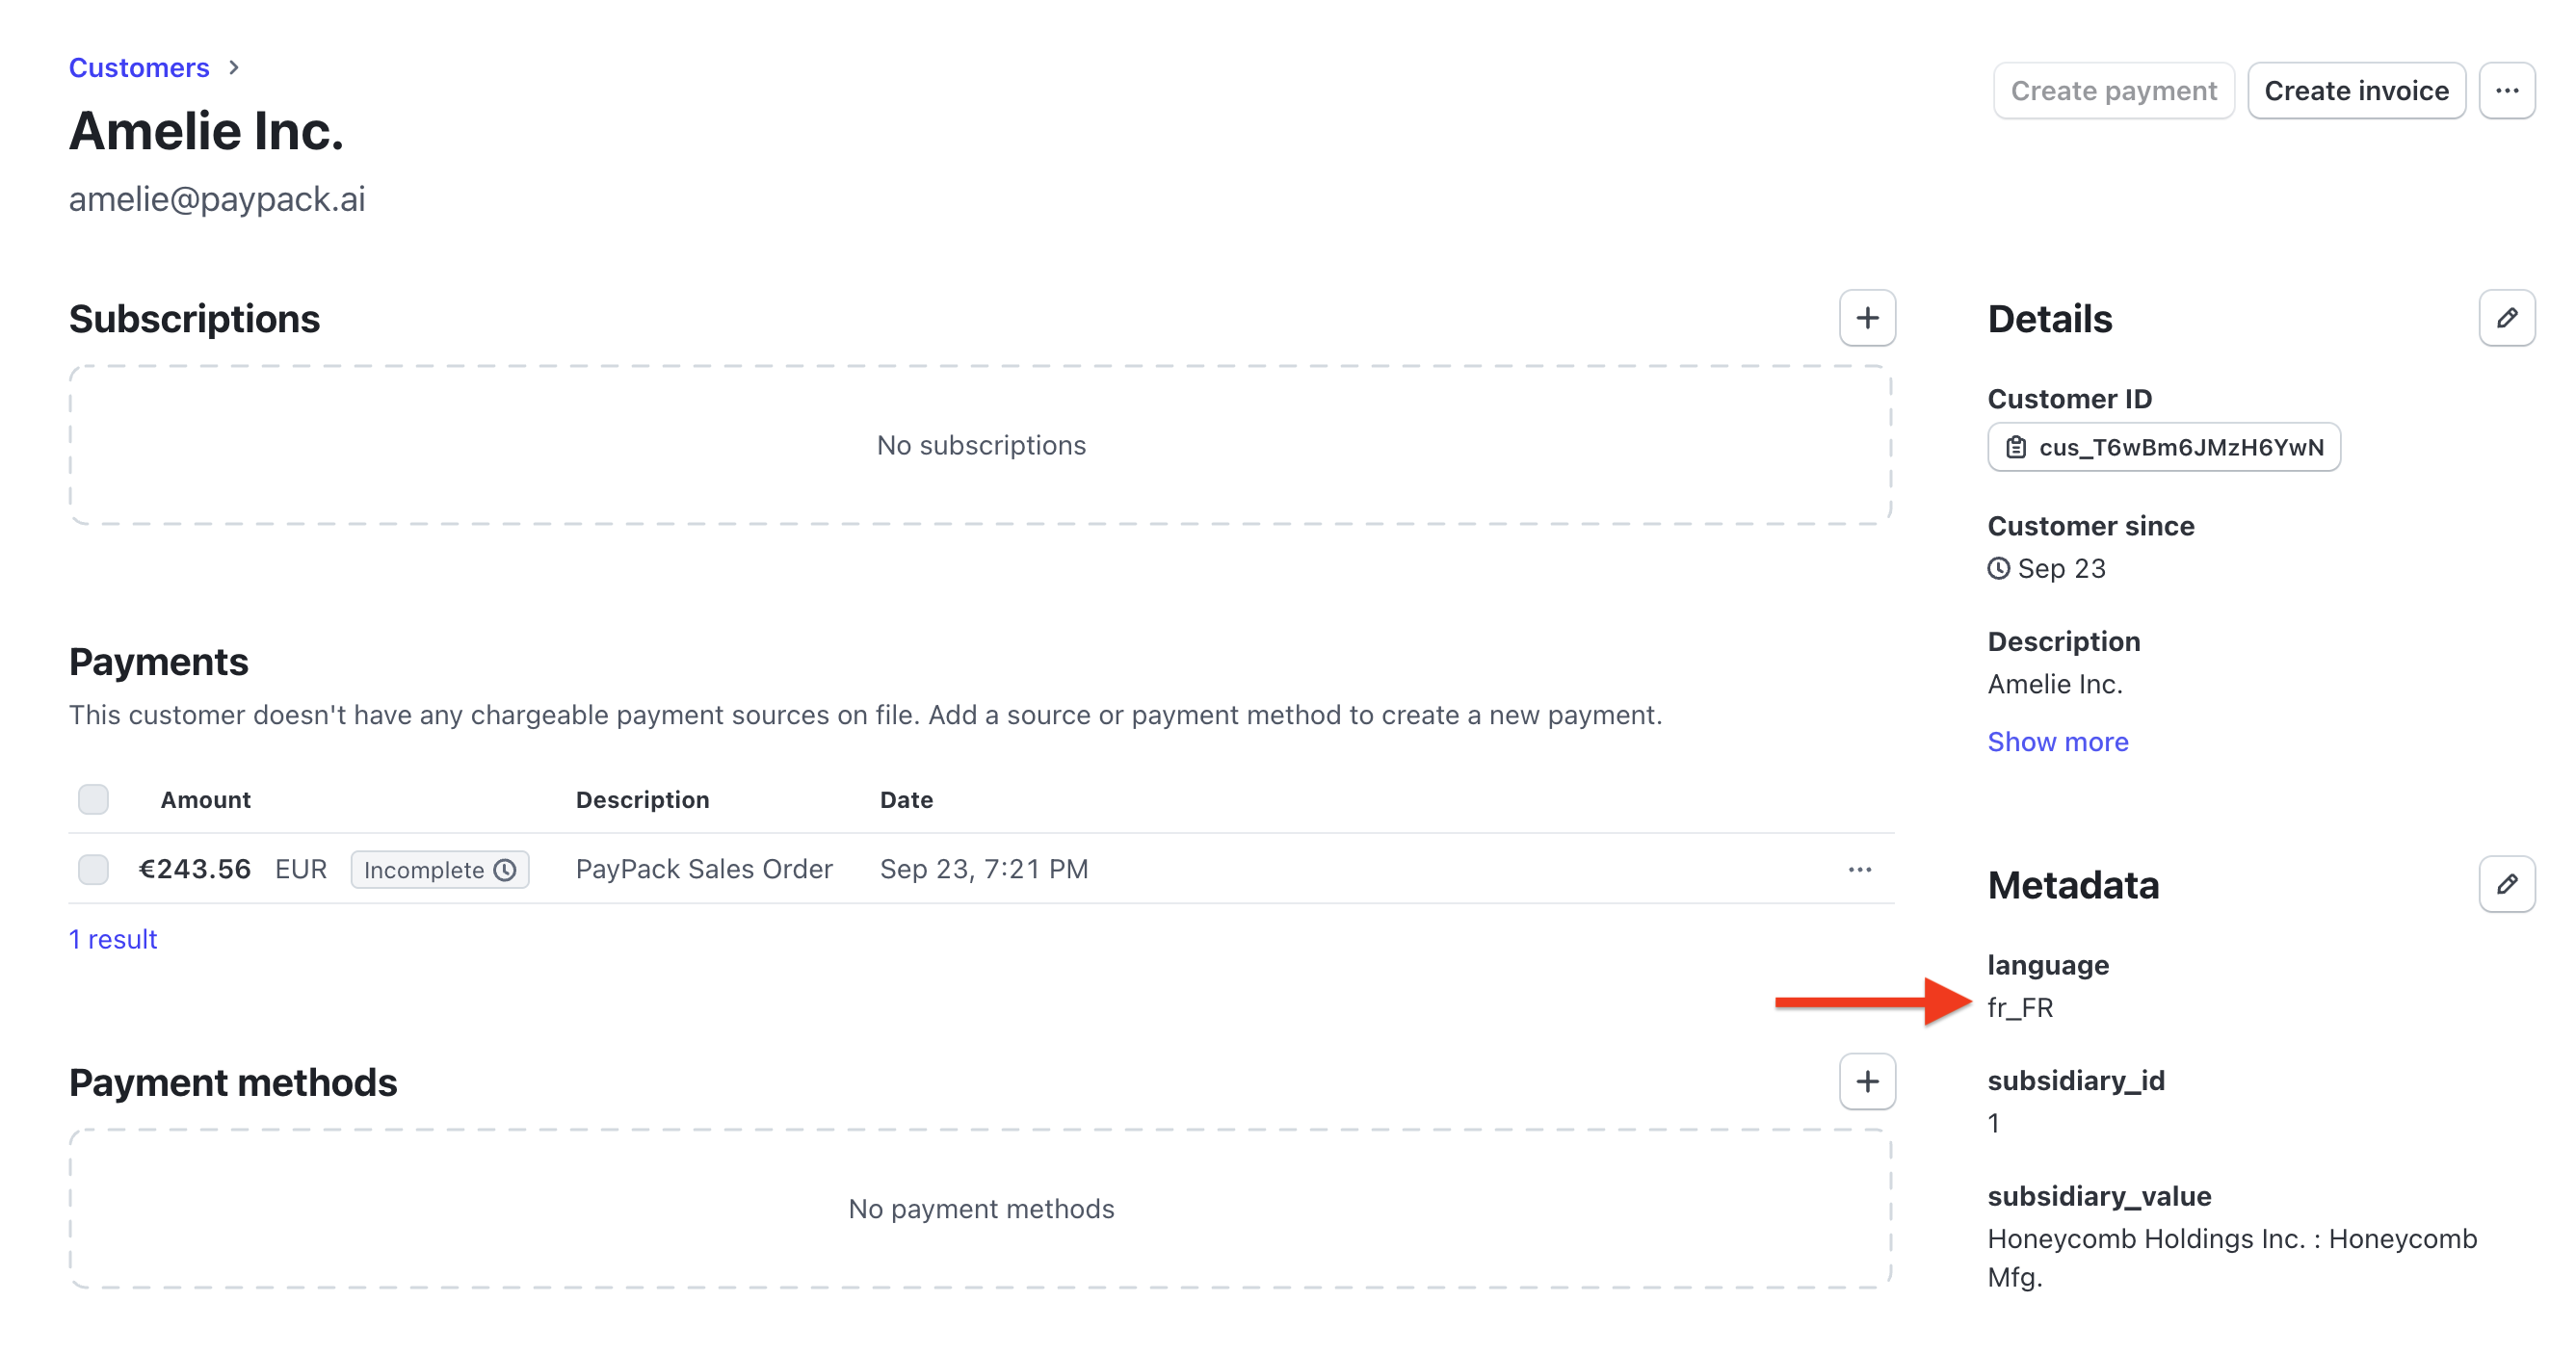
Simply add a custom label in the NetSuite saved search for syncing customers as metadata[example_name].
Re-sync a NetSuite Customer
In order to re-sync a NetSuite customer to a different Stripe customer, STRIPE CUSTOMER ID must be blank on the NetSuite customer record.
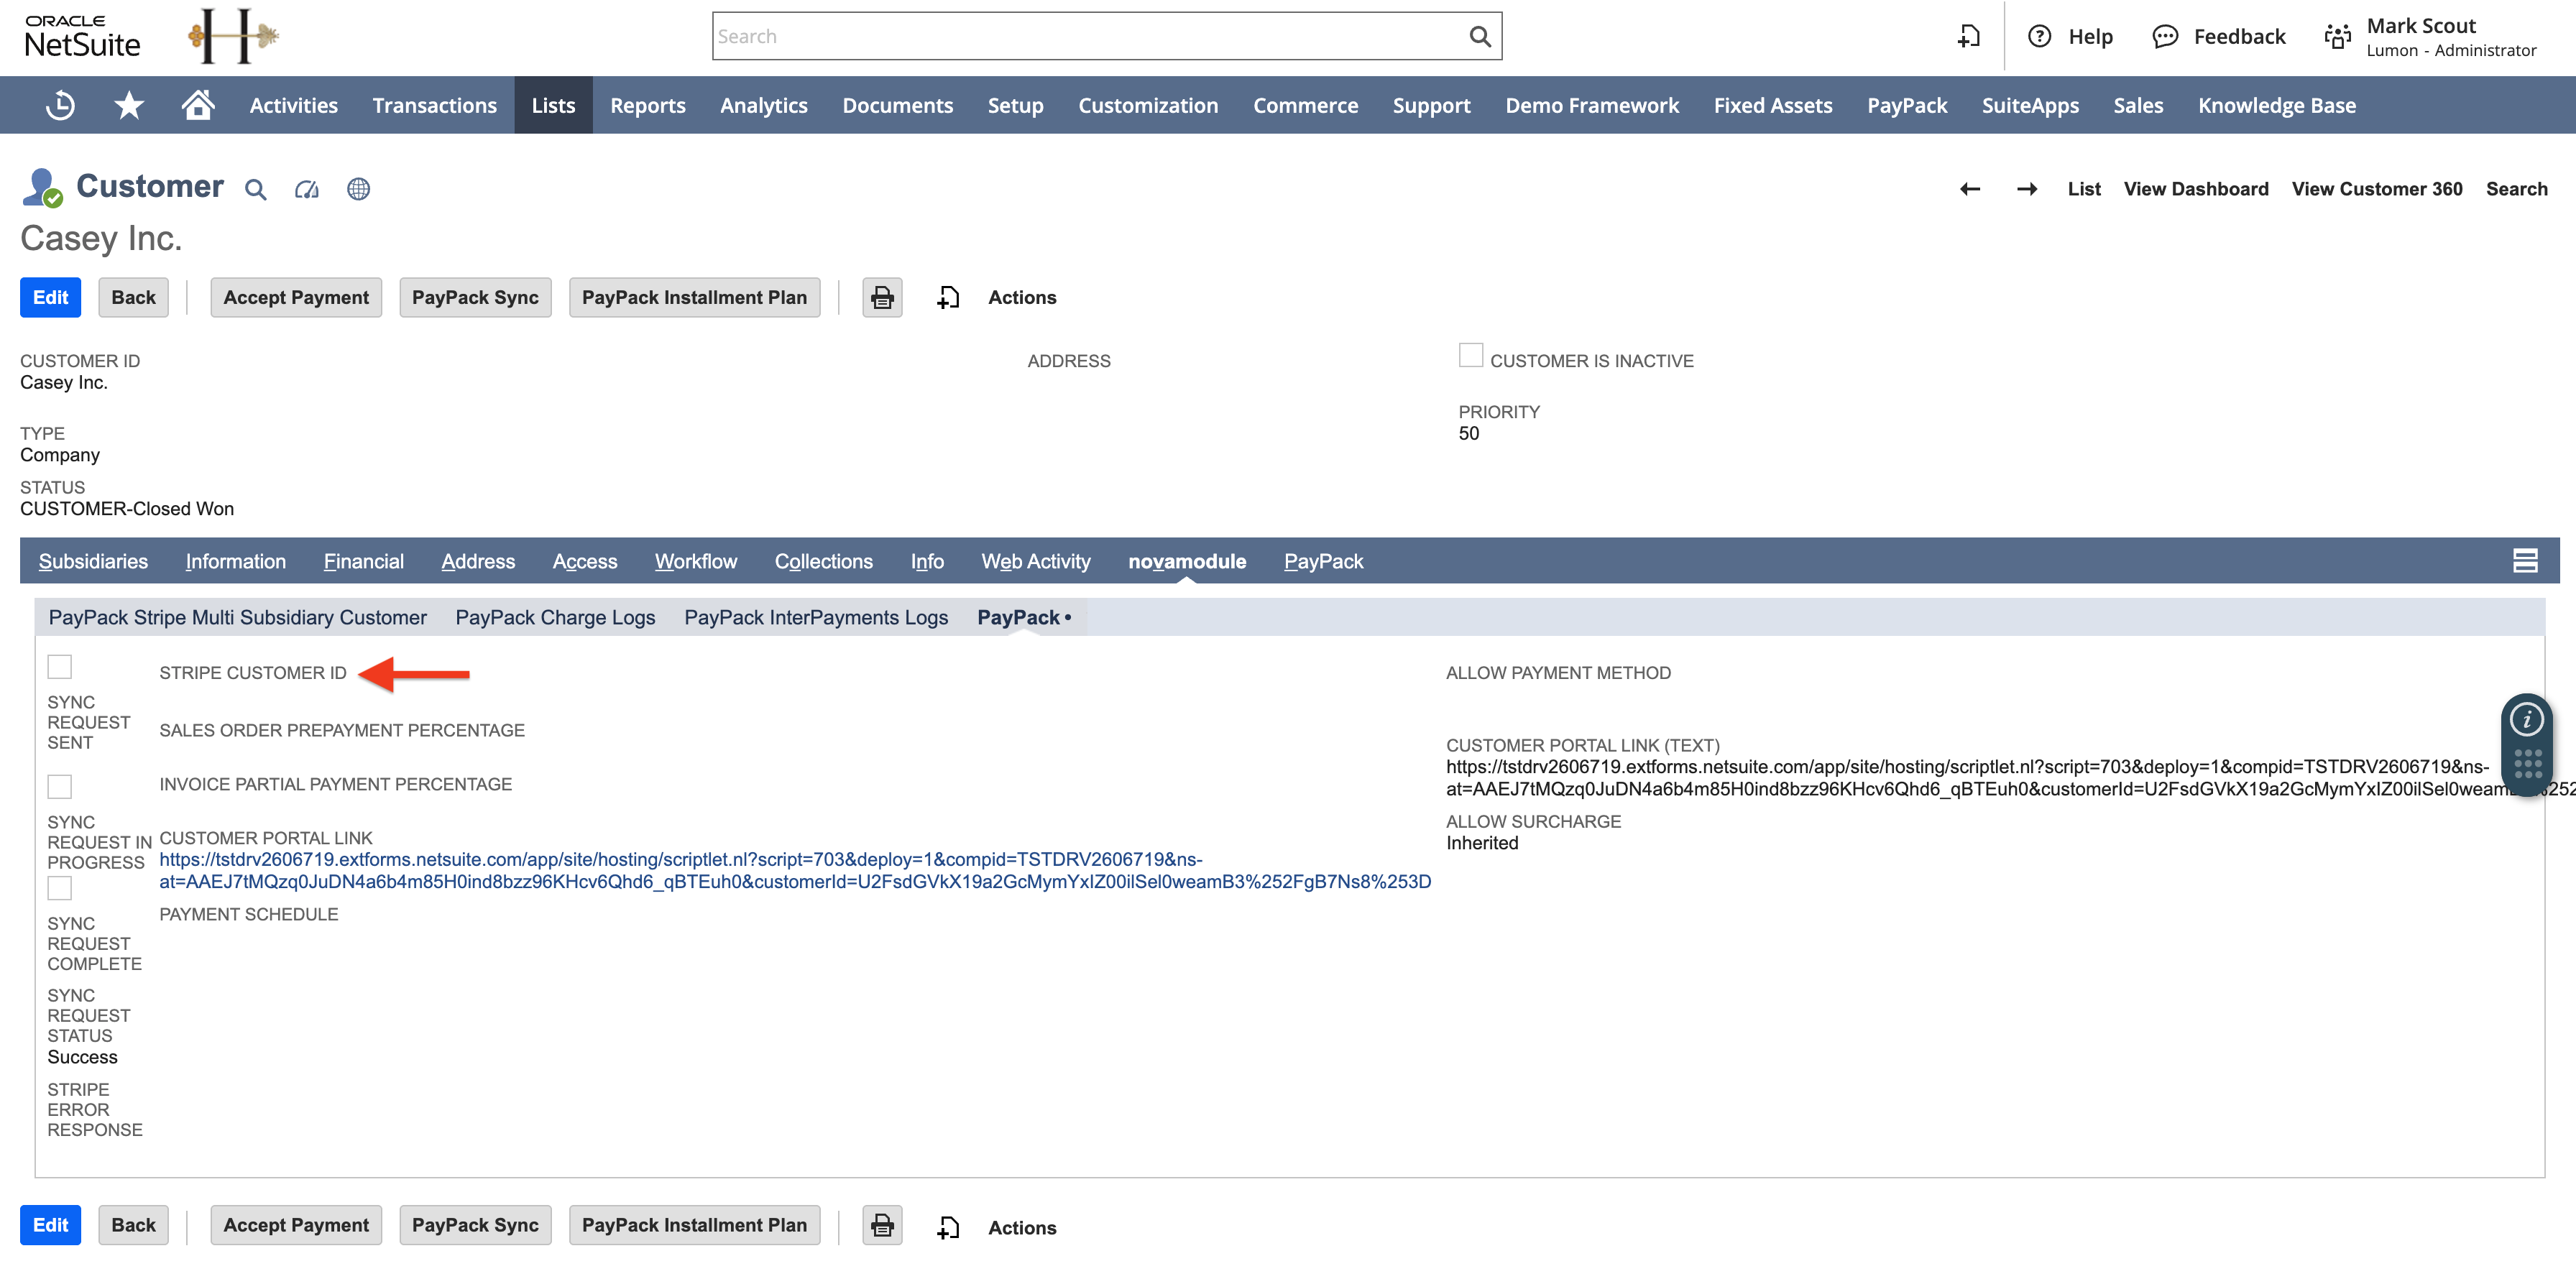
Any changes to a customer record in Stripe does not impact the NetSuite customer because it is linked by the field value of STRIPE CUSTOMER ID.
Allow Payment Method
With PayPack, you are able to leverage NetSuite Workflows to define rules for displaying specific payment methods at the customer and transaction level (quote, sales order, invoice, and invoice group).
The Allow Payment Method field is supported for payment links and customer statement links.
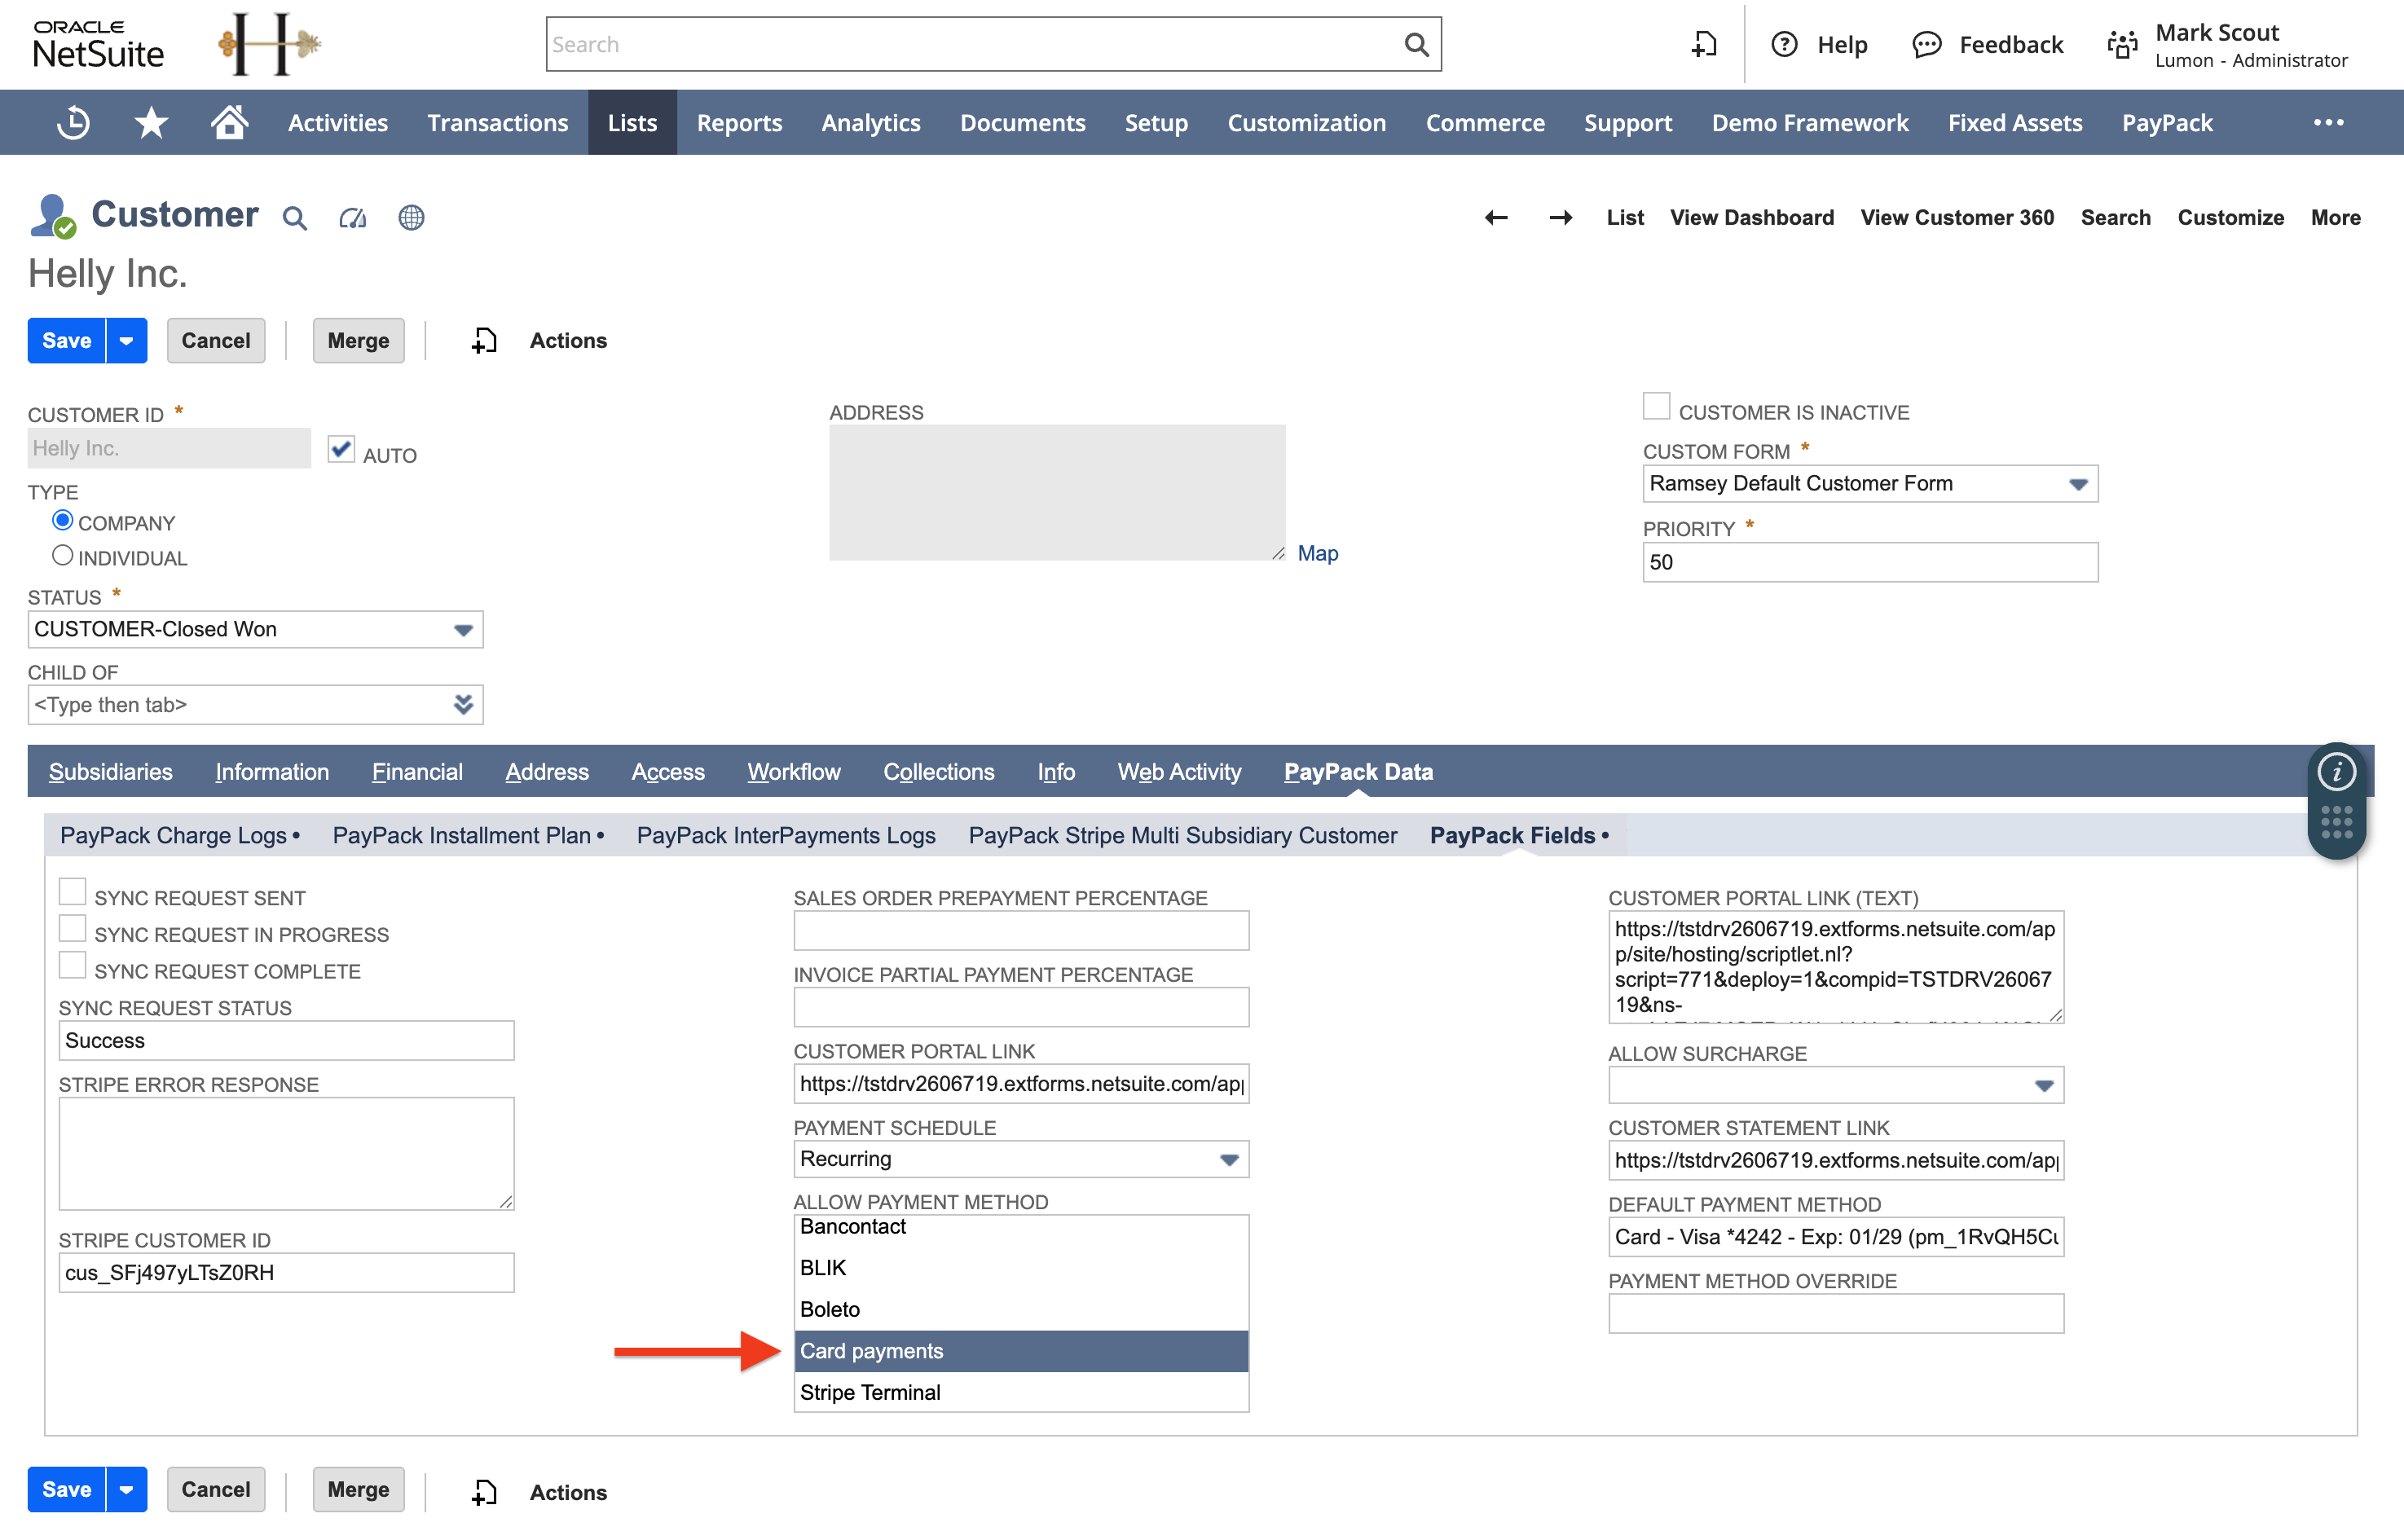
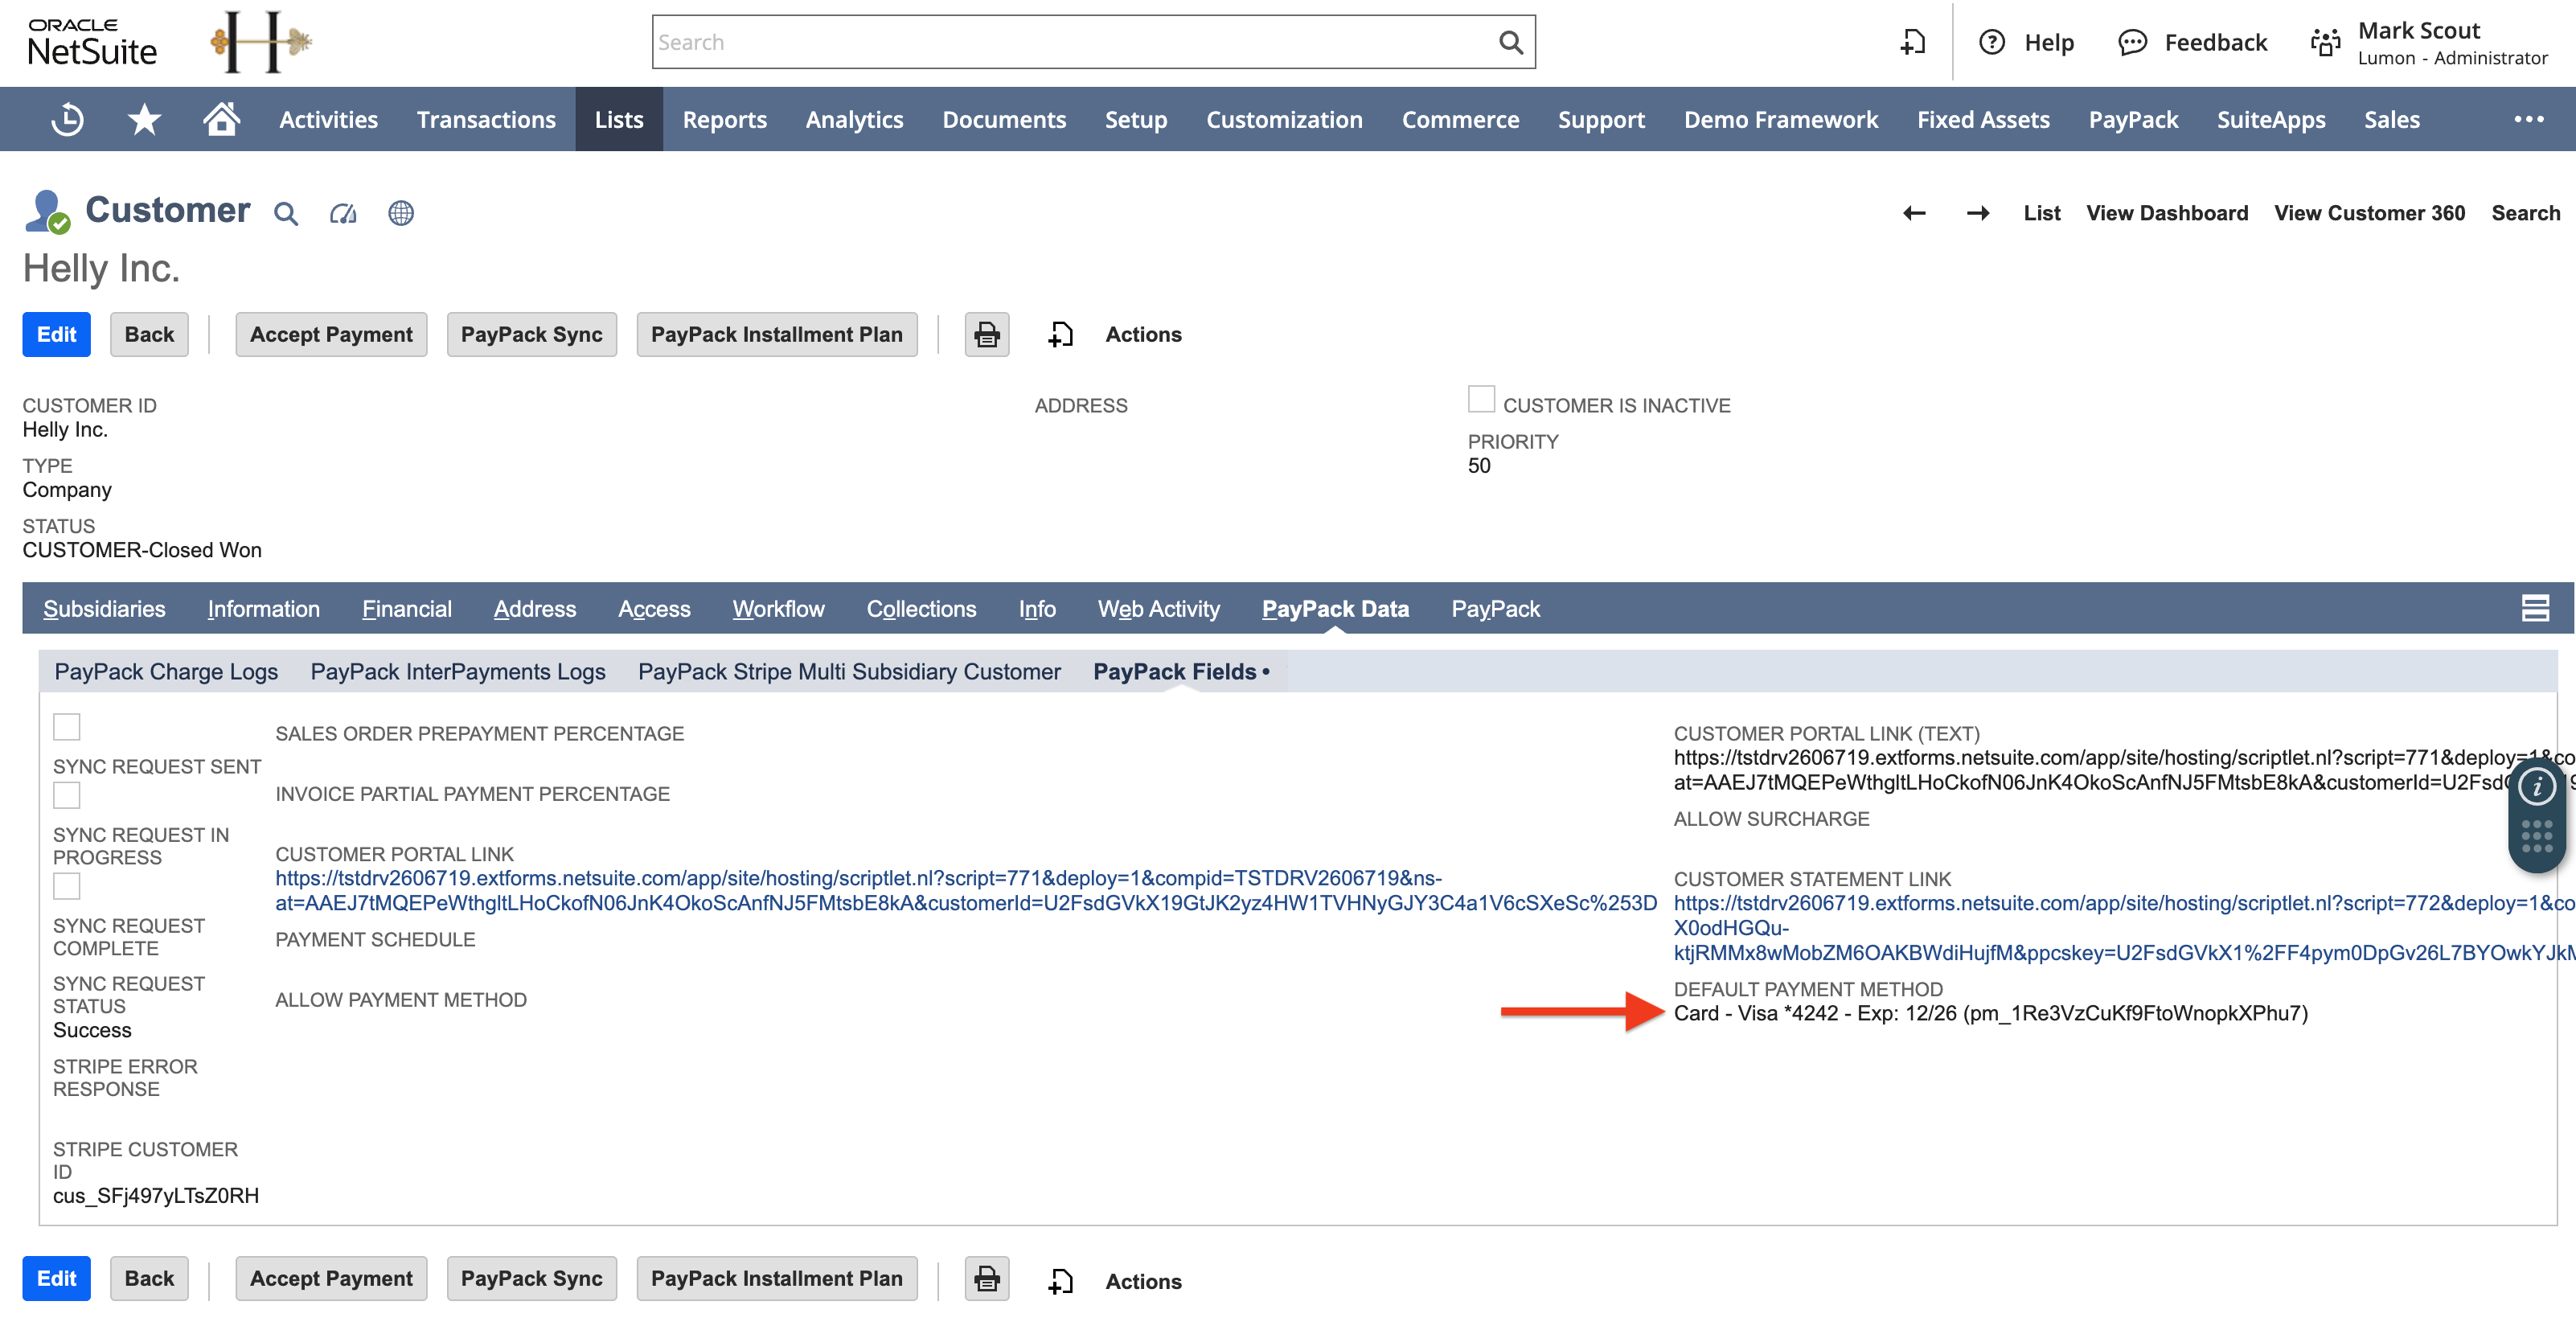
Default Payment Method
View a Stripe Customer's Default Payment Method directly on the NetSuite Customer record. This provides immediate access to crucial payment details, streamlining your customer management and support workflows.
To automatically set and refresh the NetSuite Customer's Stripe default payment method, follow these steps:
- Go to PayPack Config → Schedule → Set Default Payment Method for Customer Saved Search.
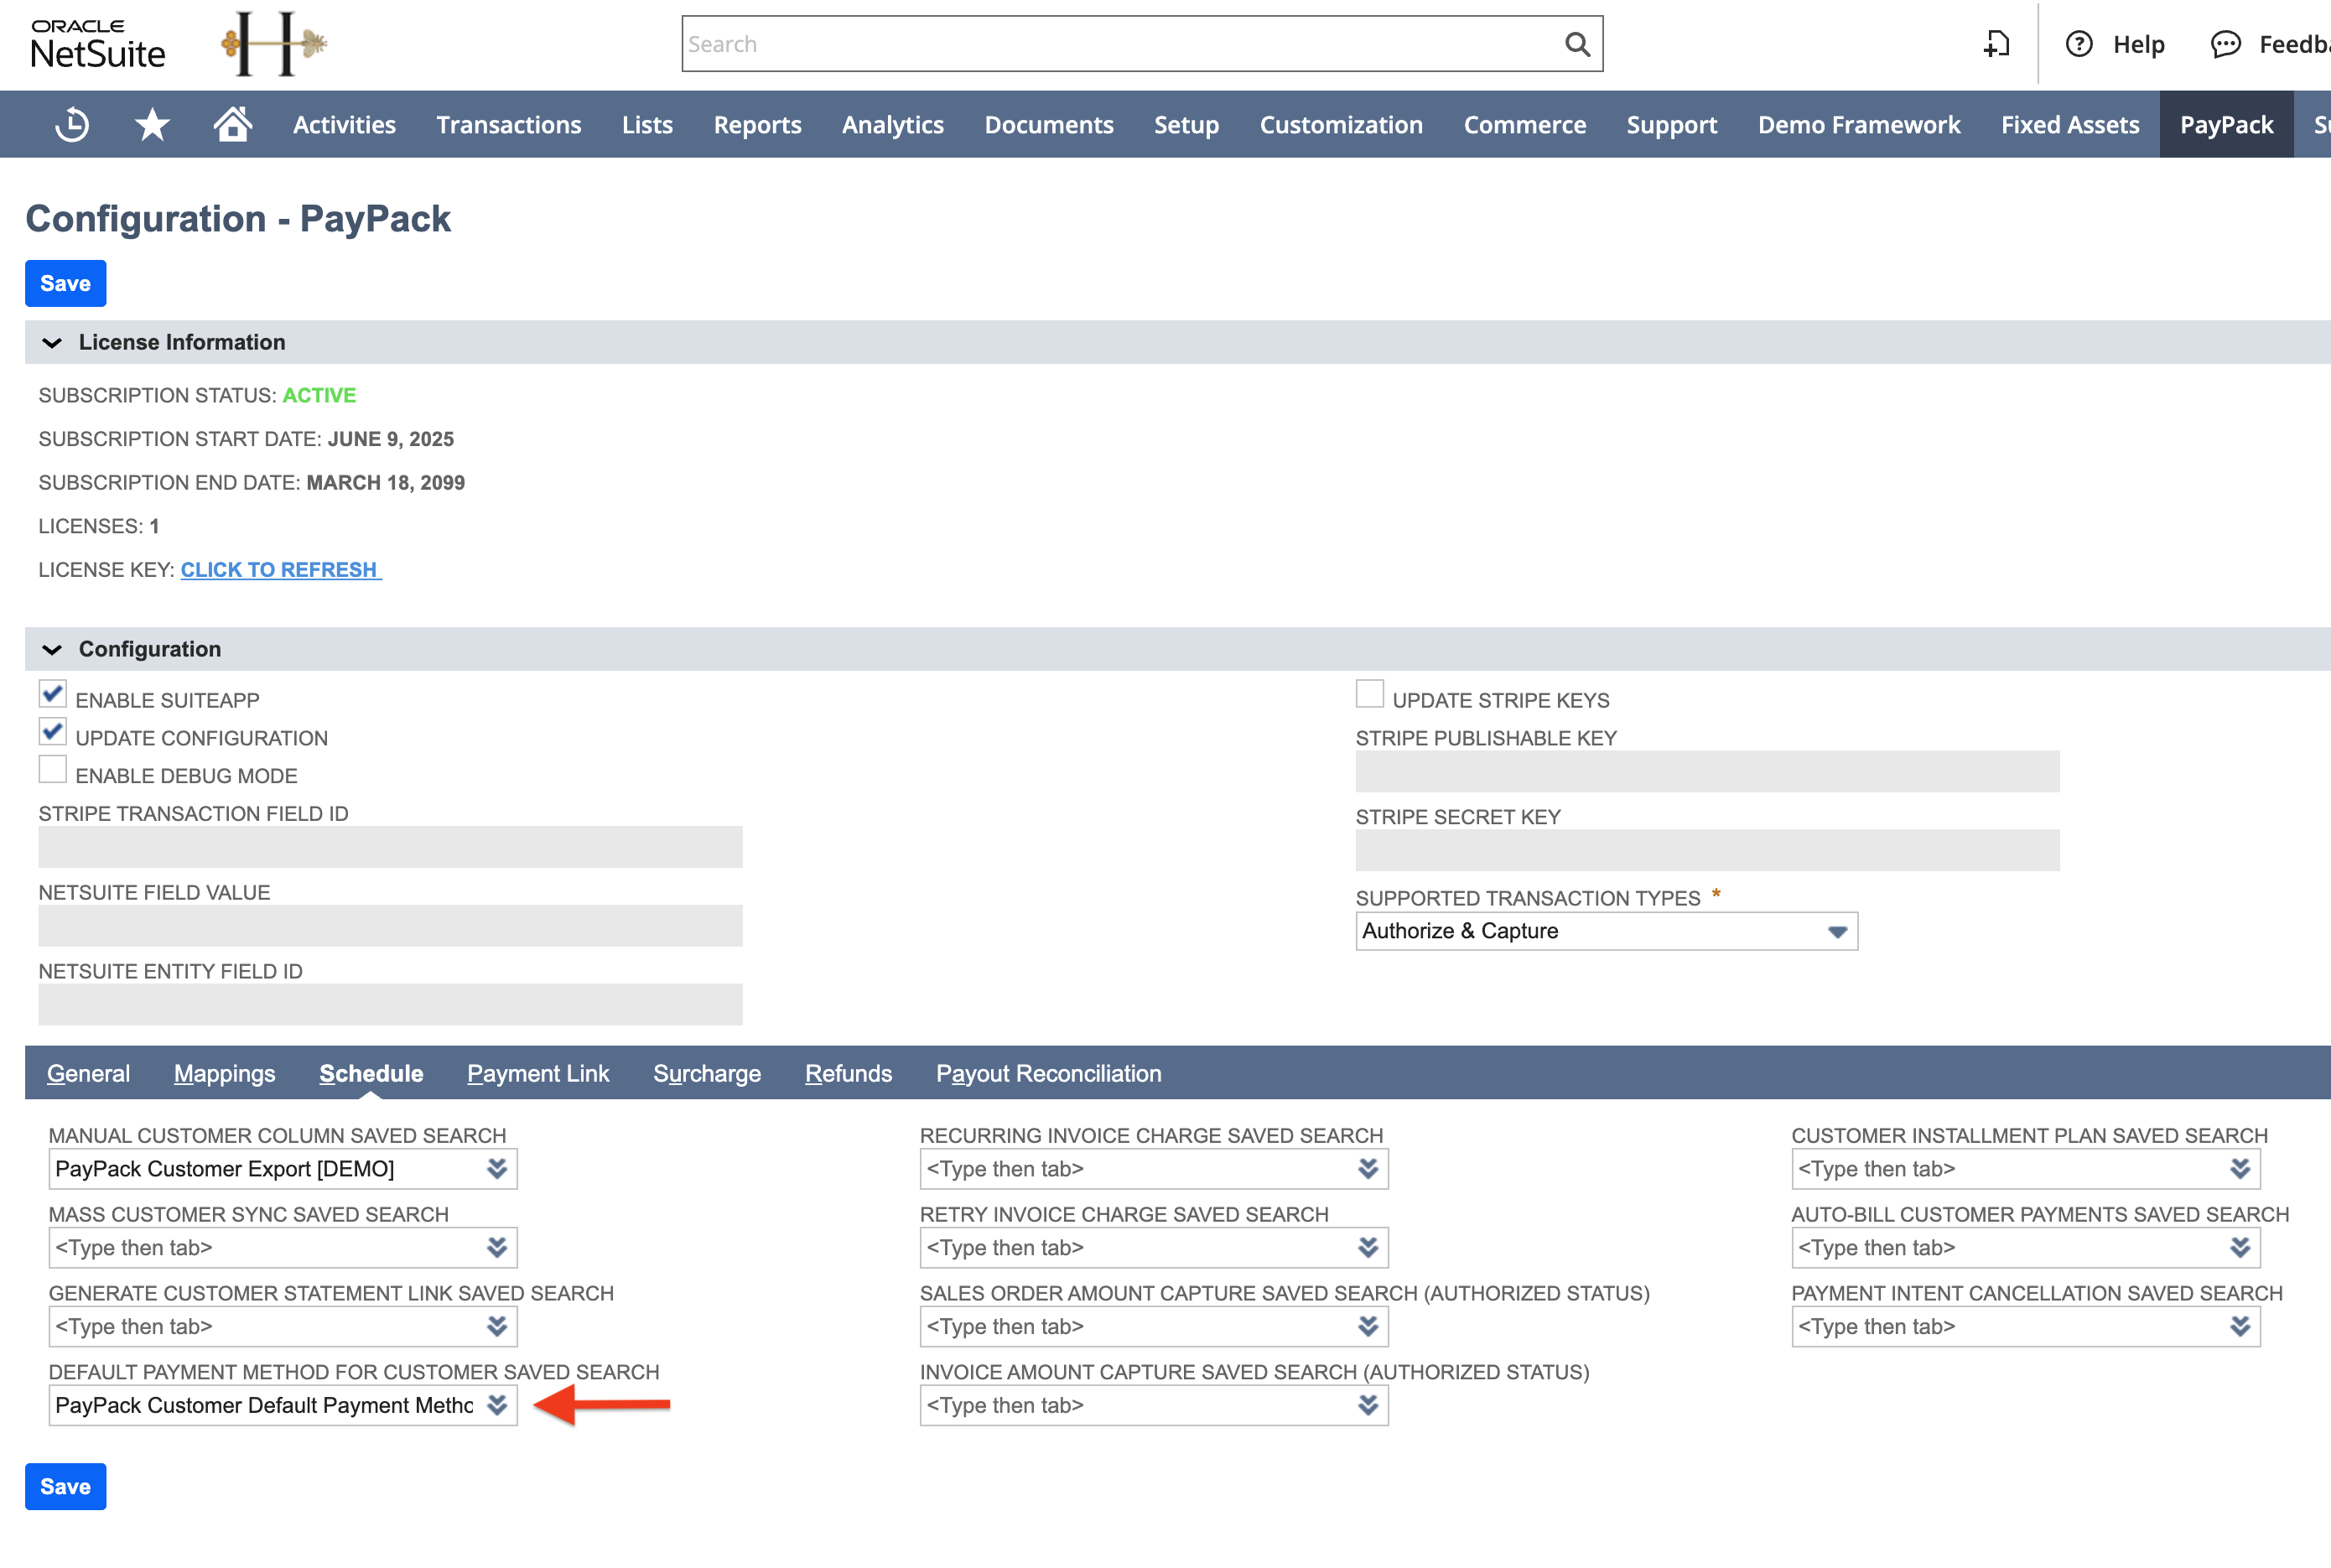
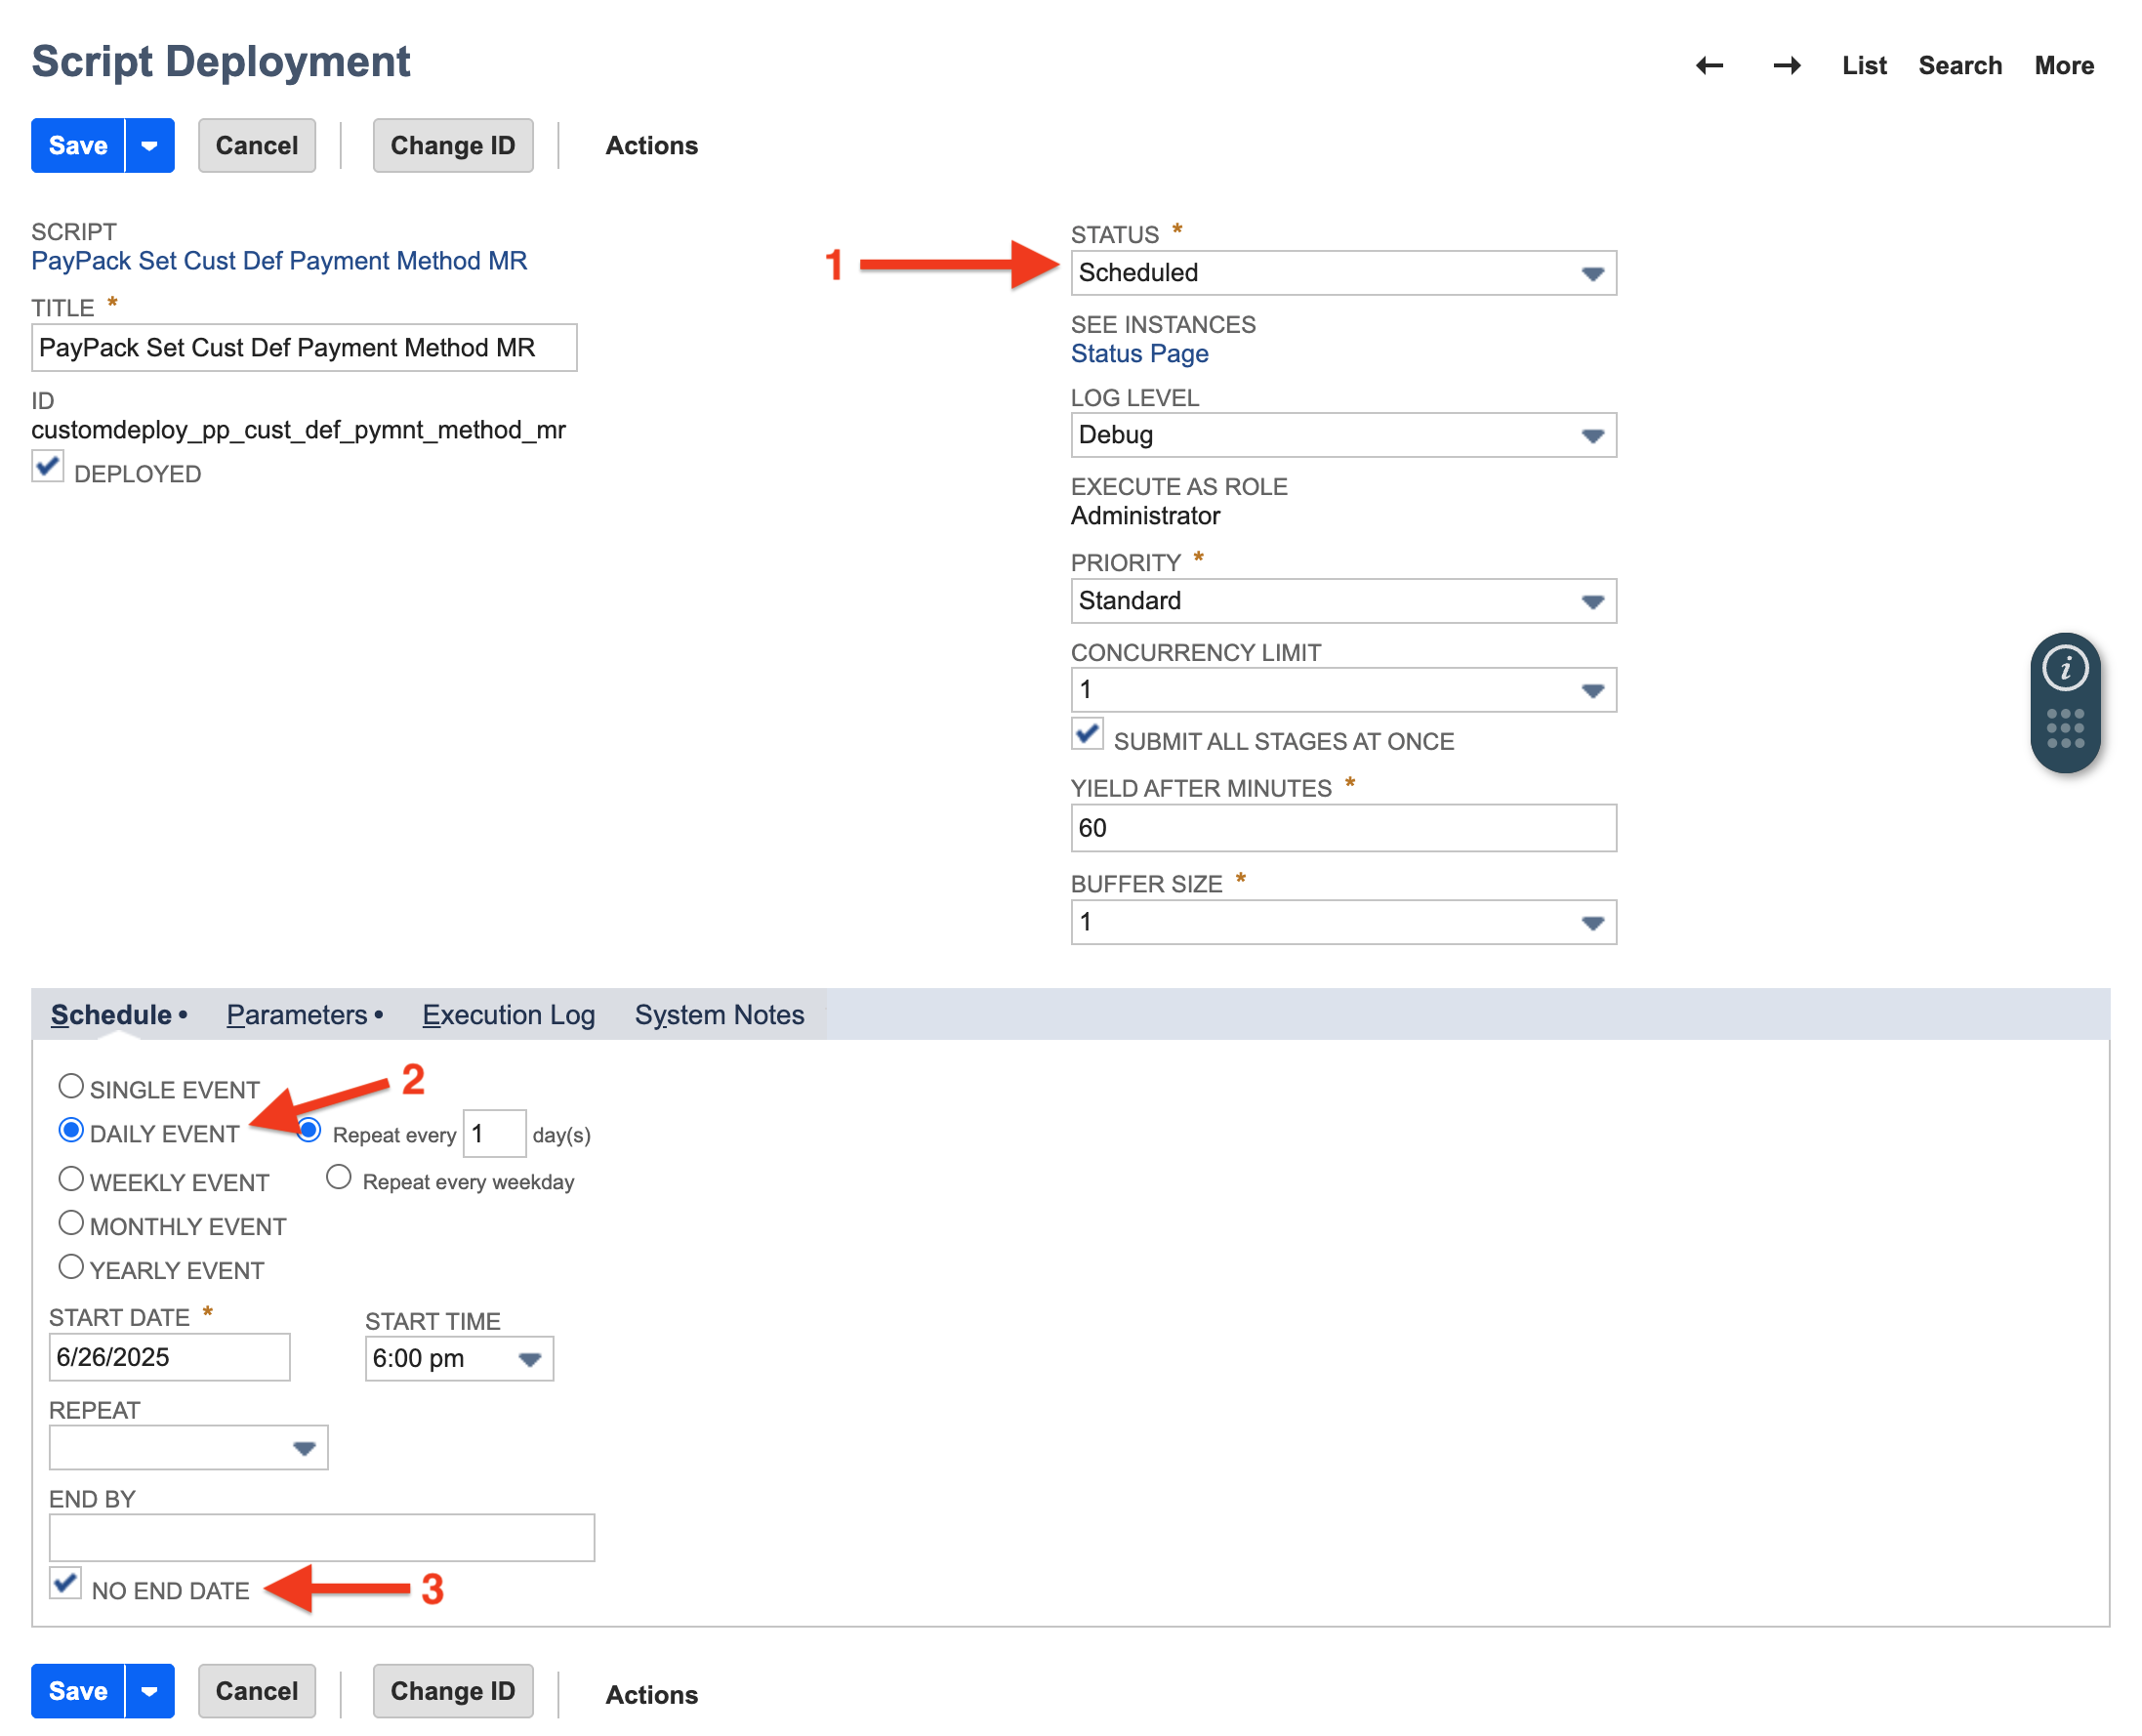
- Schedule our PayPack deployment script: PayPack Cust Def Payment Method MR.
If real-time visibility of customer payment methods are required, go to PayPack Config → General subtab and Enable Webhook. This ensures real-time default payment method updates for NetSuite's associated Stripe account configuration.
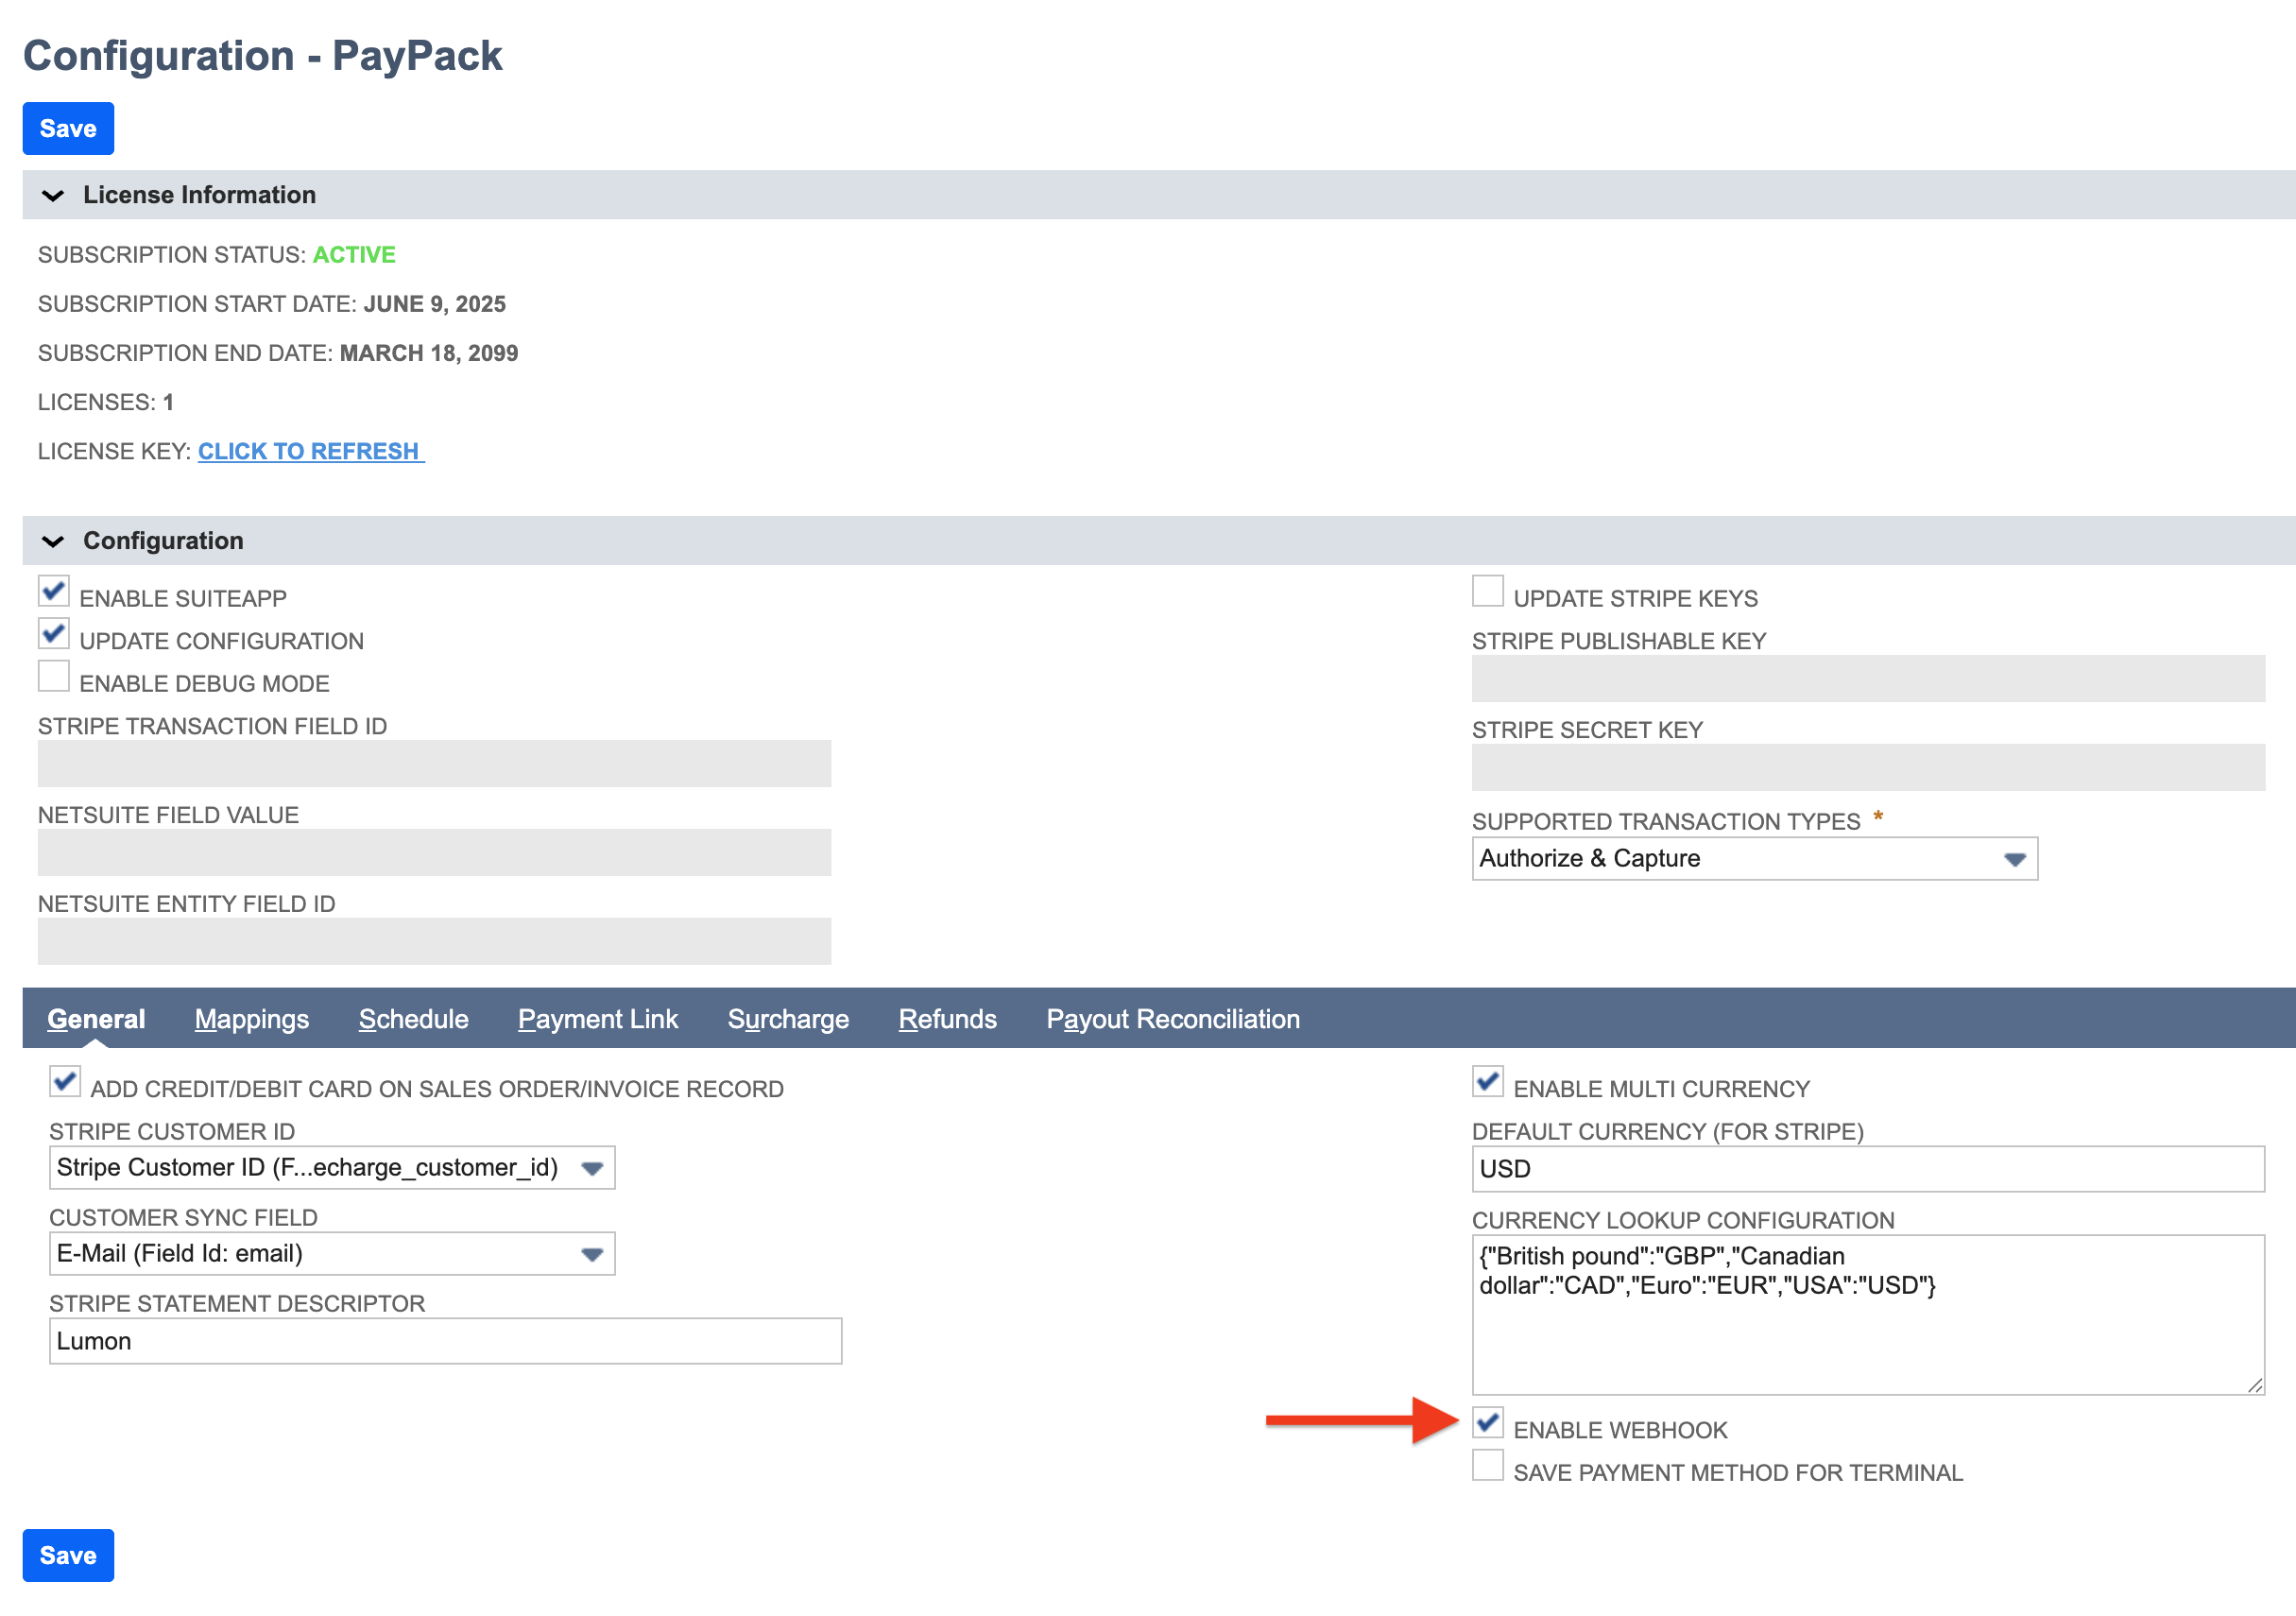
You can easily manage your Stripe webhooks directly from the PayPack configuration page using the Enable Webhook checkbox.
First-Time Setup: When you check the Enable Webhook box and save for the first time, a new webhook is automatically created and activated in the corresponding Stripe account.
Existing Webhooks: If a webhook already exists:
To enable: Check the Enable Webhook box and save.
To disable: Uncheck the Enable Webhook box and save.
Verify Status: All updates to the webhook's status (enabled or disabled) are logged in the
PayPack Stripe Webhookscustom record in NetSuite for your reference.
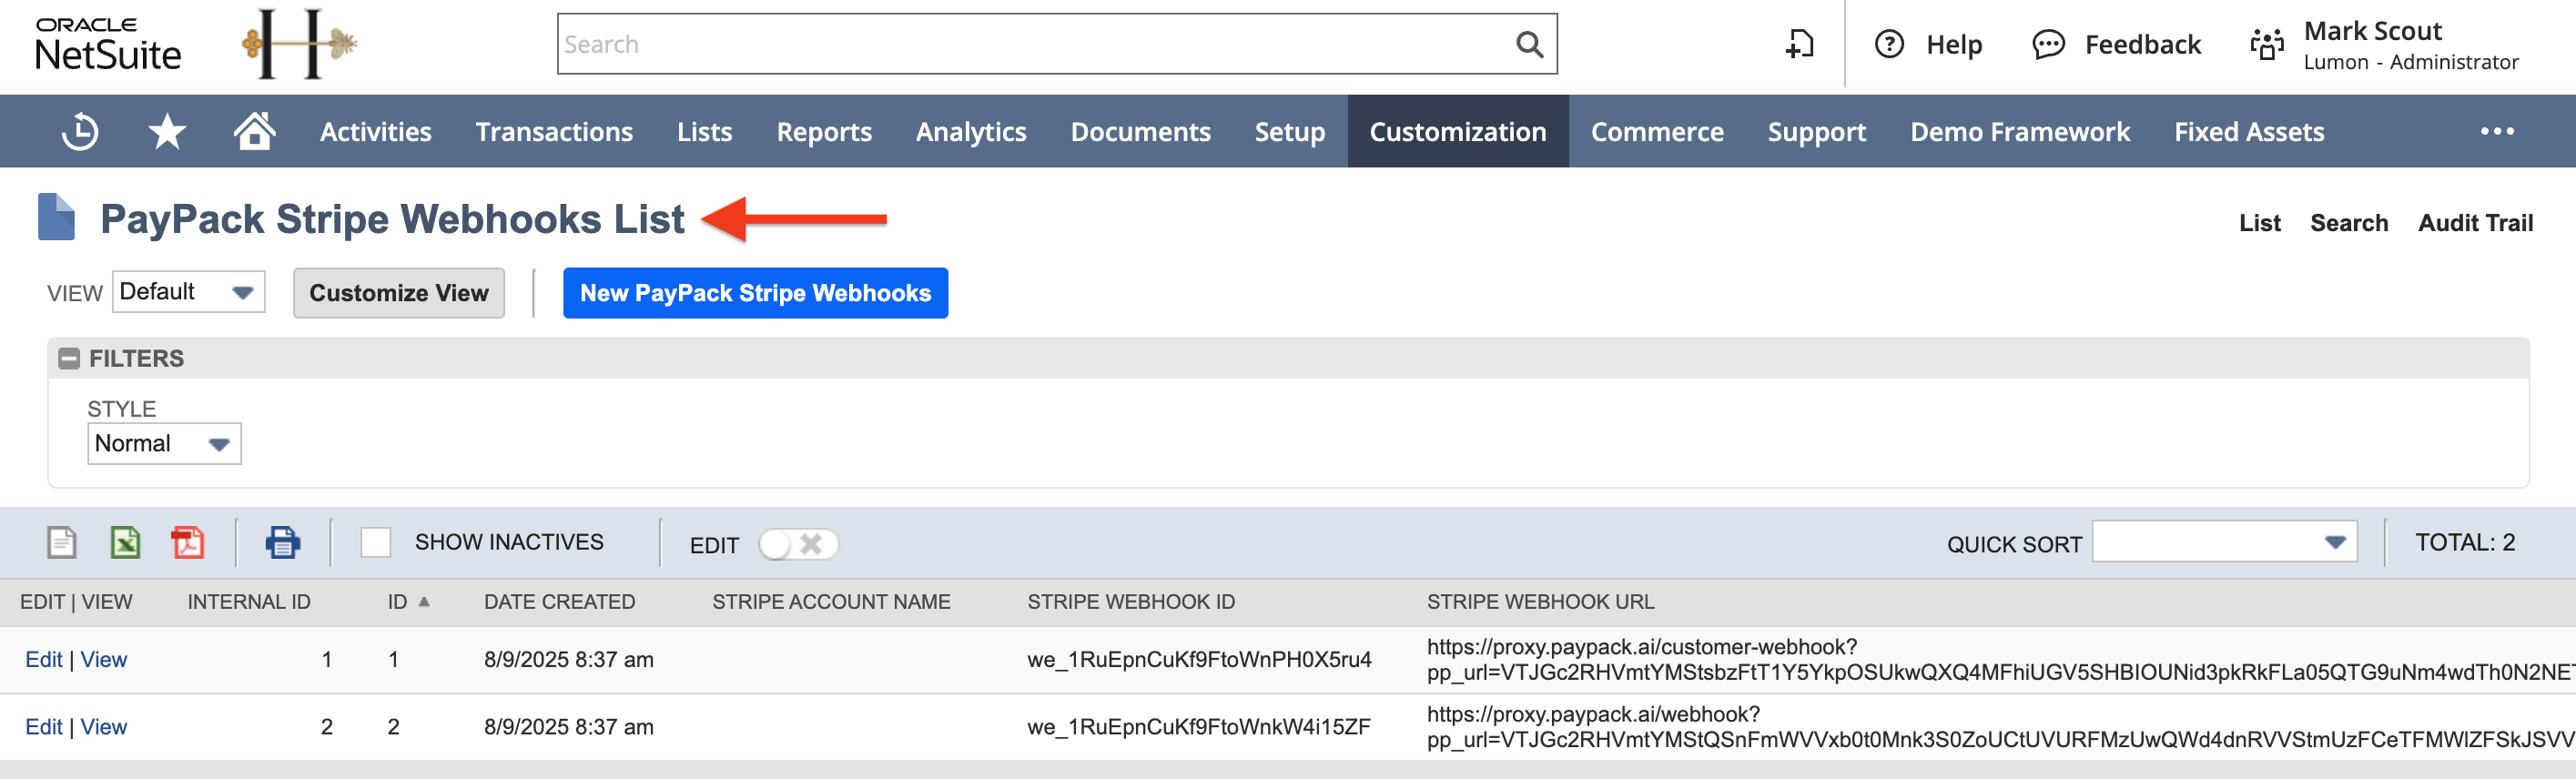
PayPack webhooks listen for the customer.created and customer.updated events in Stripe to keep customer information synchronized with NetSuite.
Because Stripe and NetSuite format data differently, a secure middleware service (proxy.paypack.ai) is used to translate the information.
Stripe sends an event notification to the middleware.
The middleware reformats the data into a structure NetSuite can accept.
The reformatted data is securely forwarded to a unique URL in your NetSuite account.
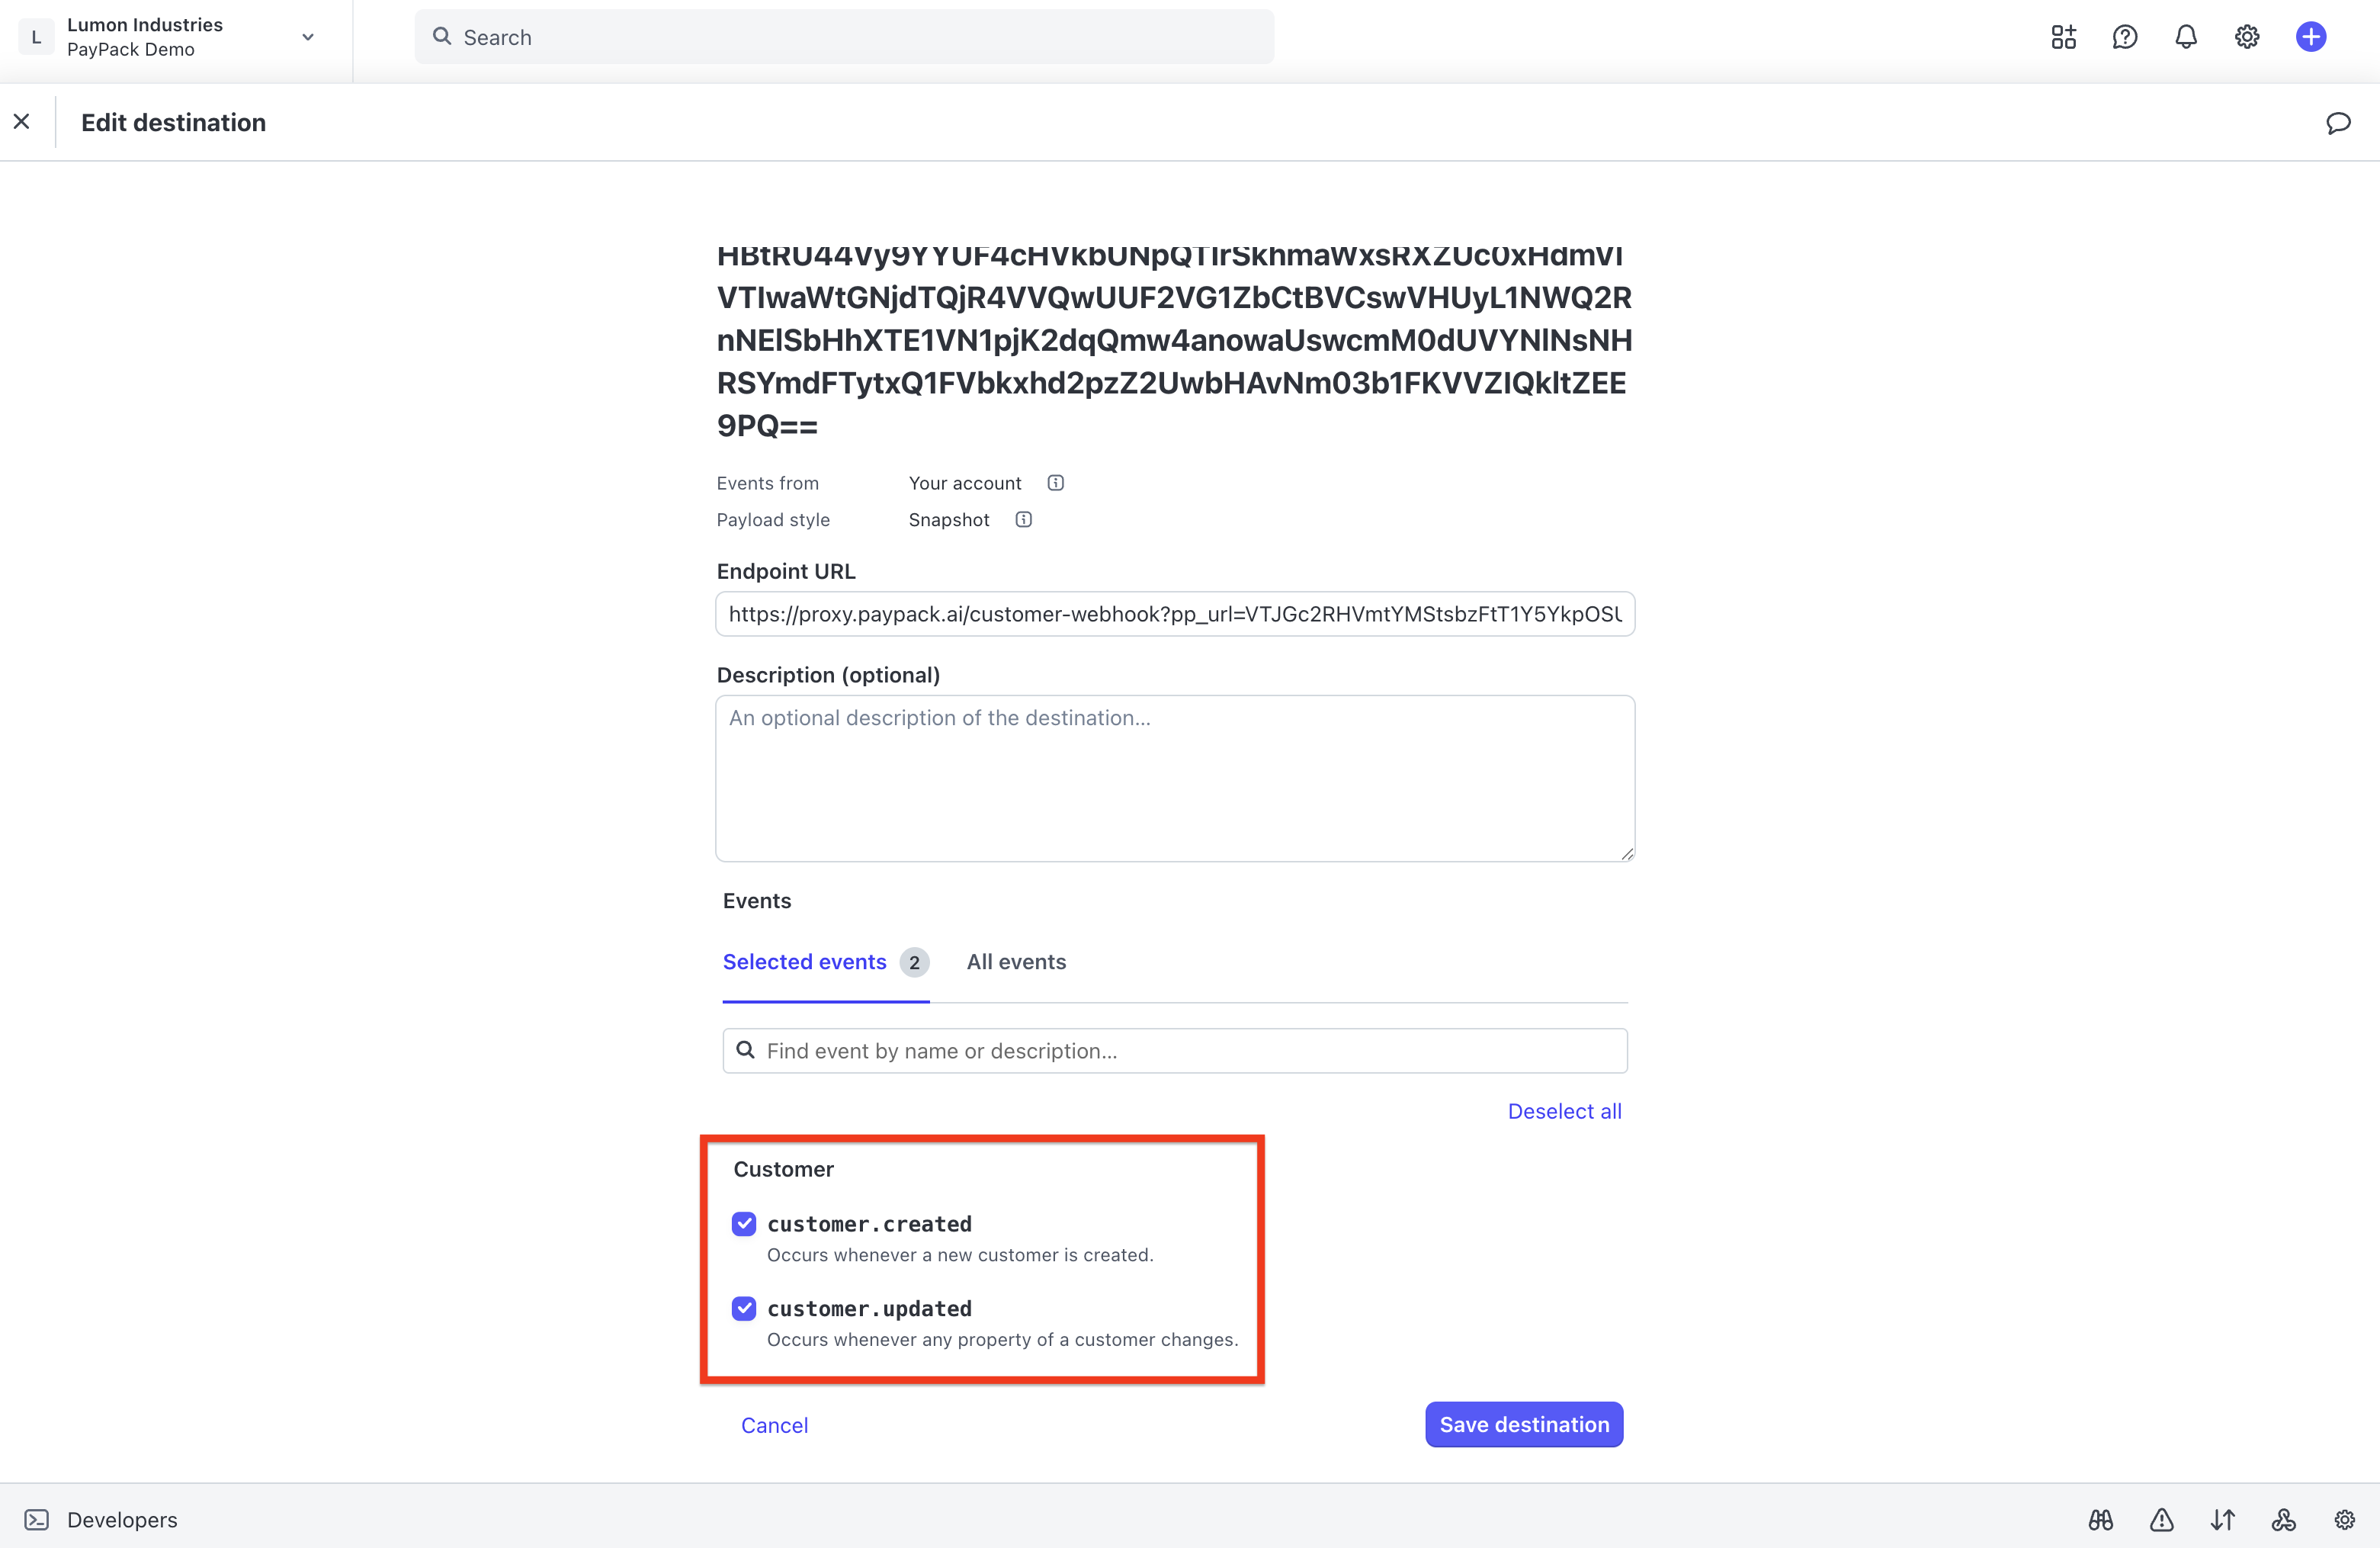
This process ensures that customer data from Stripe integrates seamlessly and reliably. The endpoint URL is constructed securely, with your NetSuite URL encrypted as a parameter:
https://proxy.paypack.ai/customer-webhook?pp_url=<encoded_suitelet_url>
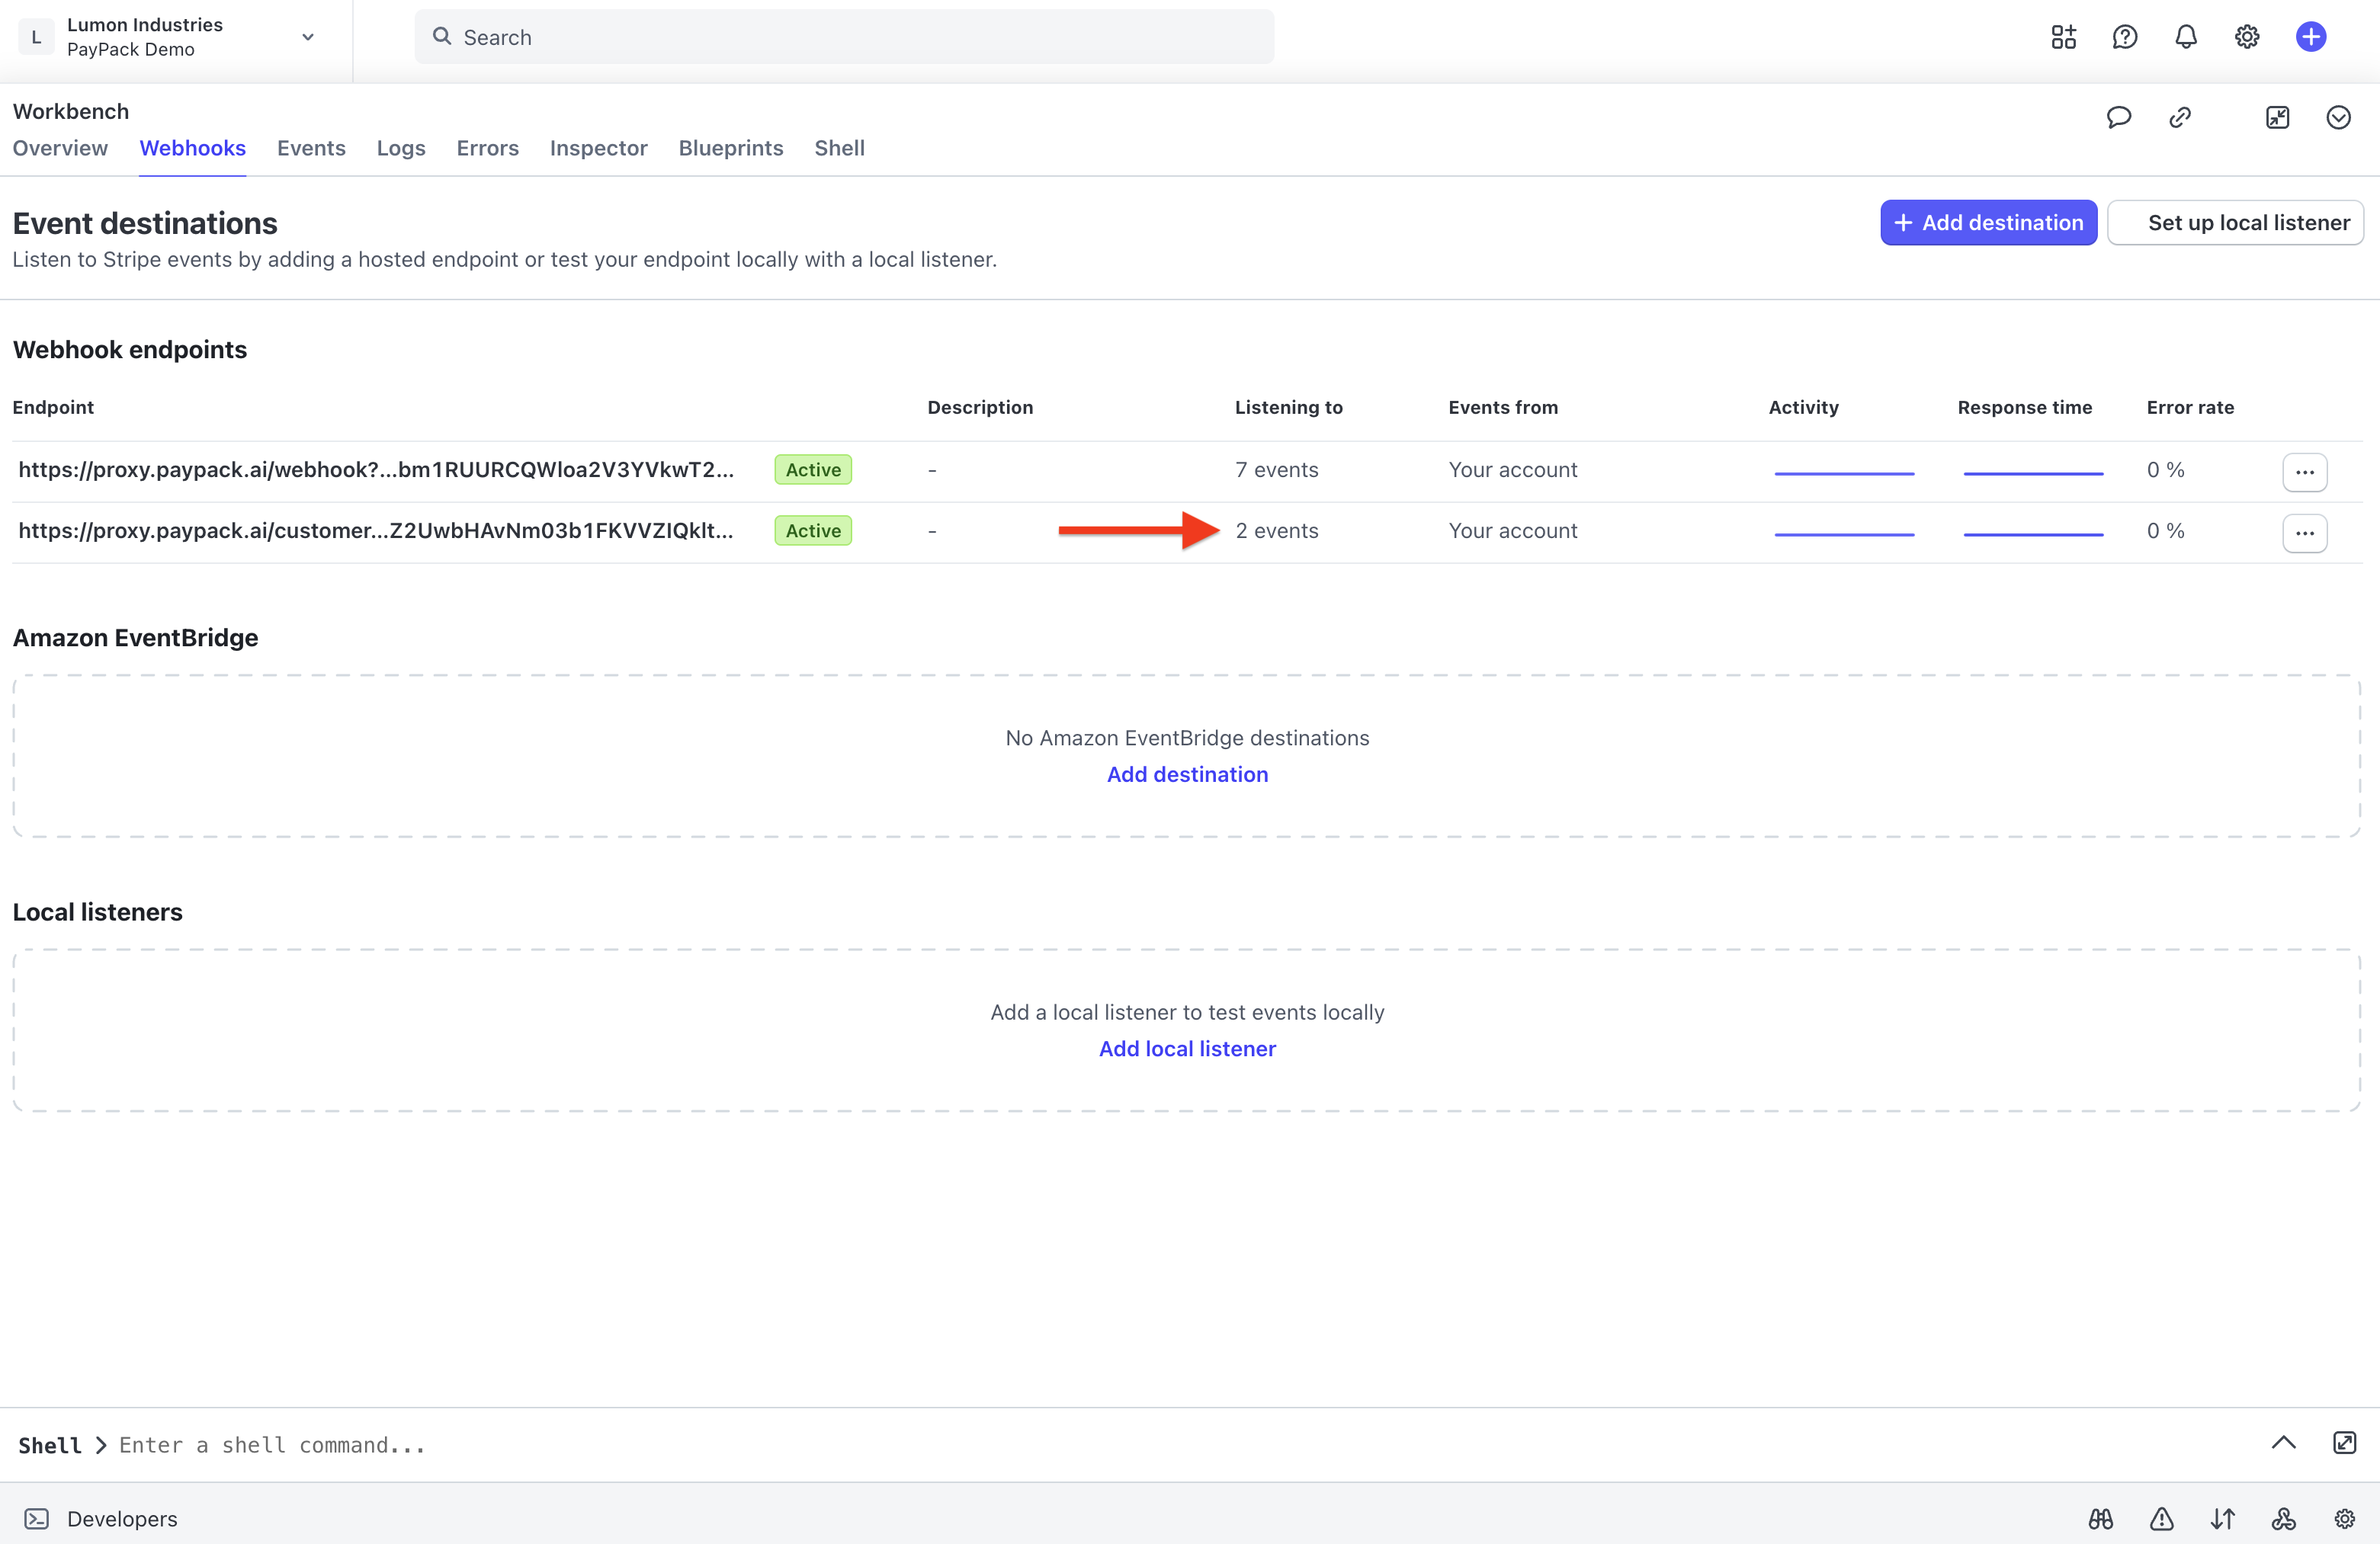
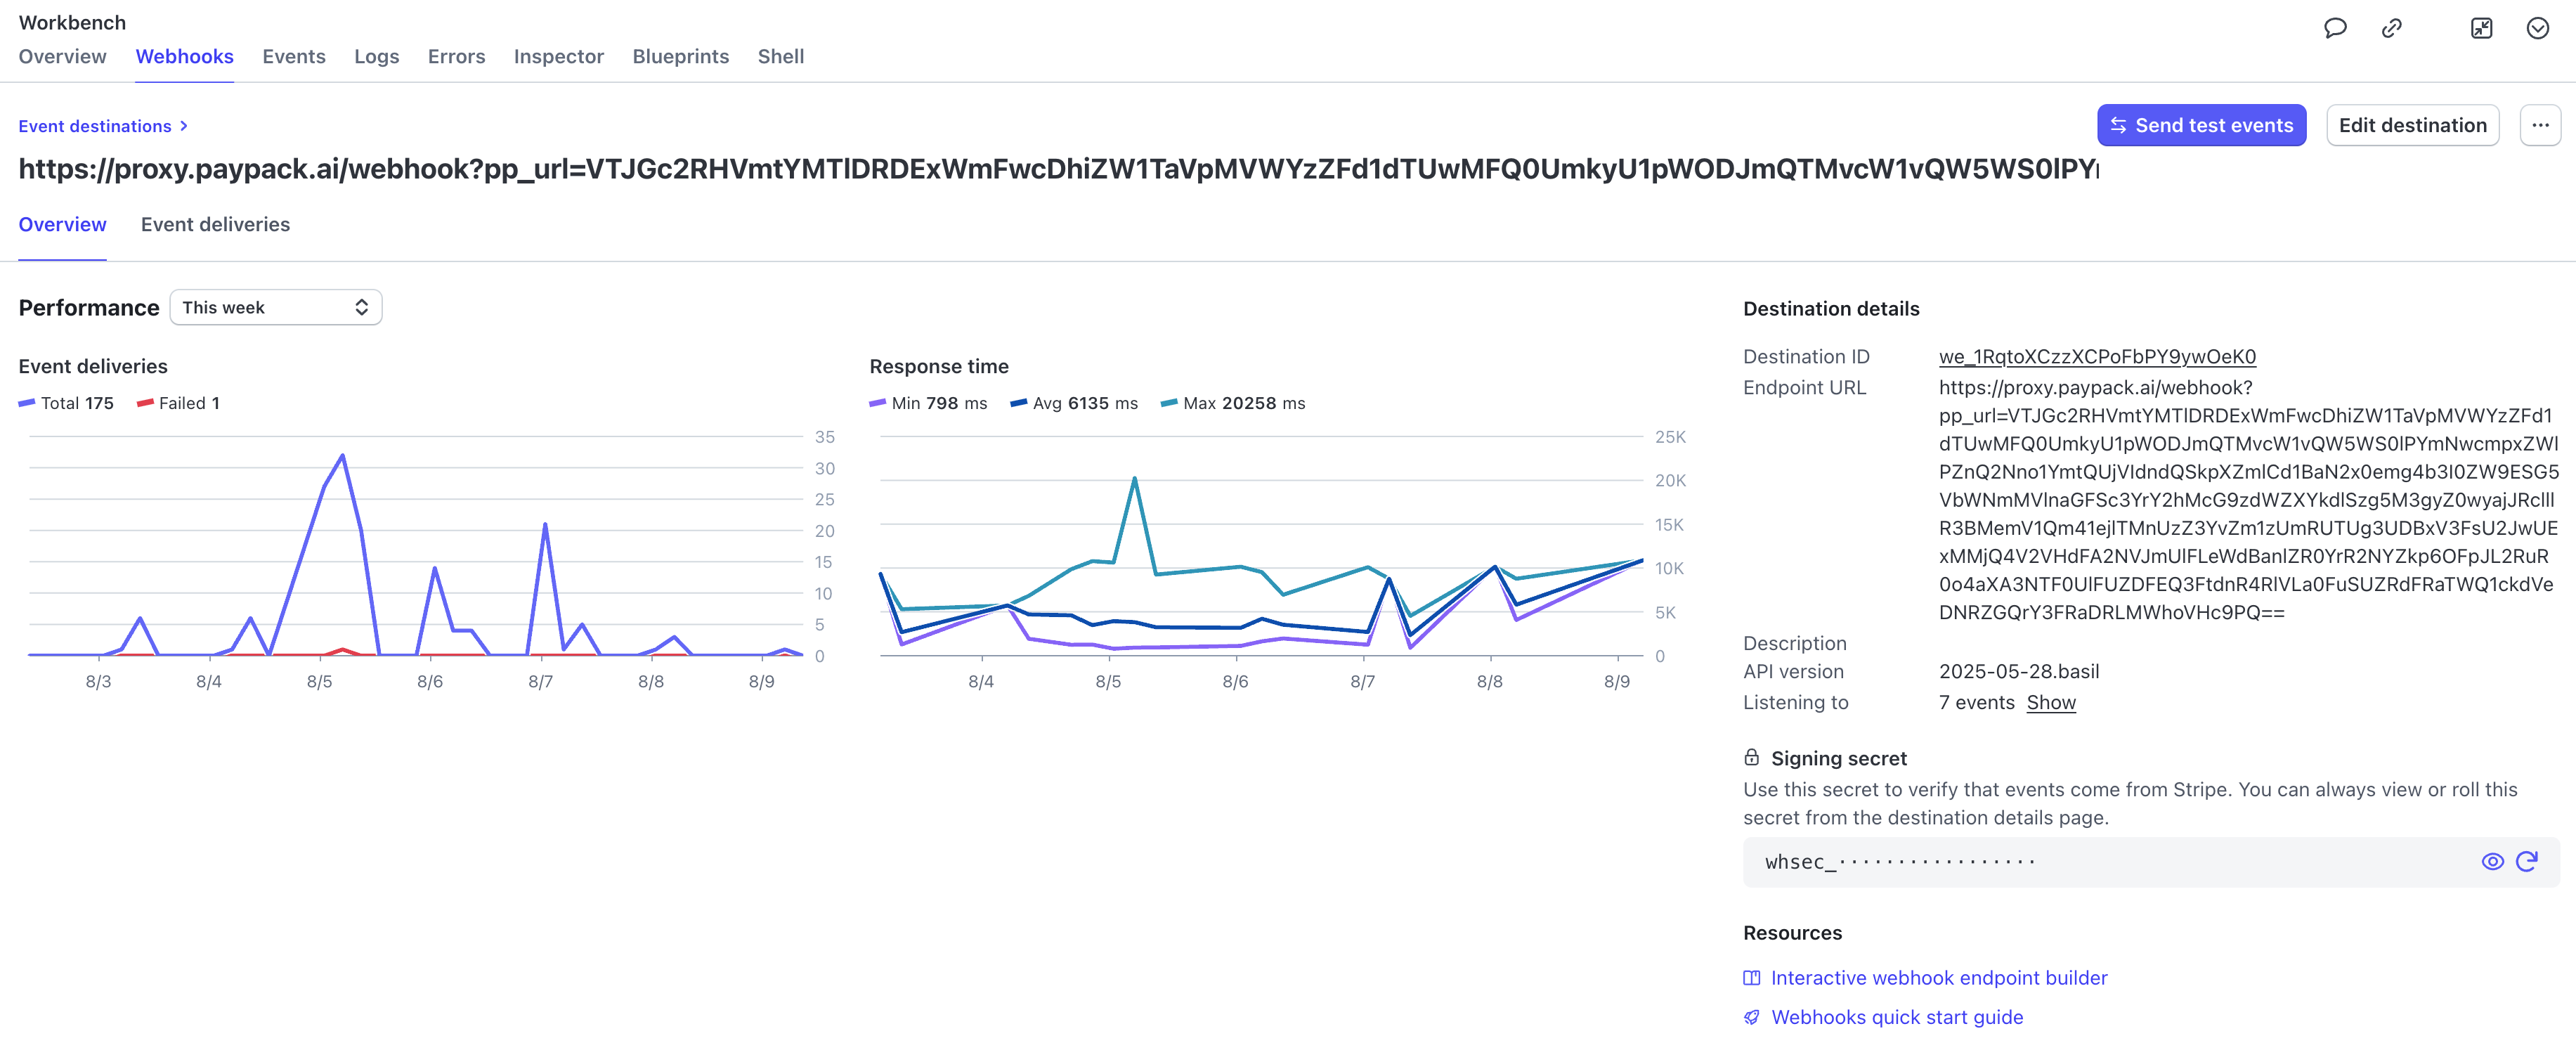
You can view your Stripe webhooks and their activity directly from the Stripe Dashboard. This allows you to see which webhooks you have configured, check their status, and review the logs of events they have received.
Webhook endpoints are the specific URLs you've configured in Stripe to receive event notifications.
Log in to your Stripe Dashboard.
Navigate to the Developers section, which you can typically find in the top-right corner of the dashboard.
In the Developers menu, select Webhooks.
This page lists all your configured webhook endpoints. You'll see the URL for each endpoint, which events it's subscribed to, and its current status (enabled or disabled).
The default customer payment method webhook in Stripe will listen to 2 events.
Edit destination of the Stripe webhook to see what events are listened to.
- customer.created
- customer.updated
View success and failed Stripe webhook events using the event destination dashboard.
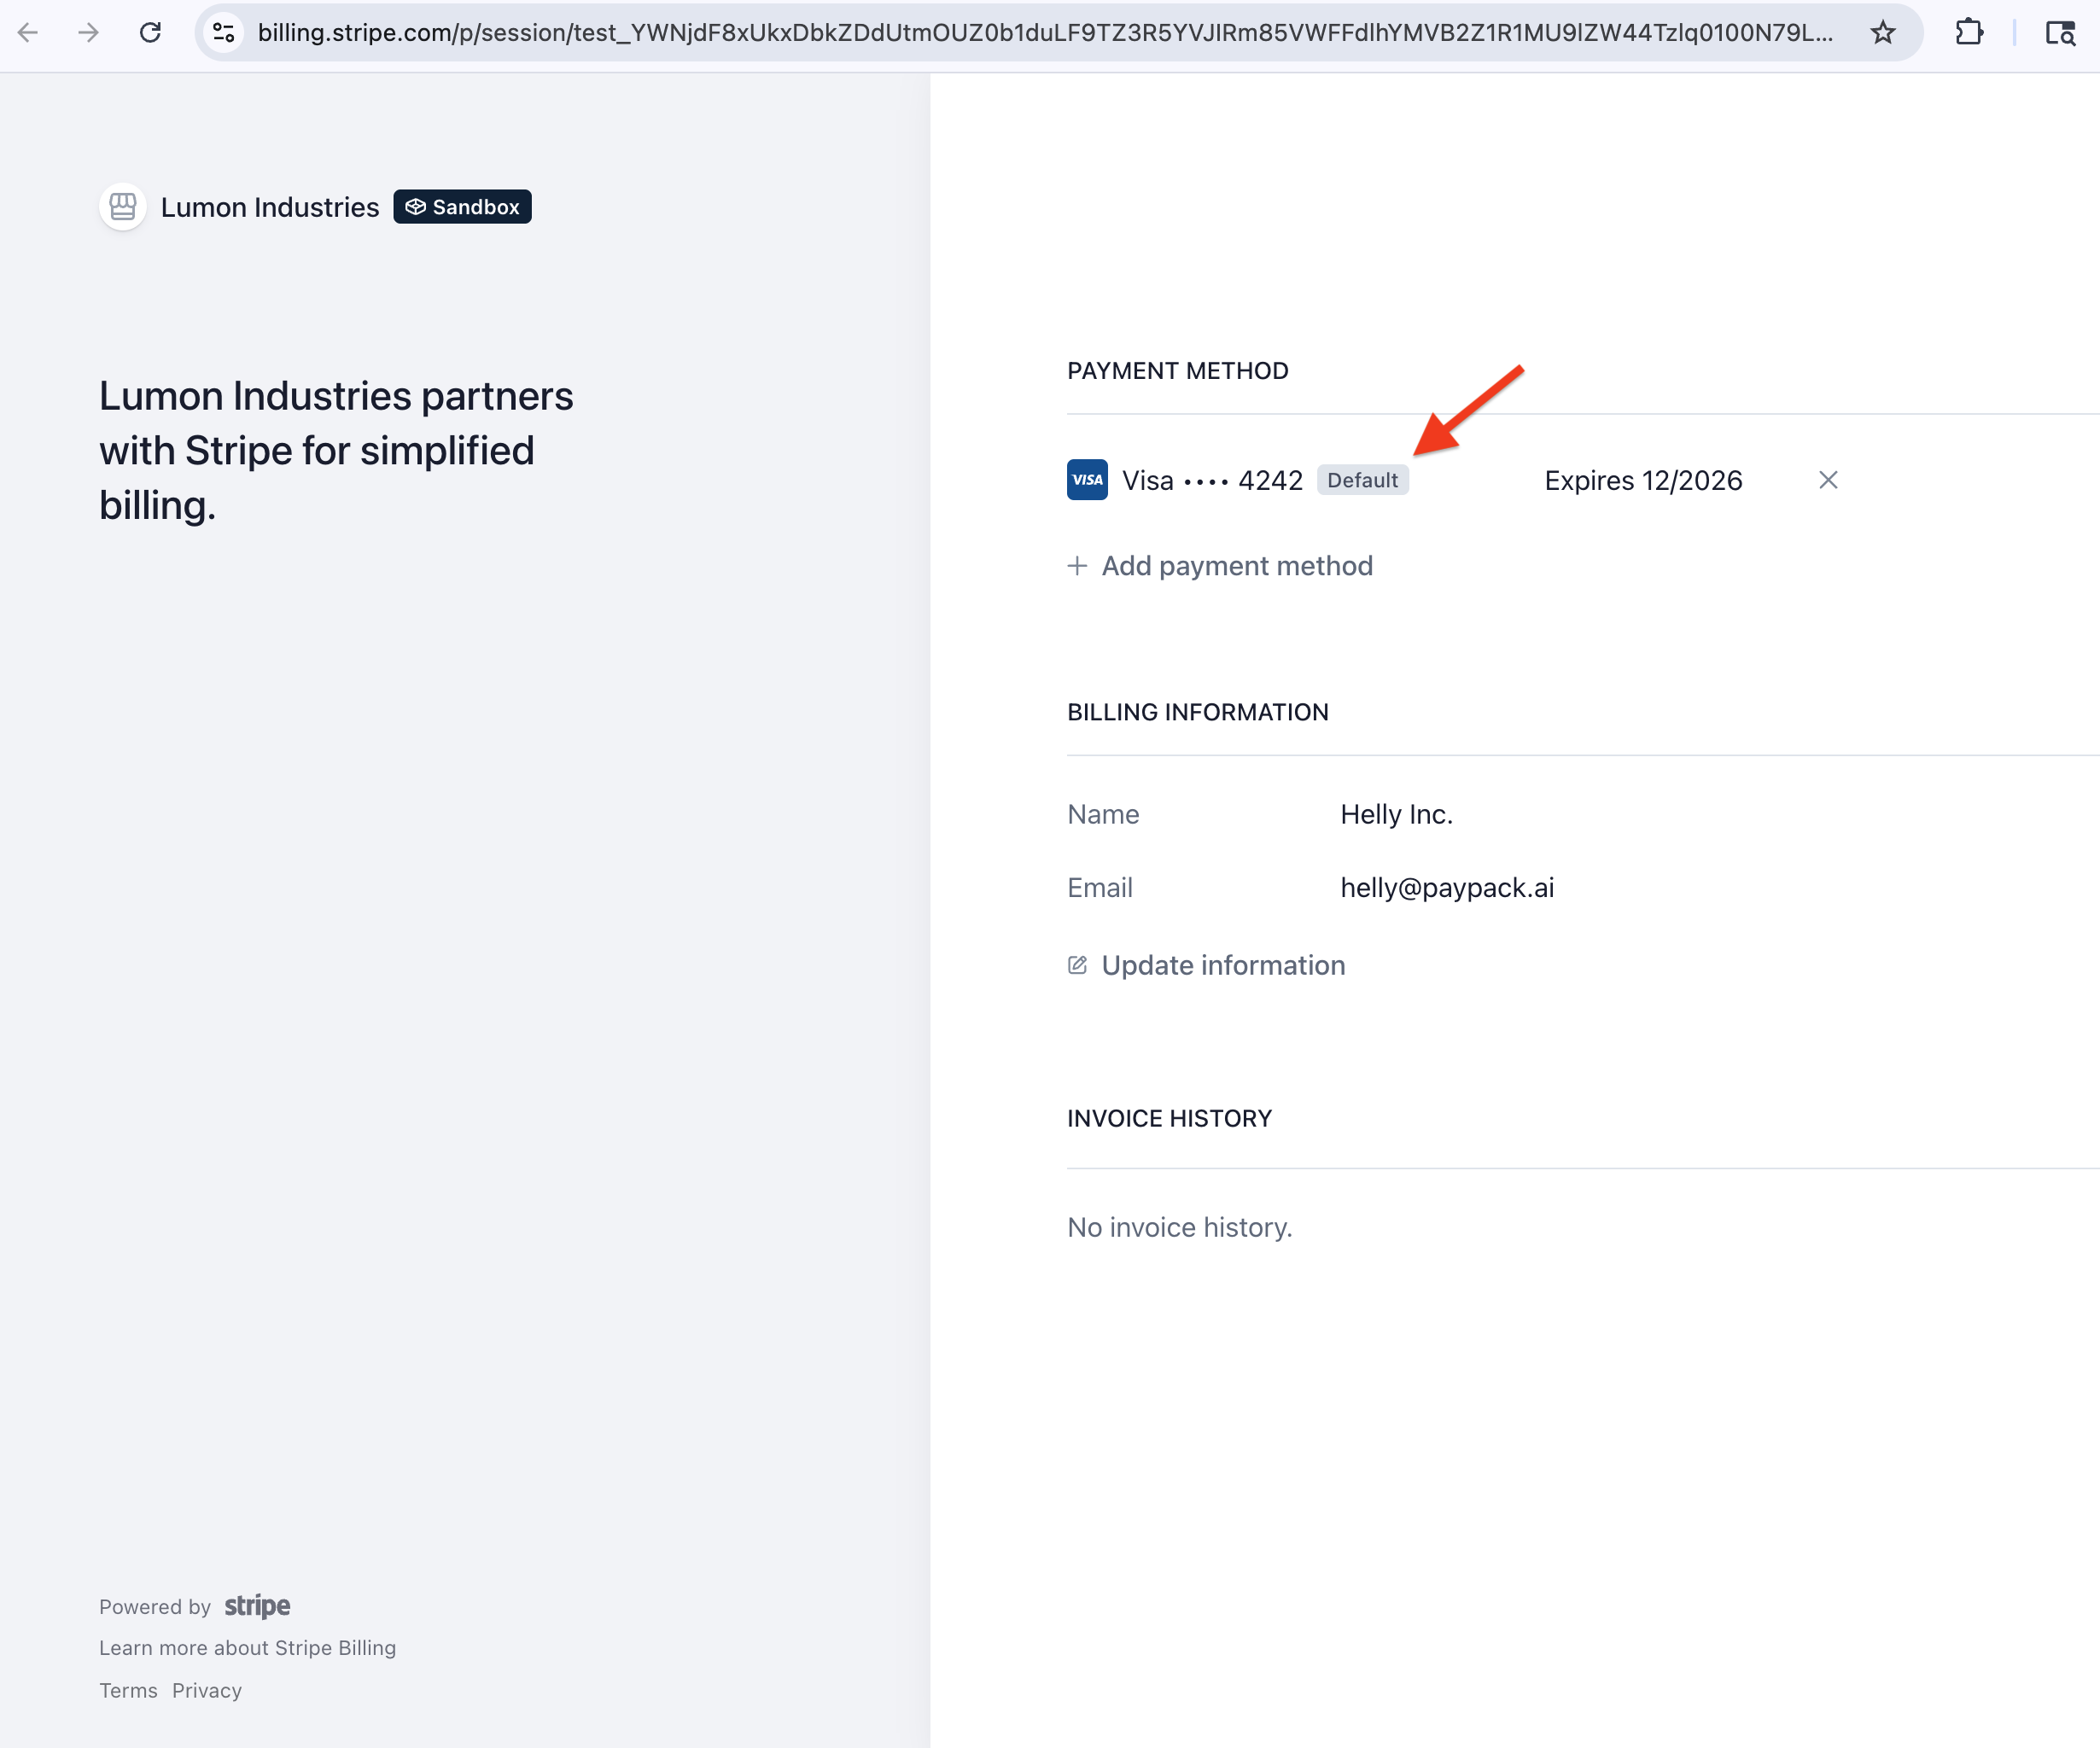
Stripe Customer Portal
To allow customers to view and edit their payment methods as a self-service option, a custom field is added to the NetSuite customer record and includes the customer portal session URL. This custom field can be added to NetSuite email templates for automating communication.
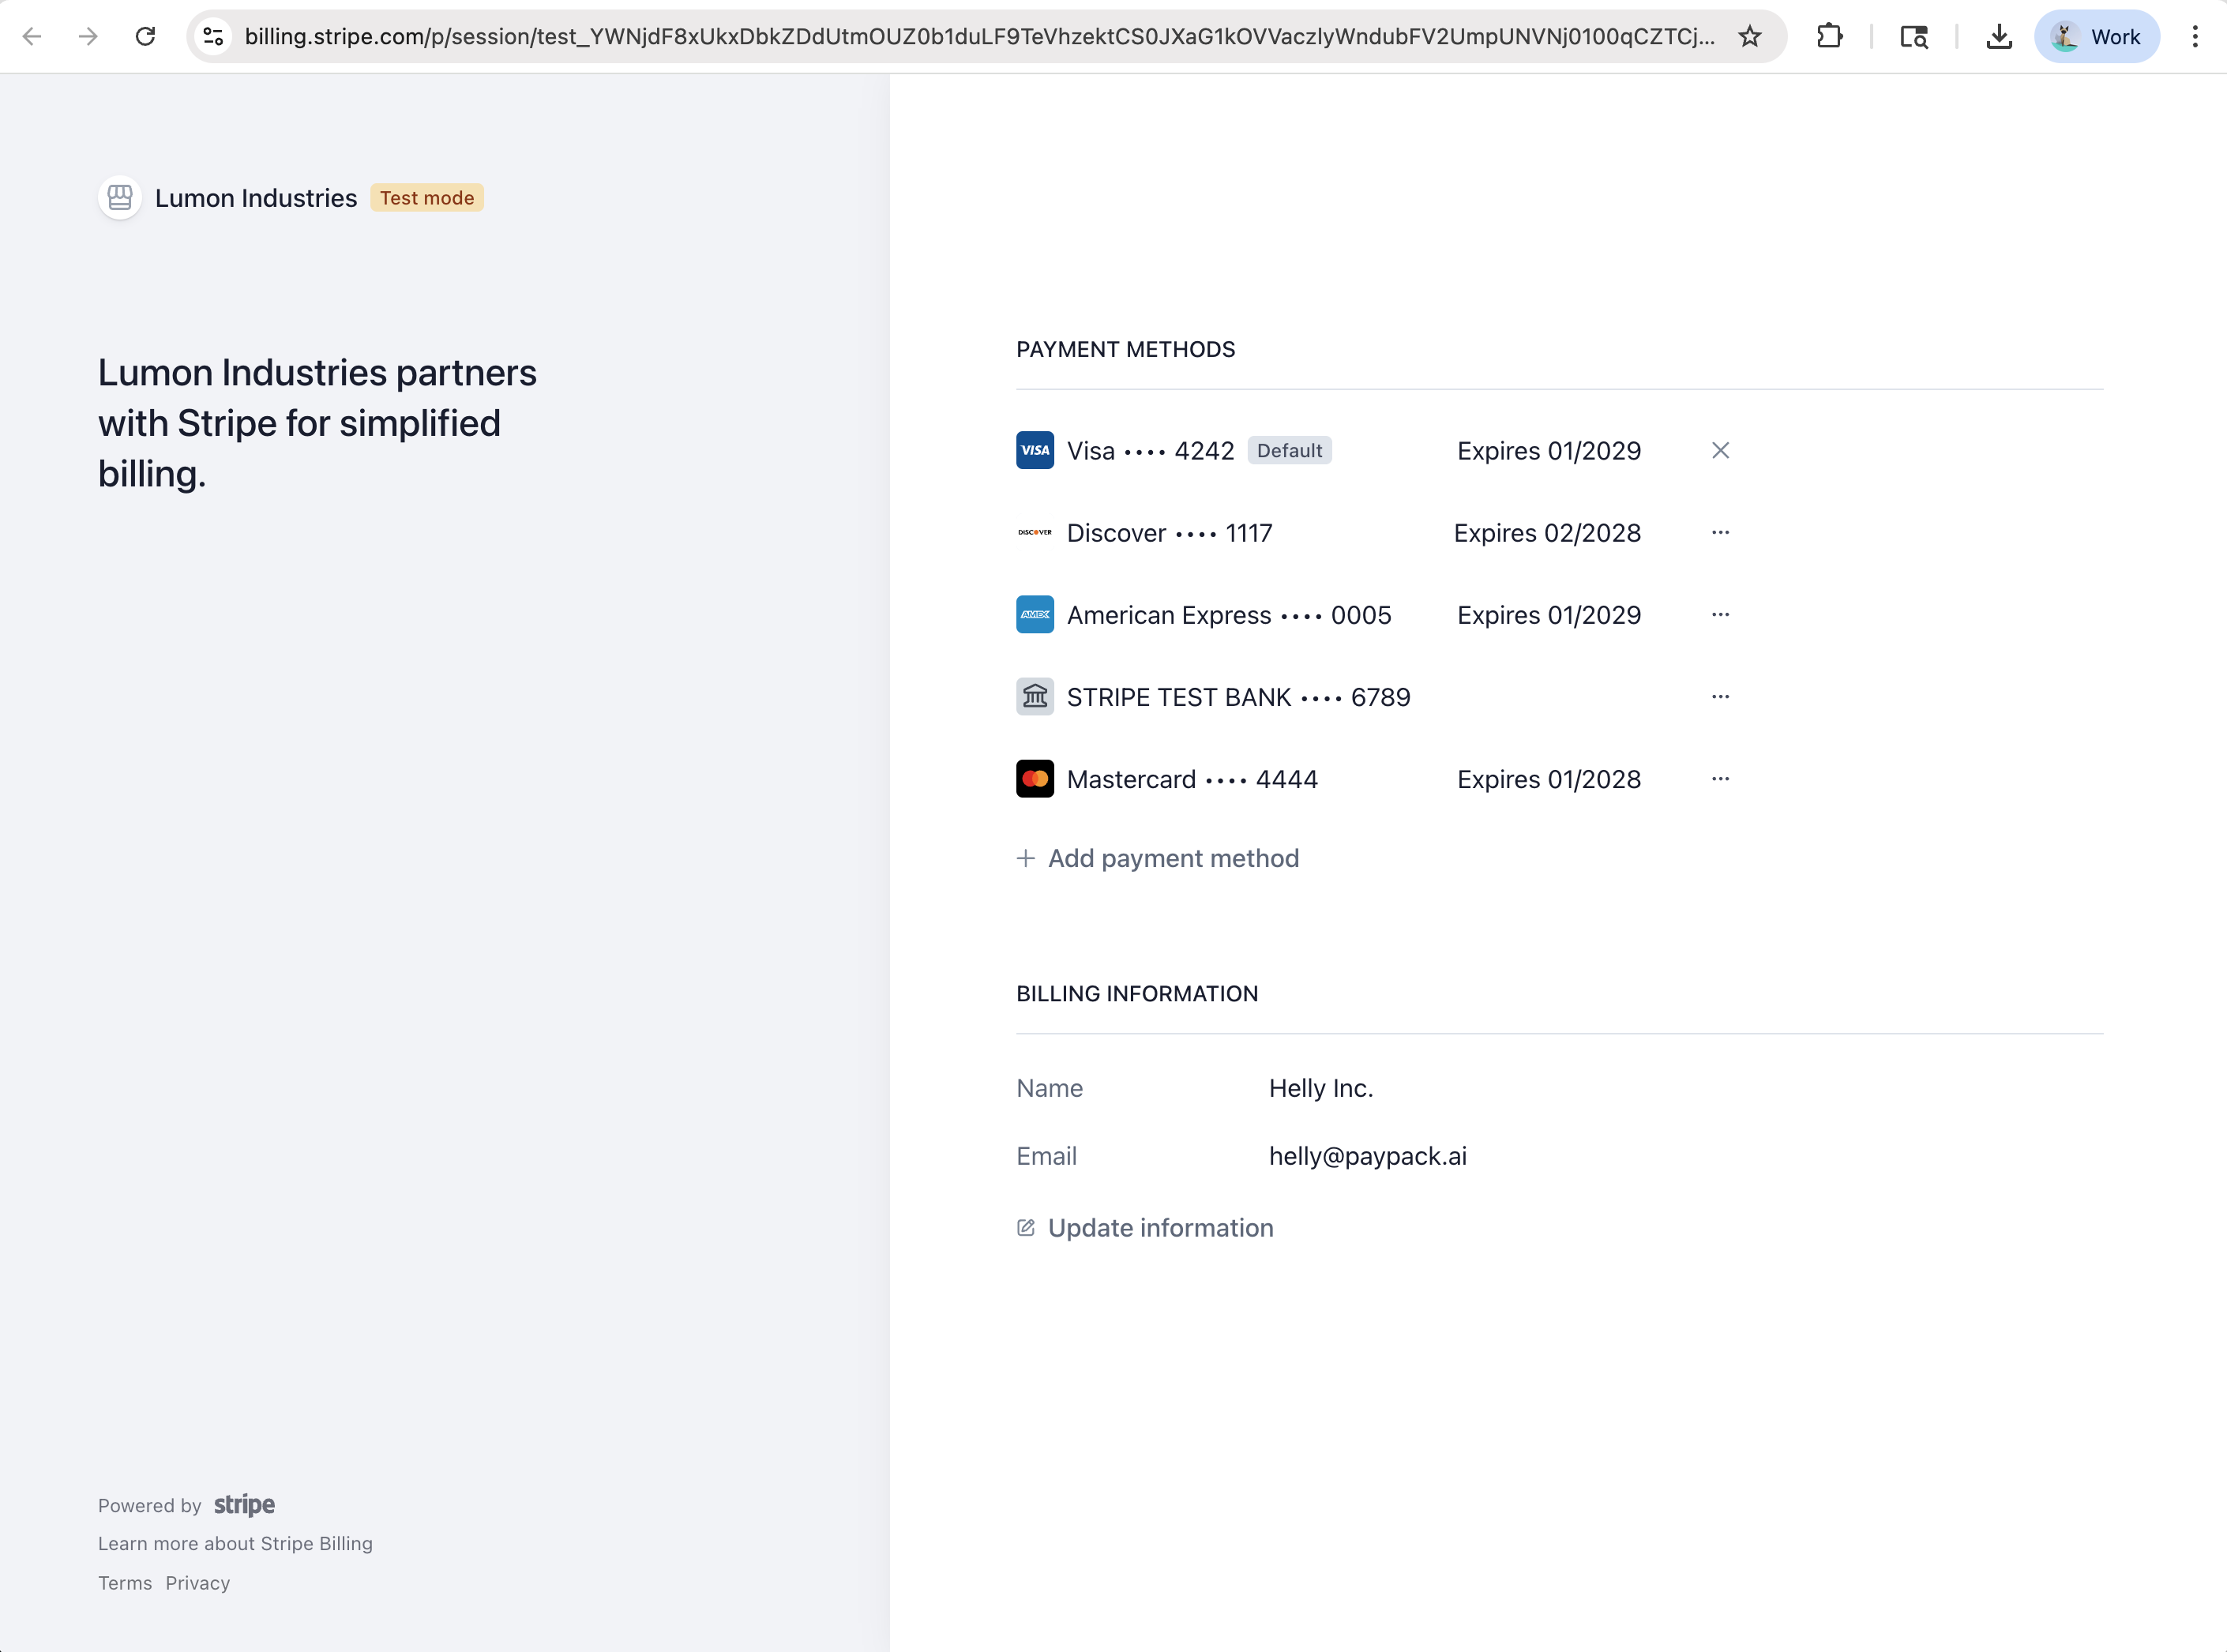
By visiting the session's URL, the customer can manage their billing details. For security reasons, sessions are short-lived and will expire if the customer does not visit the URL.
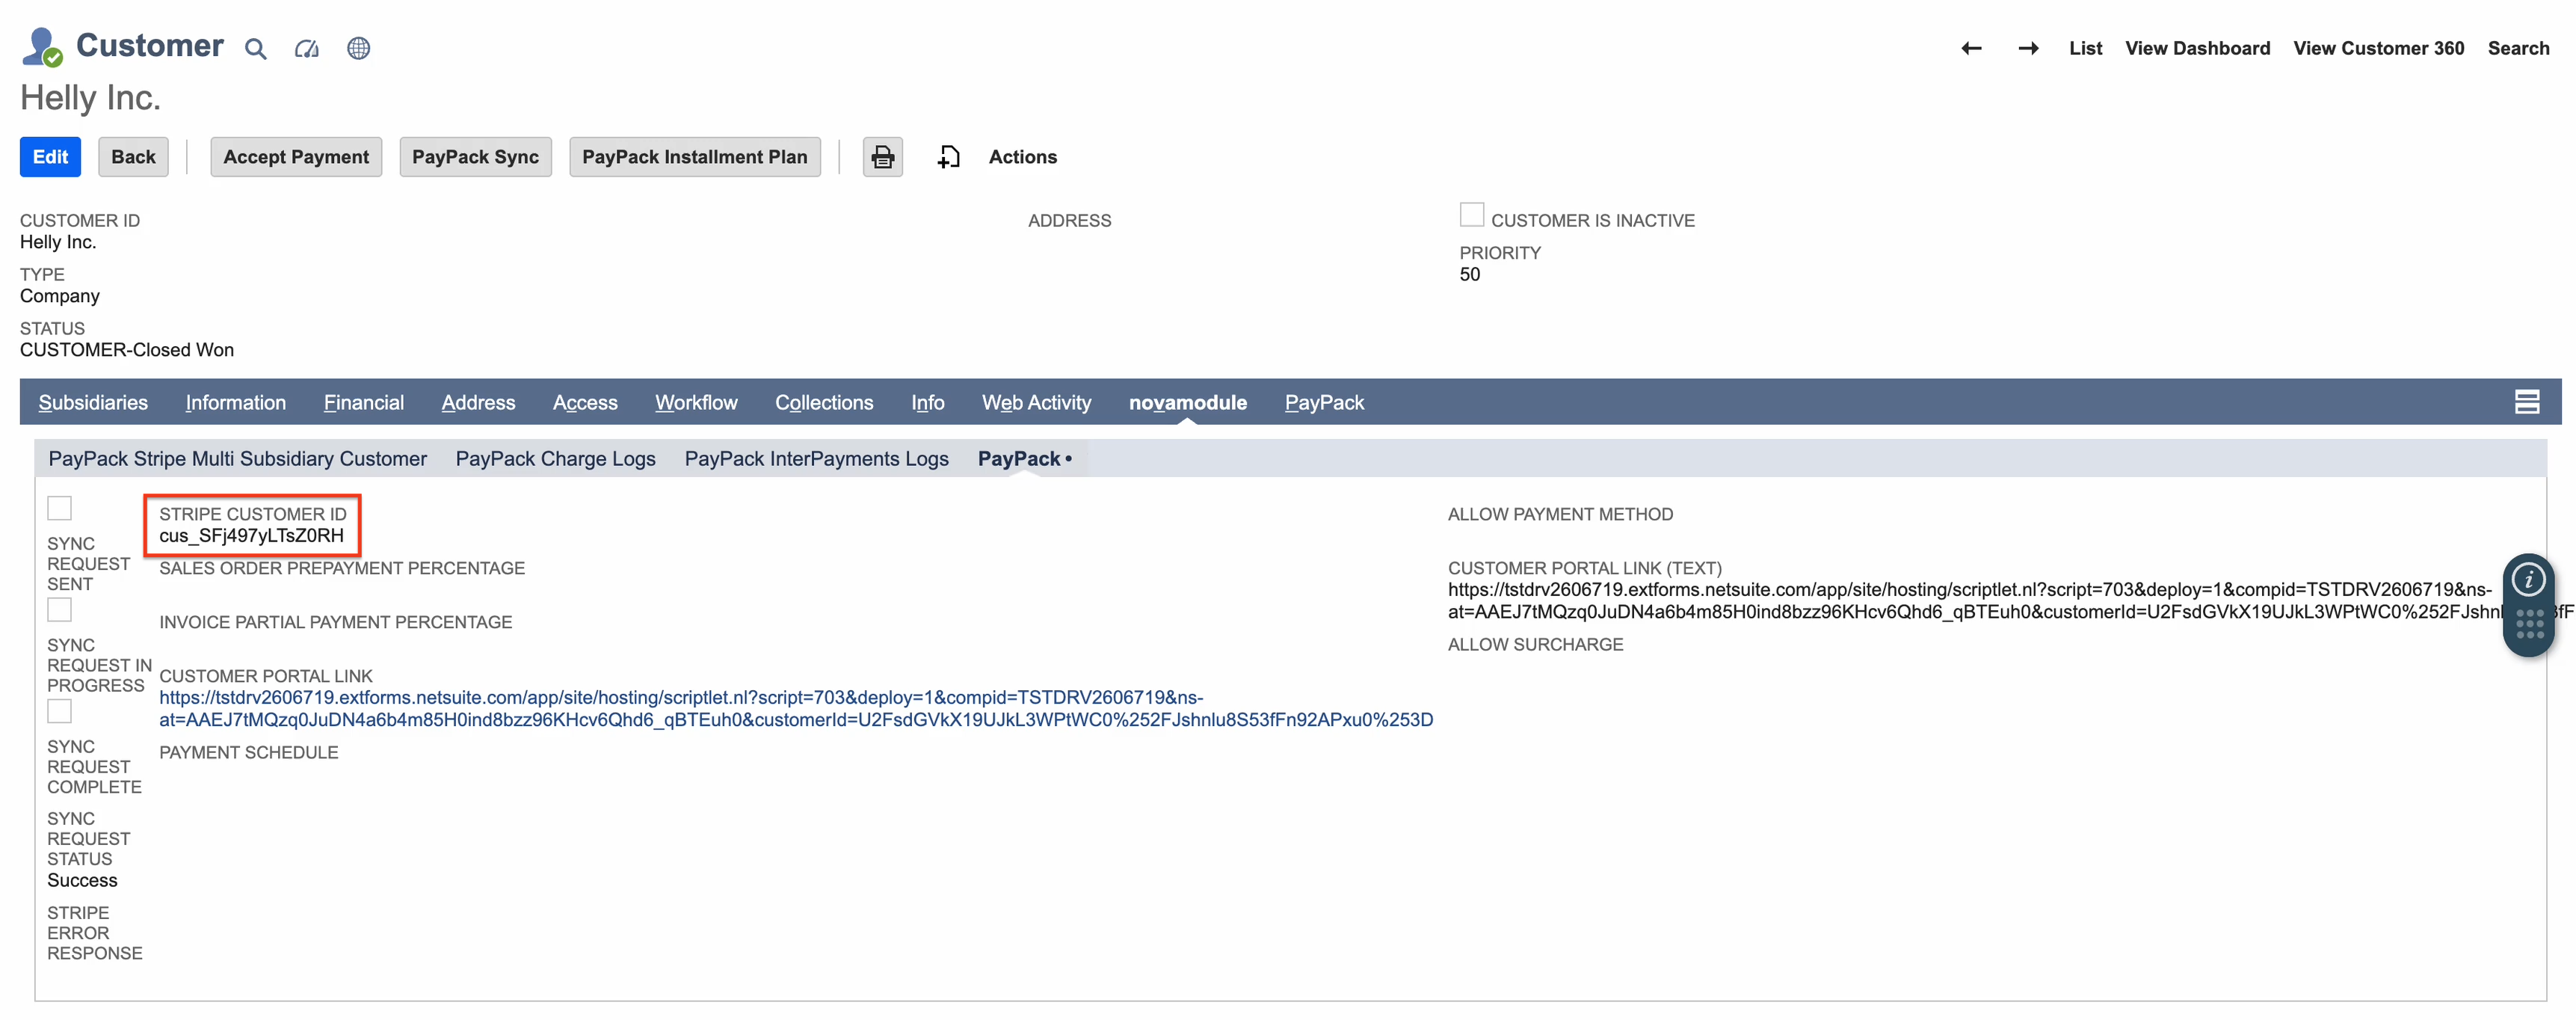
To find the customer portal link, go to a NetSuite Customer → PayPack Data → PayPack Fields.
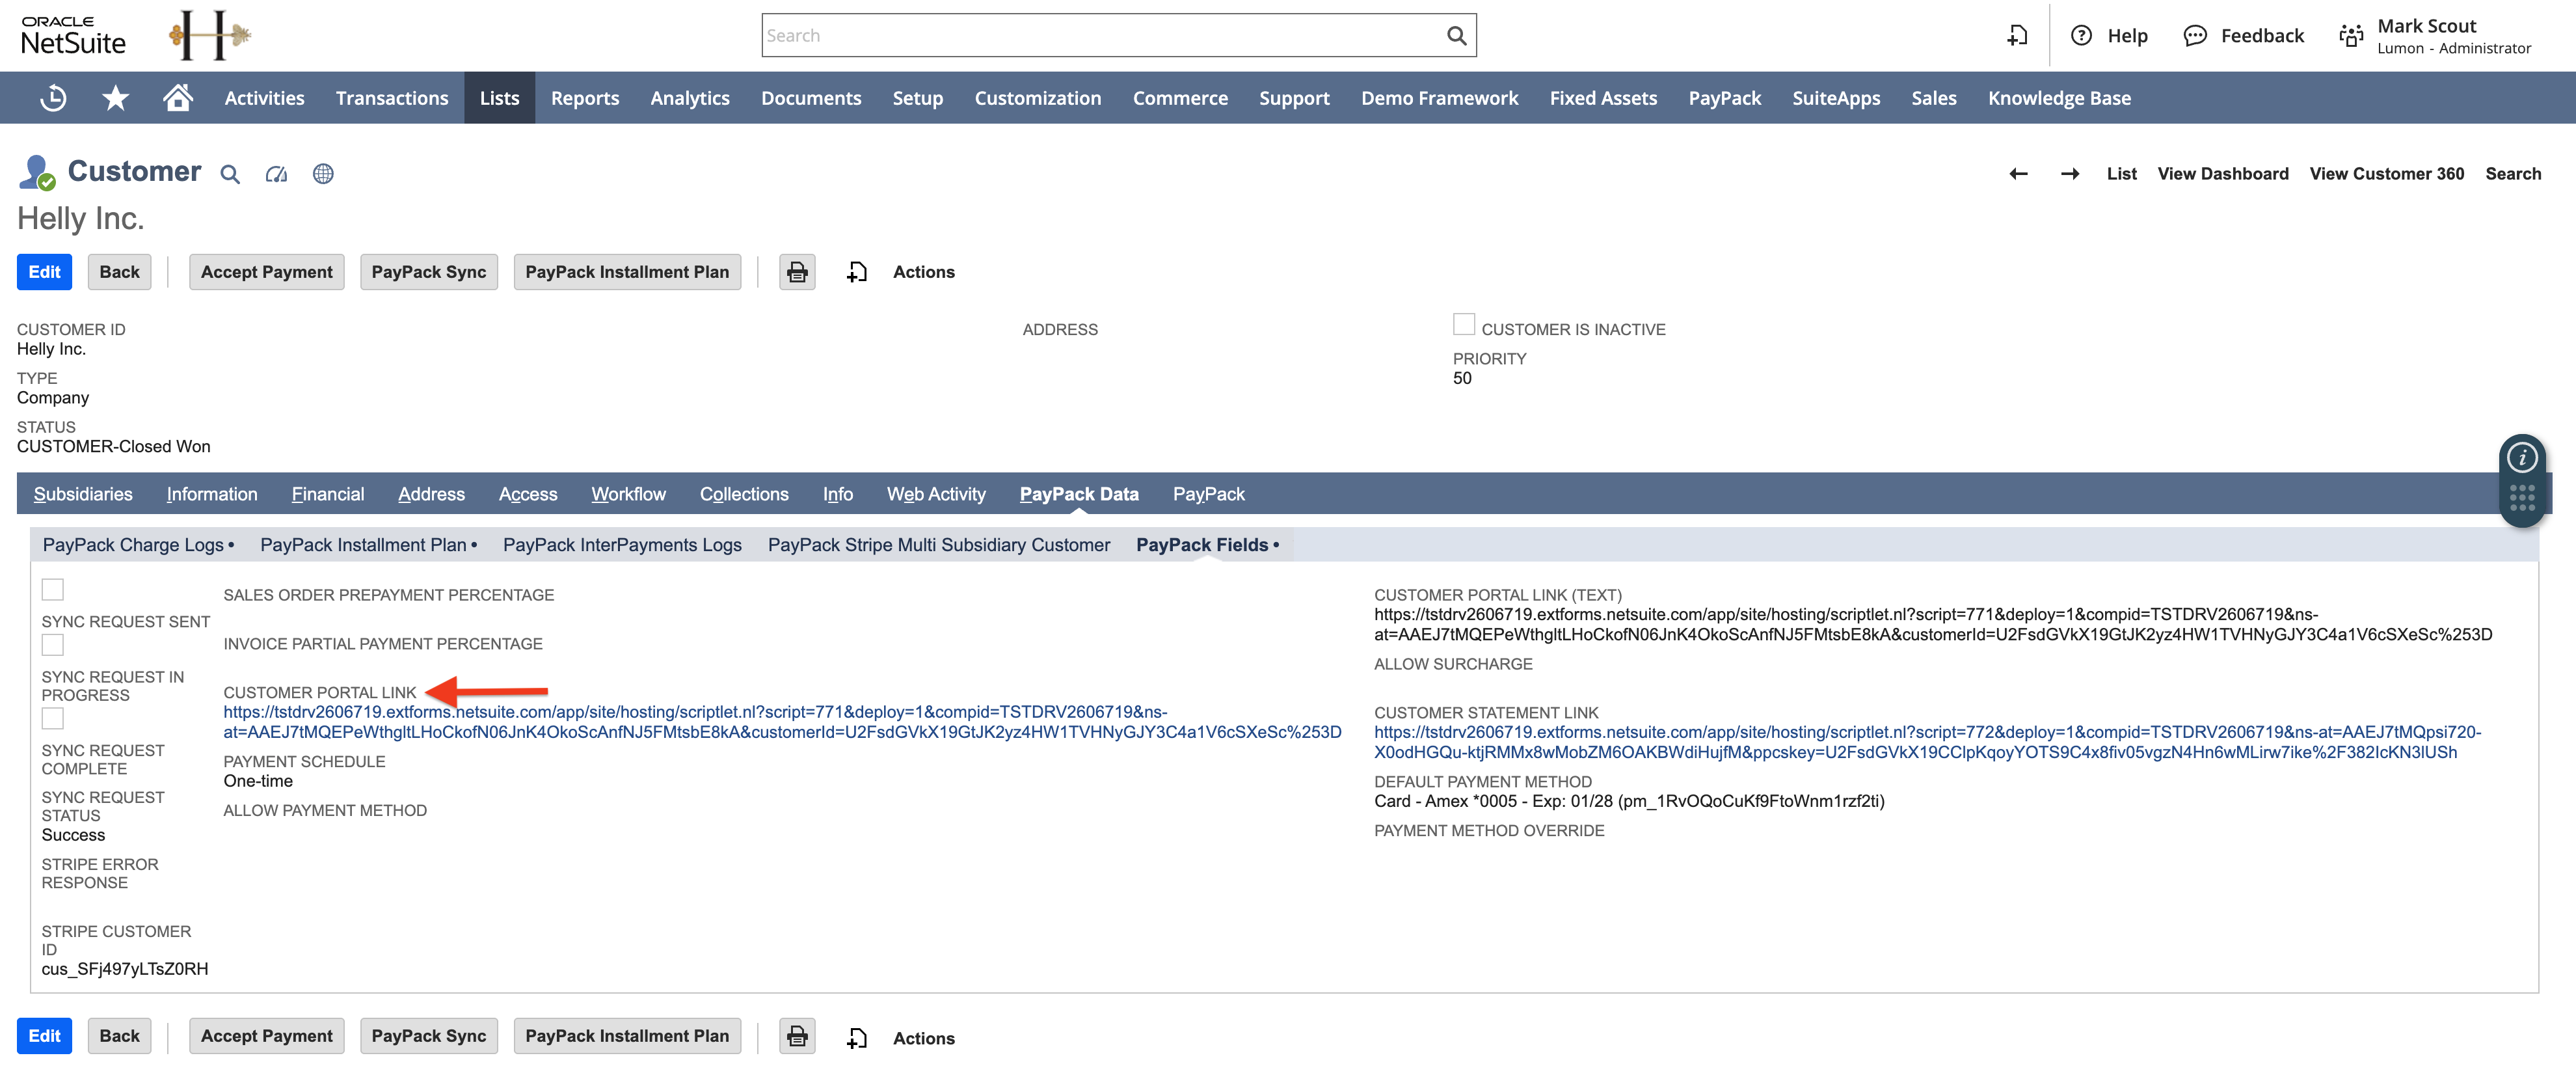
The NetSuite Suitelet link redirect to the Stripe Customer Portal session.
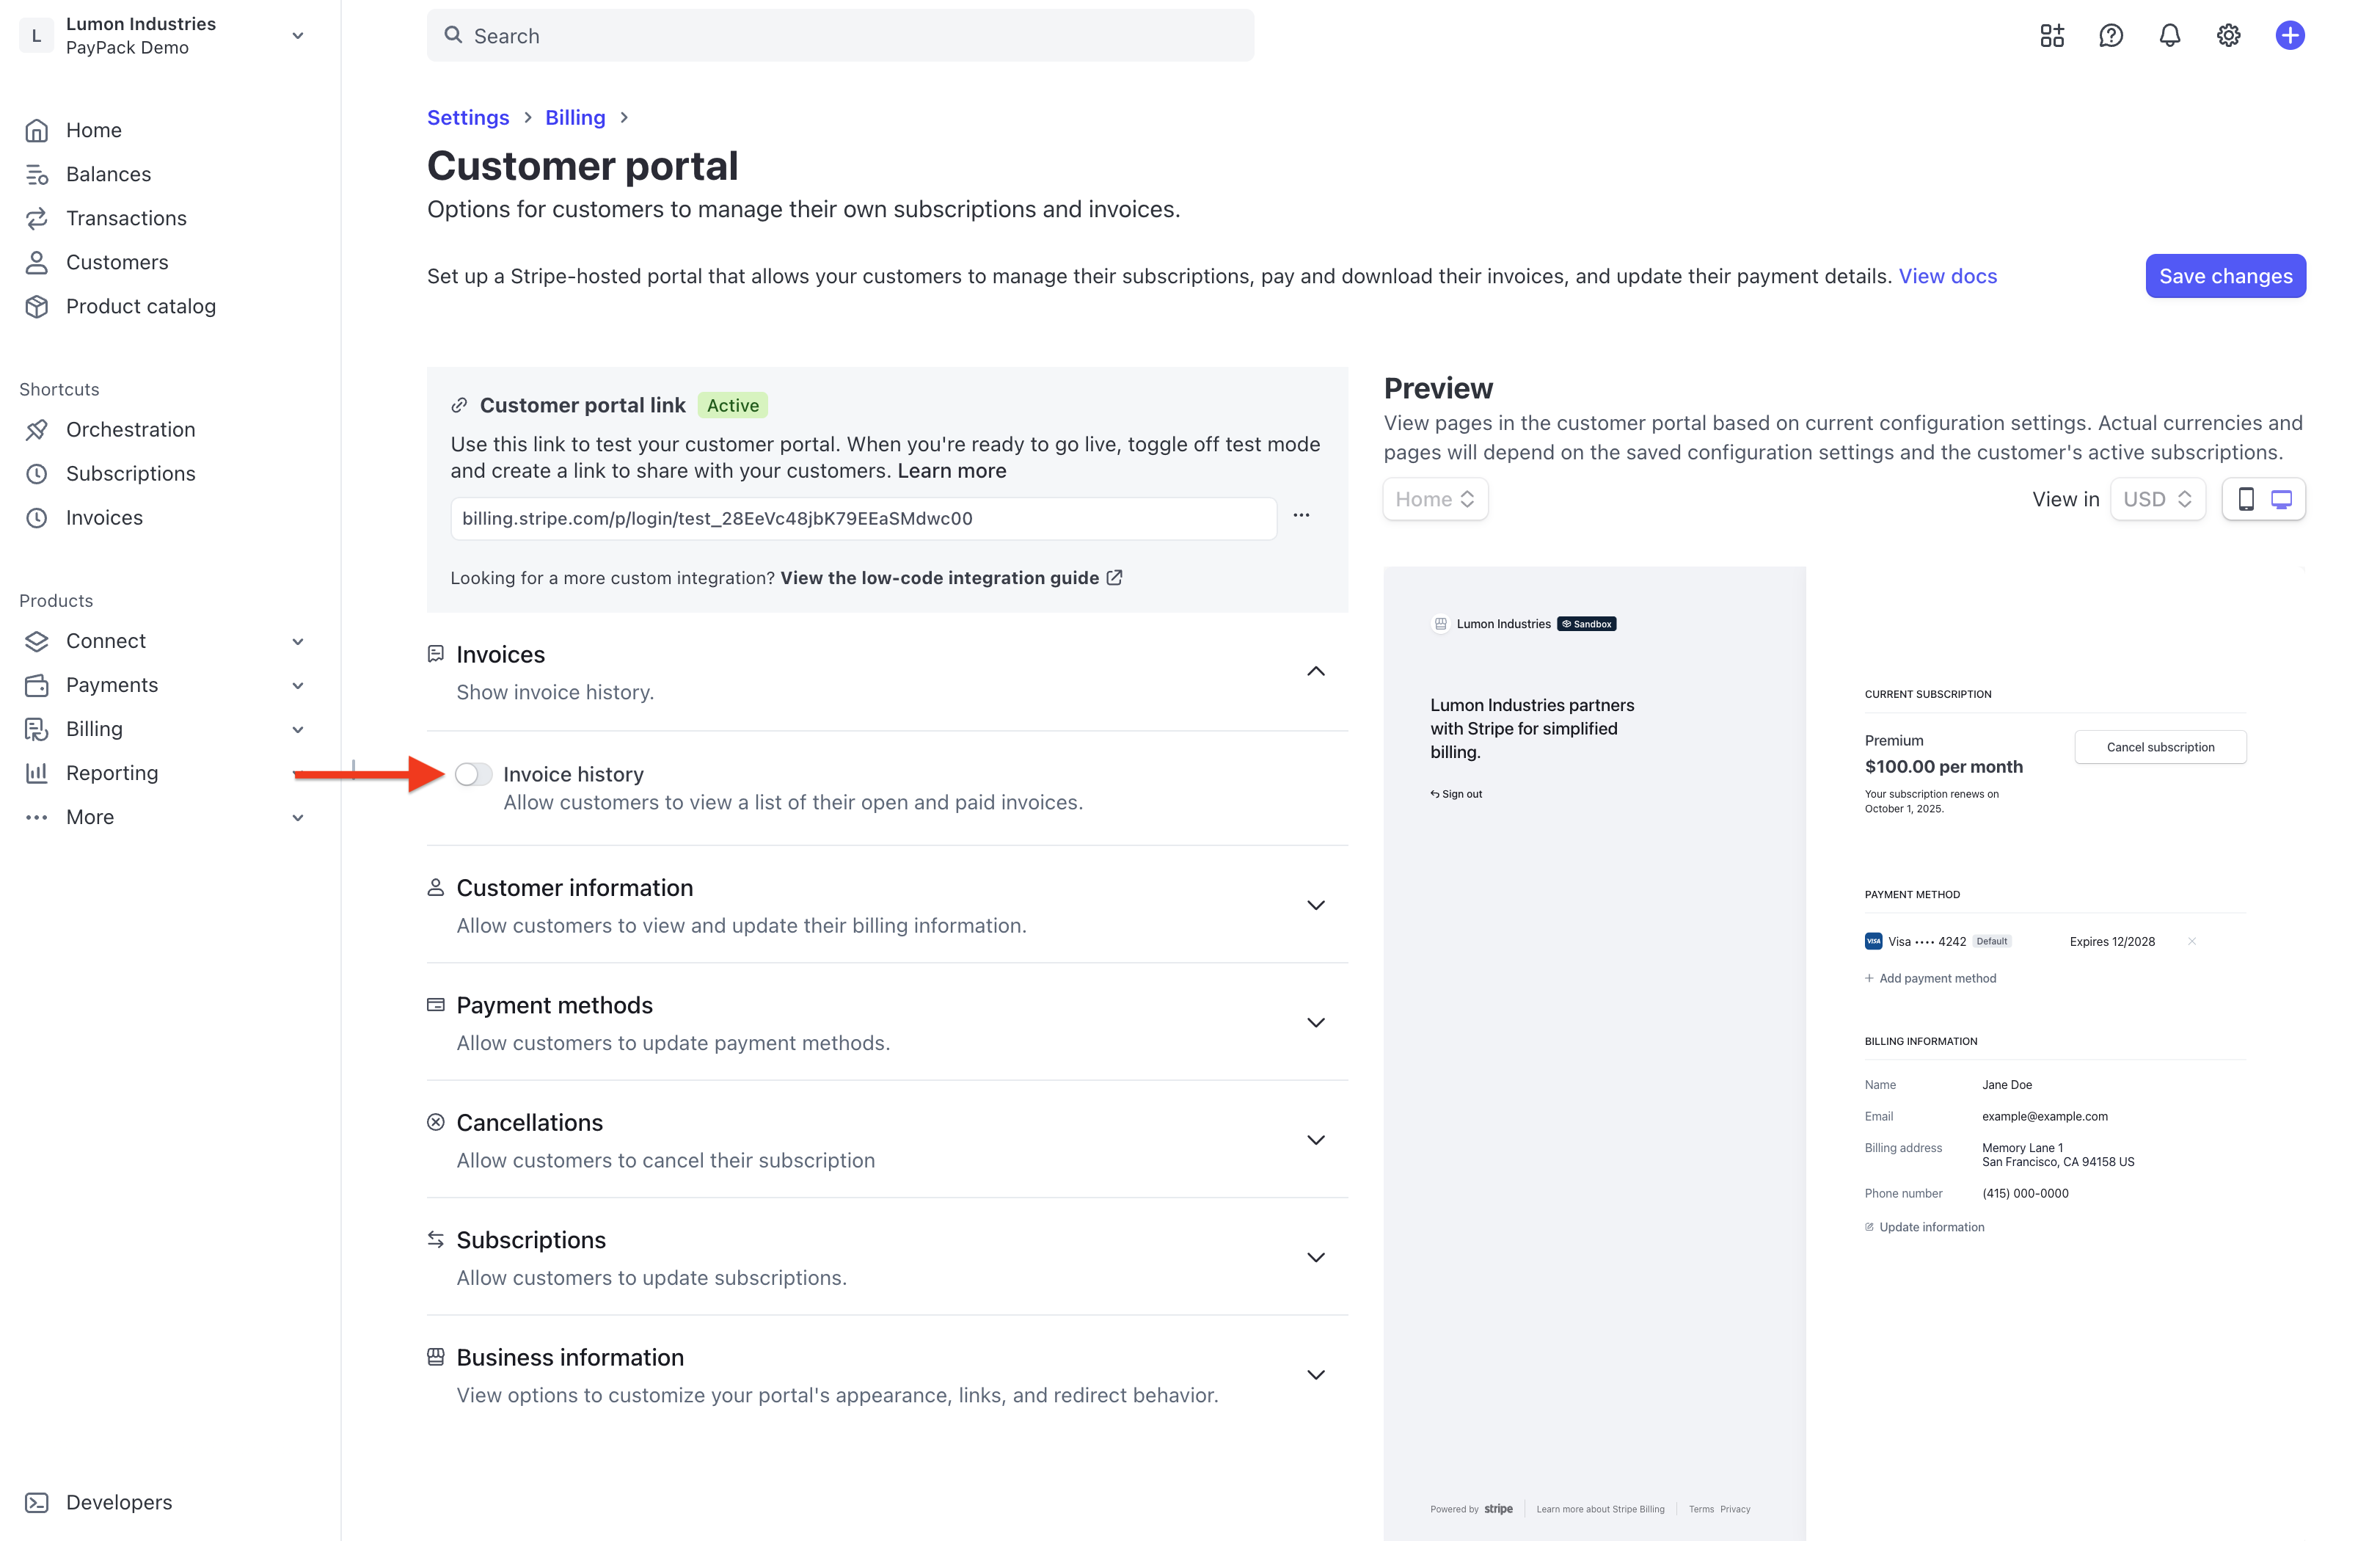
Since PayPack does not use Stripe Invoices (i.e. only Stripe payment intents and charges), we recommend disabling the Invoice history section in the Stripe Customer Portal.
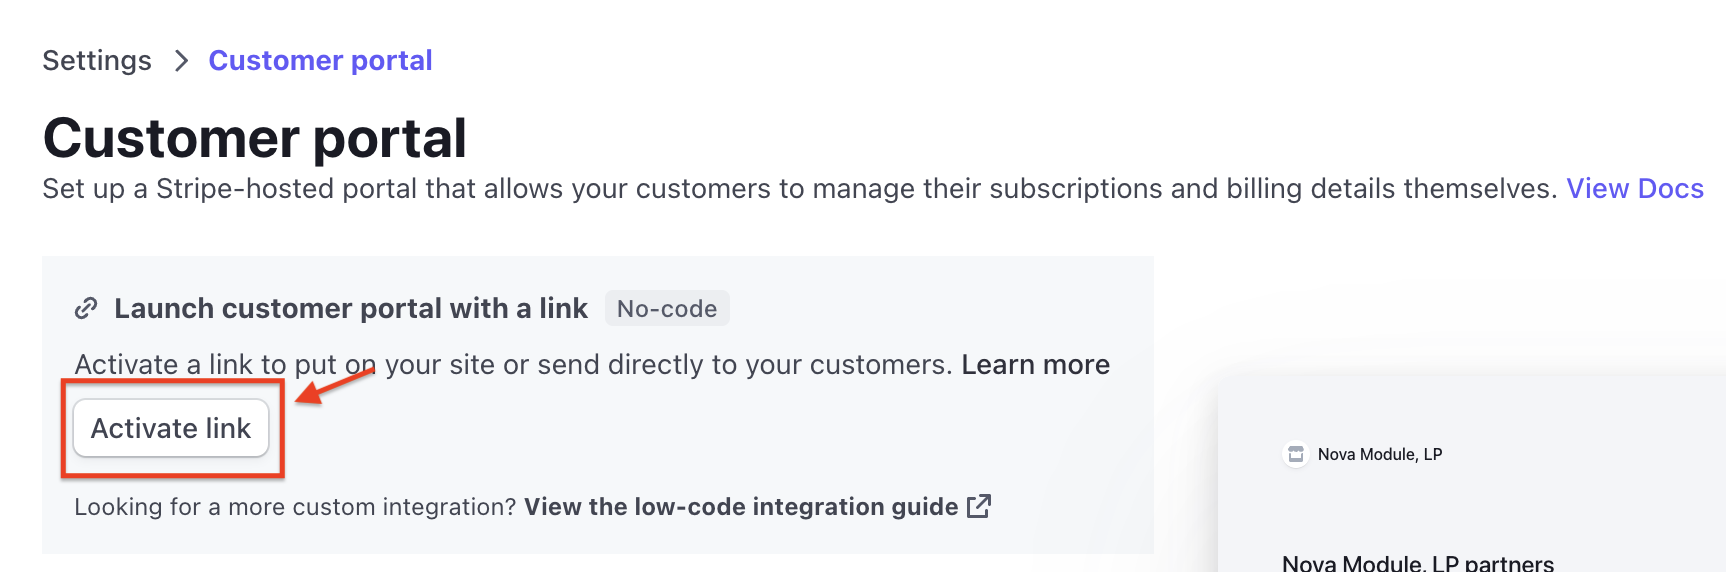
Go to a Stripe dashboard → Settings → Billing → Customer portal.
Troubleshooting Tips
- Generate customer portal links for existing customers: Manually click the button, PayPack Sync, at the top of the customer record page.
- Diagnose script issues: Ensure the scripted deployment for customdeploy_nm_paypack_external_cus_por is released.
- Error message "Getting error while generating customer portal Session URL" when clicking NetSuite customer portal link:
Go to Settings → Customer Portal and click Activate link.