Multi-Account ConfigurationUpdated 4 days ago
The PayPack multi-account solution allows you to manage multiple Stripe accounts within a single NetSuite instance. This ensures transactions are attributed to the correct Stripe account and subsidiary, streamlining financial tracking and reconciliation.
Initial Setup
To begin, you must define each Stripe account as a unique record in NetSuite. The record is a NetSuite custom record that comes with the PayPack installation process.
Before you add multi-account, ensure you activate the PayPack license and have enough licenses.
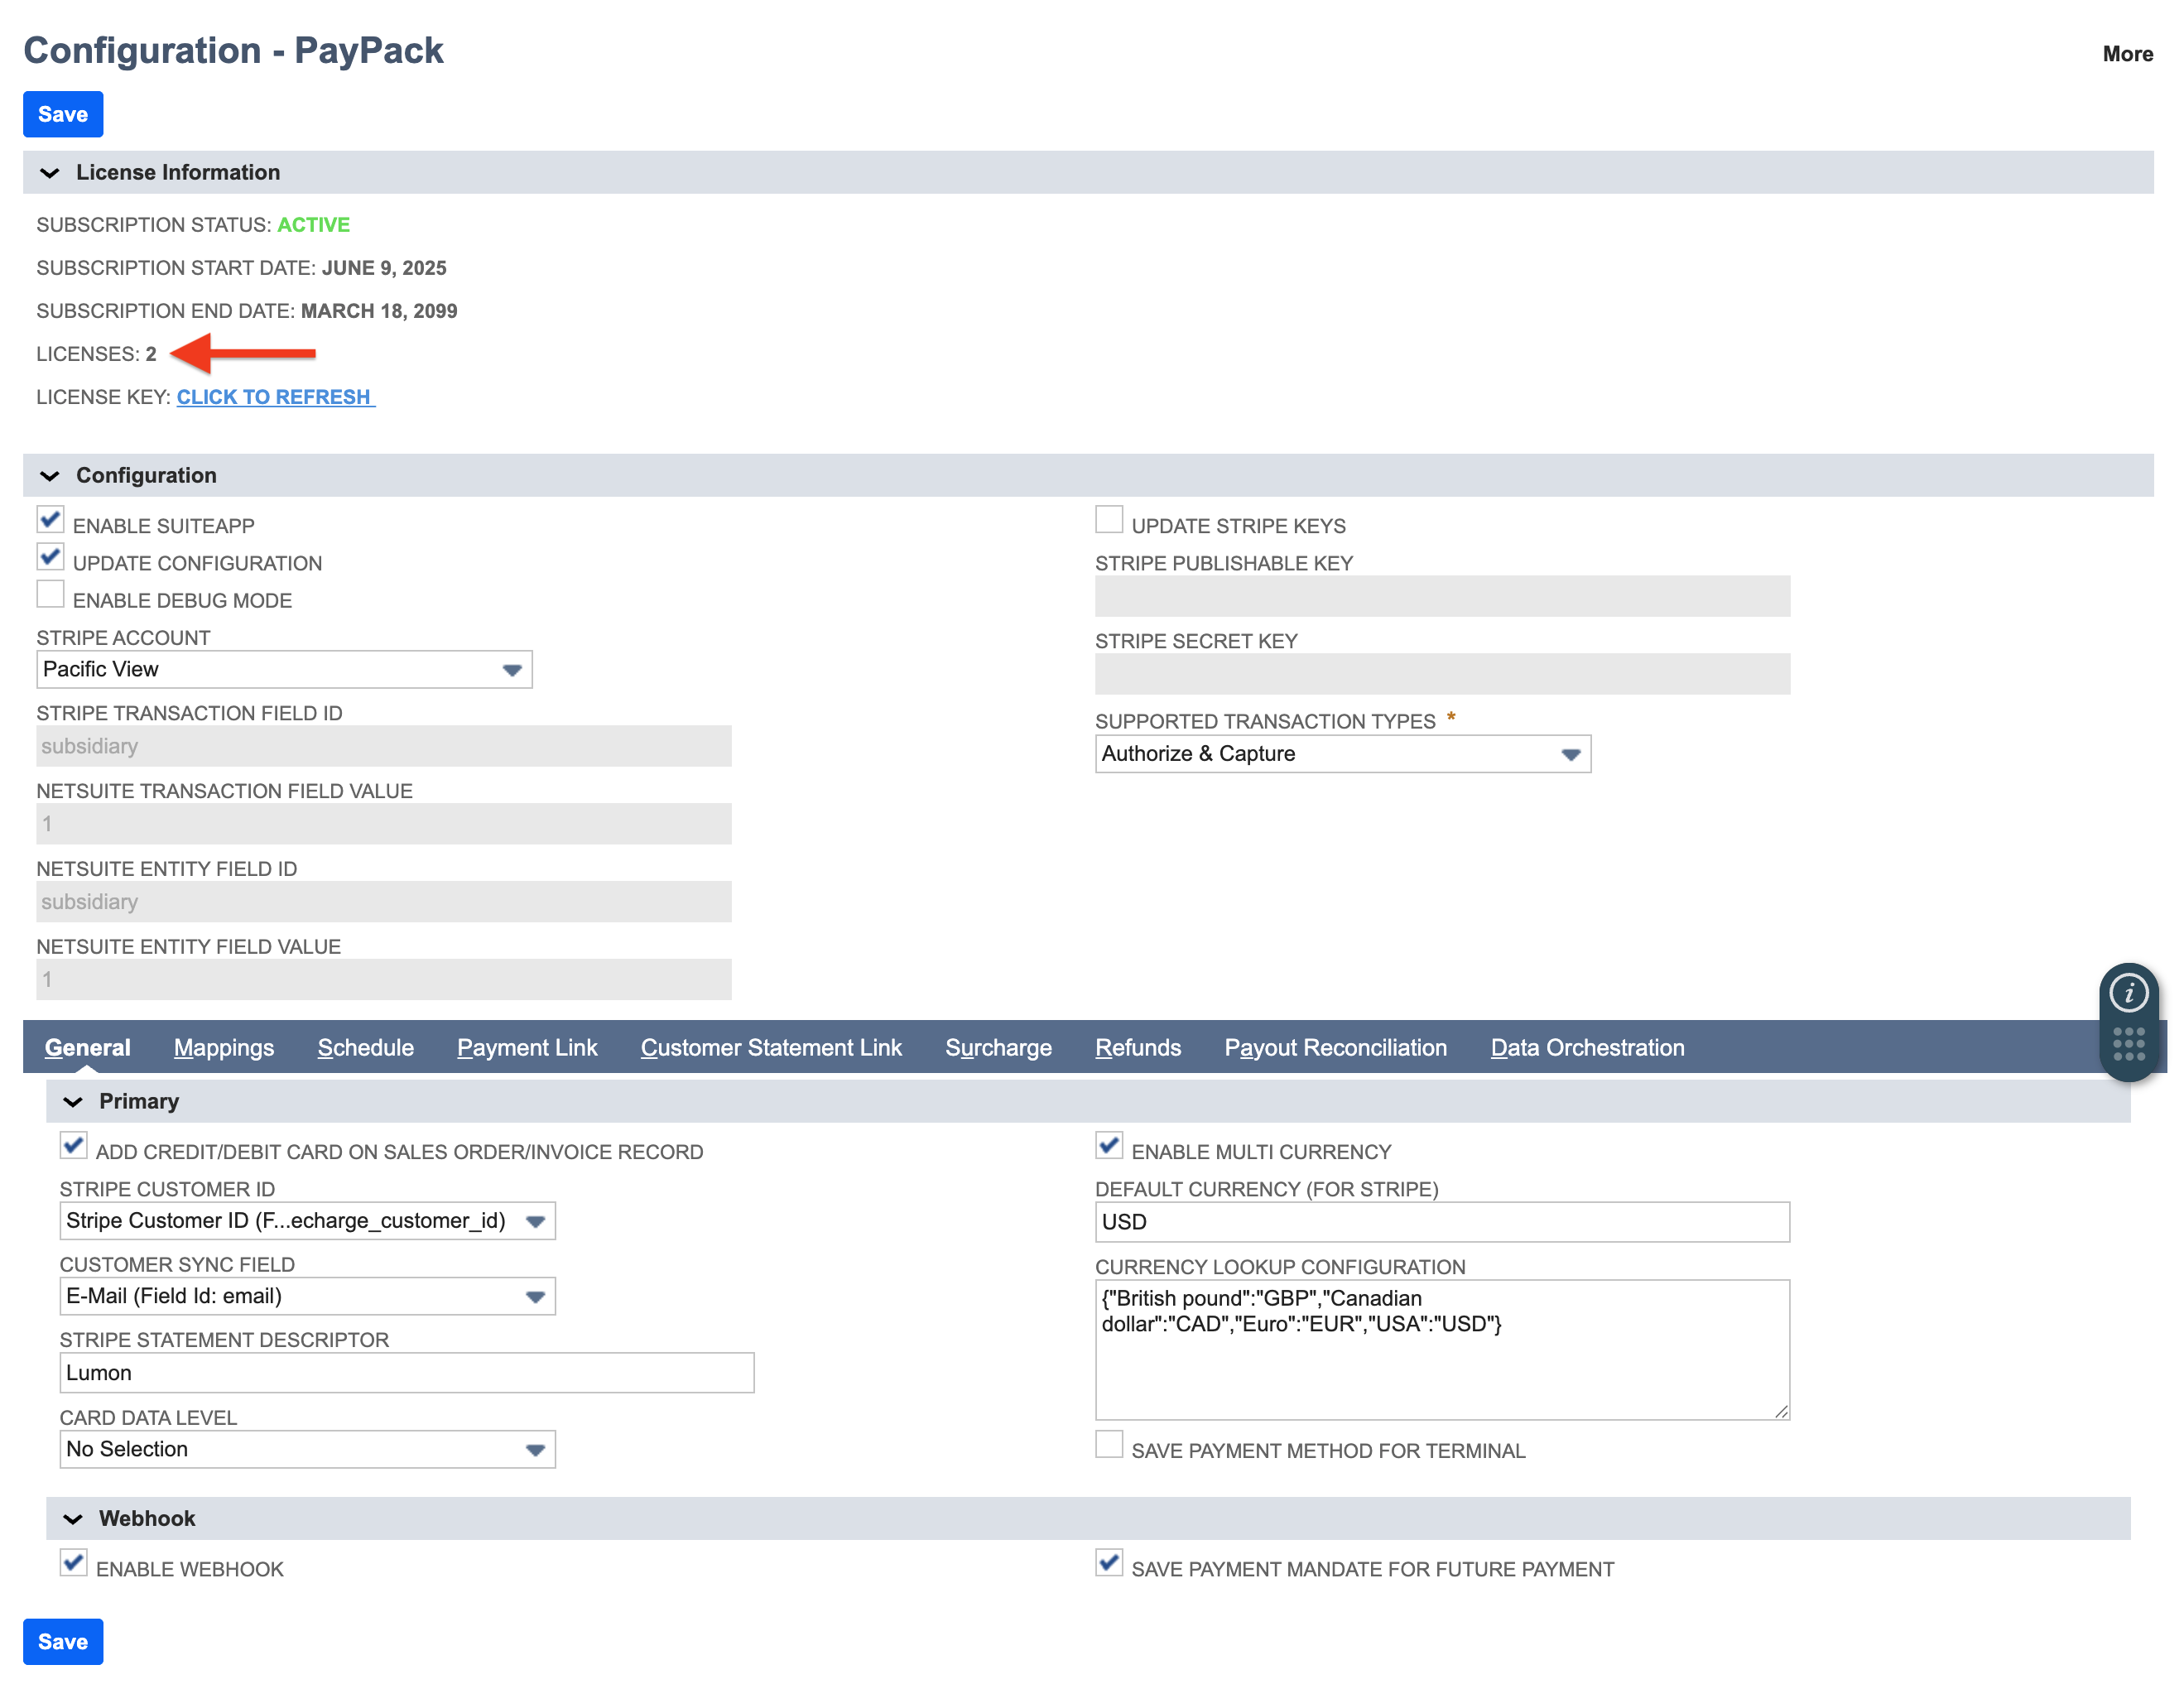
Contact support if you need assistance adding licenses.
Tip: Complete your first PayPack configuration before adding more Stripe Accounts. See the integration guide for reference. This allows you to duplicate the initial PayPack configuration for multi-account configuration.
Create Stripe Account Records:
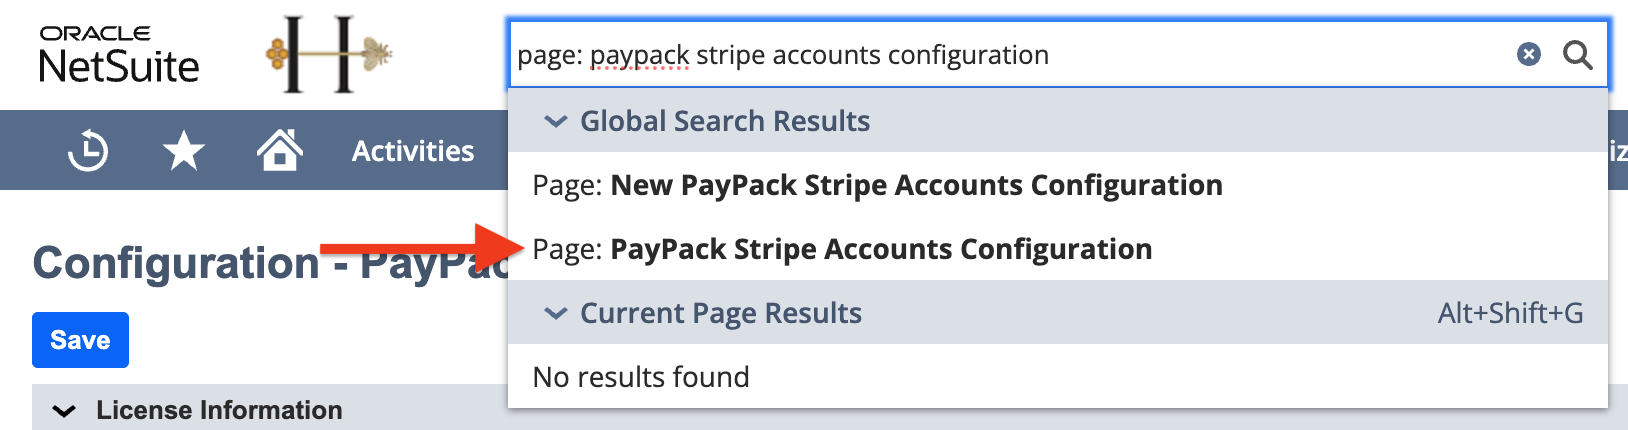
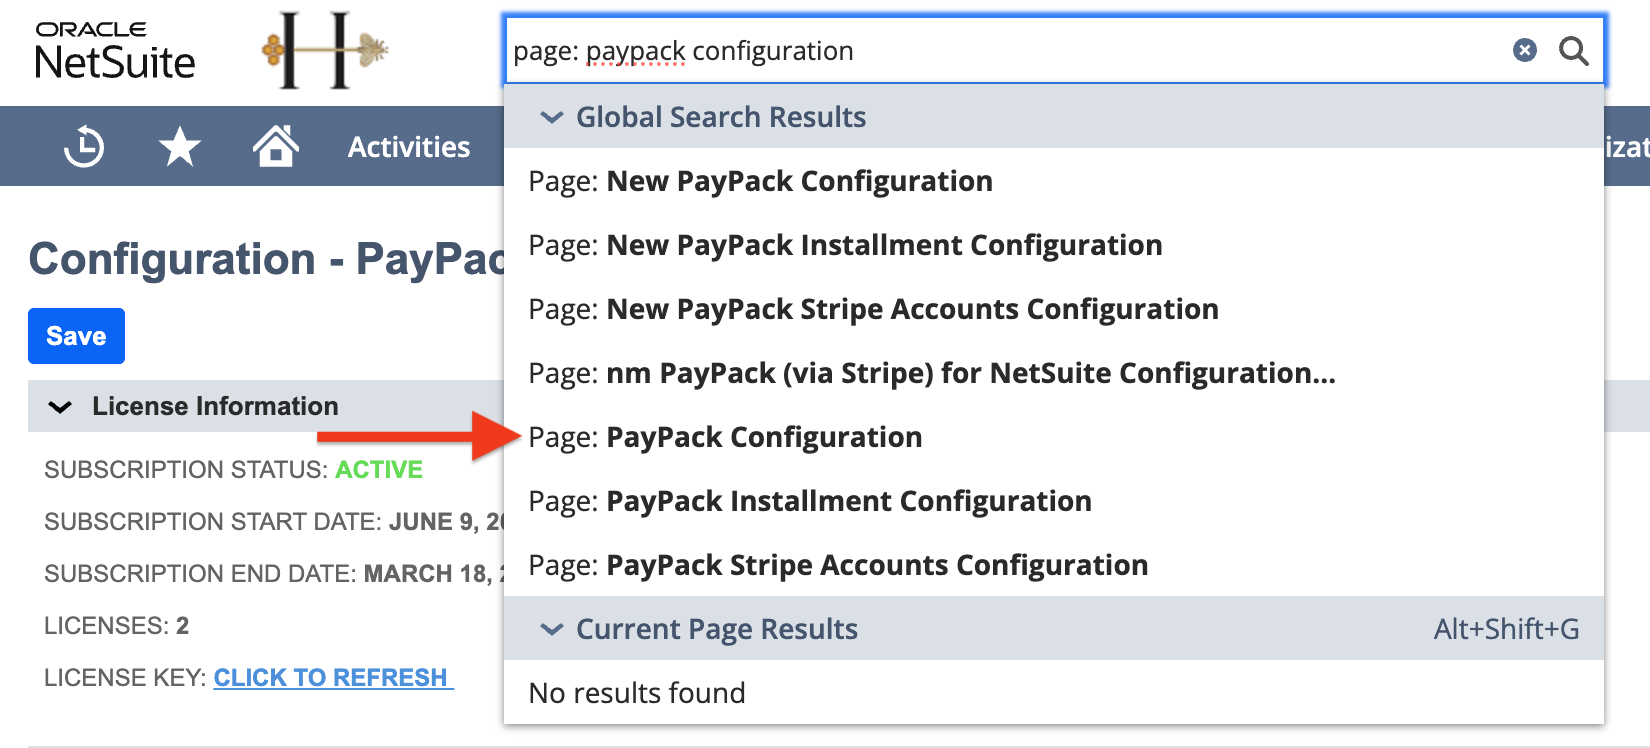
Search for PayPack Stripe Accounts Configuration in the global search bar.
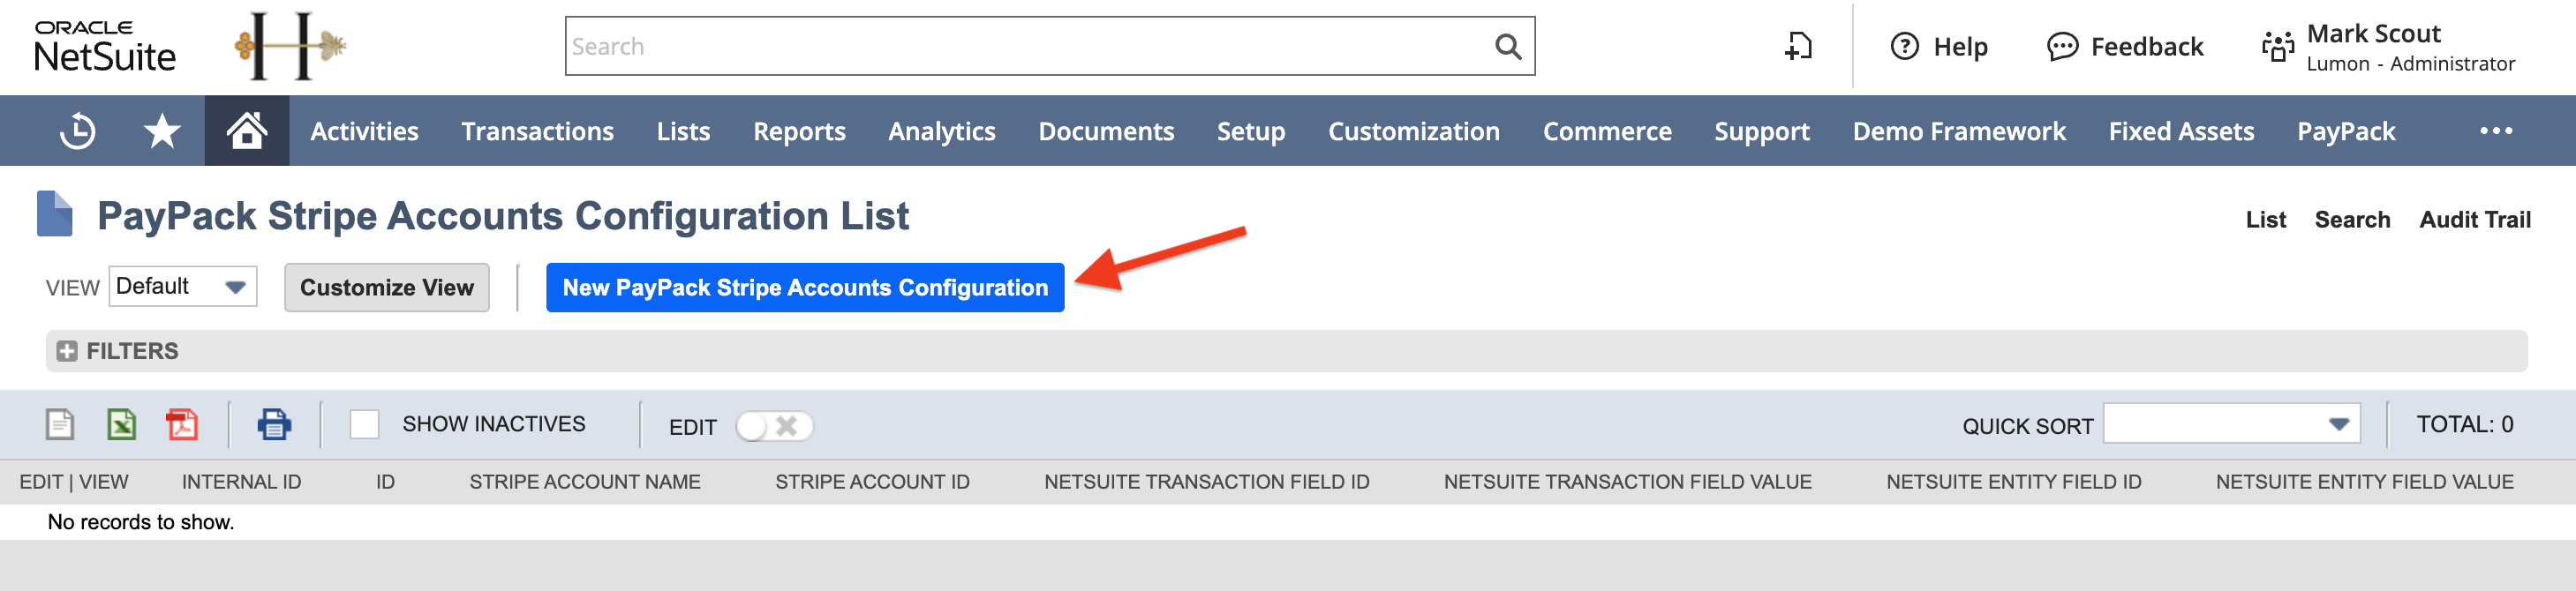
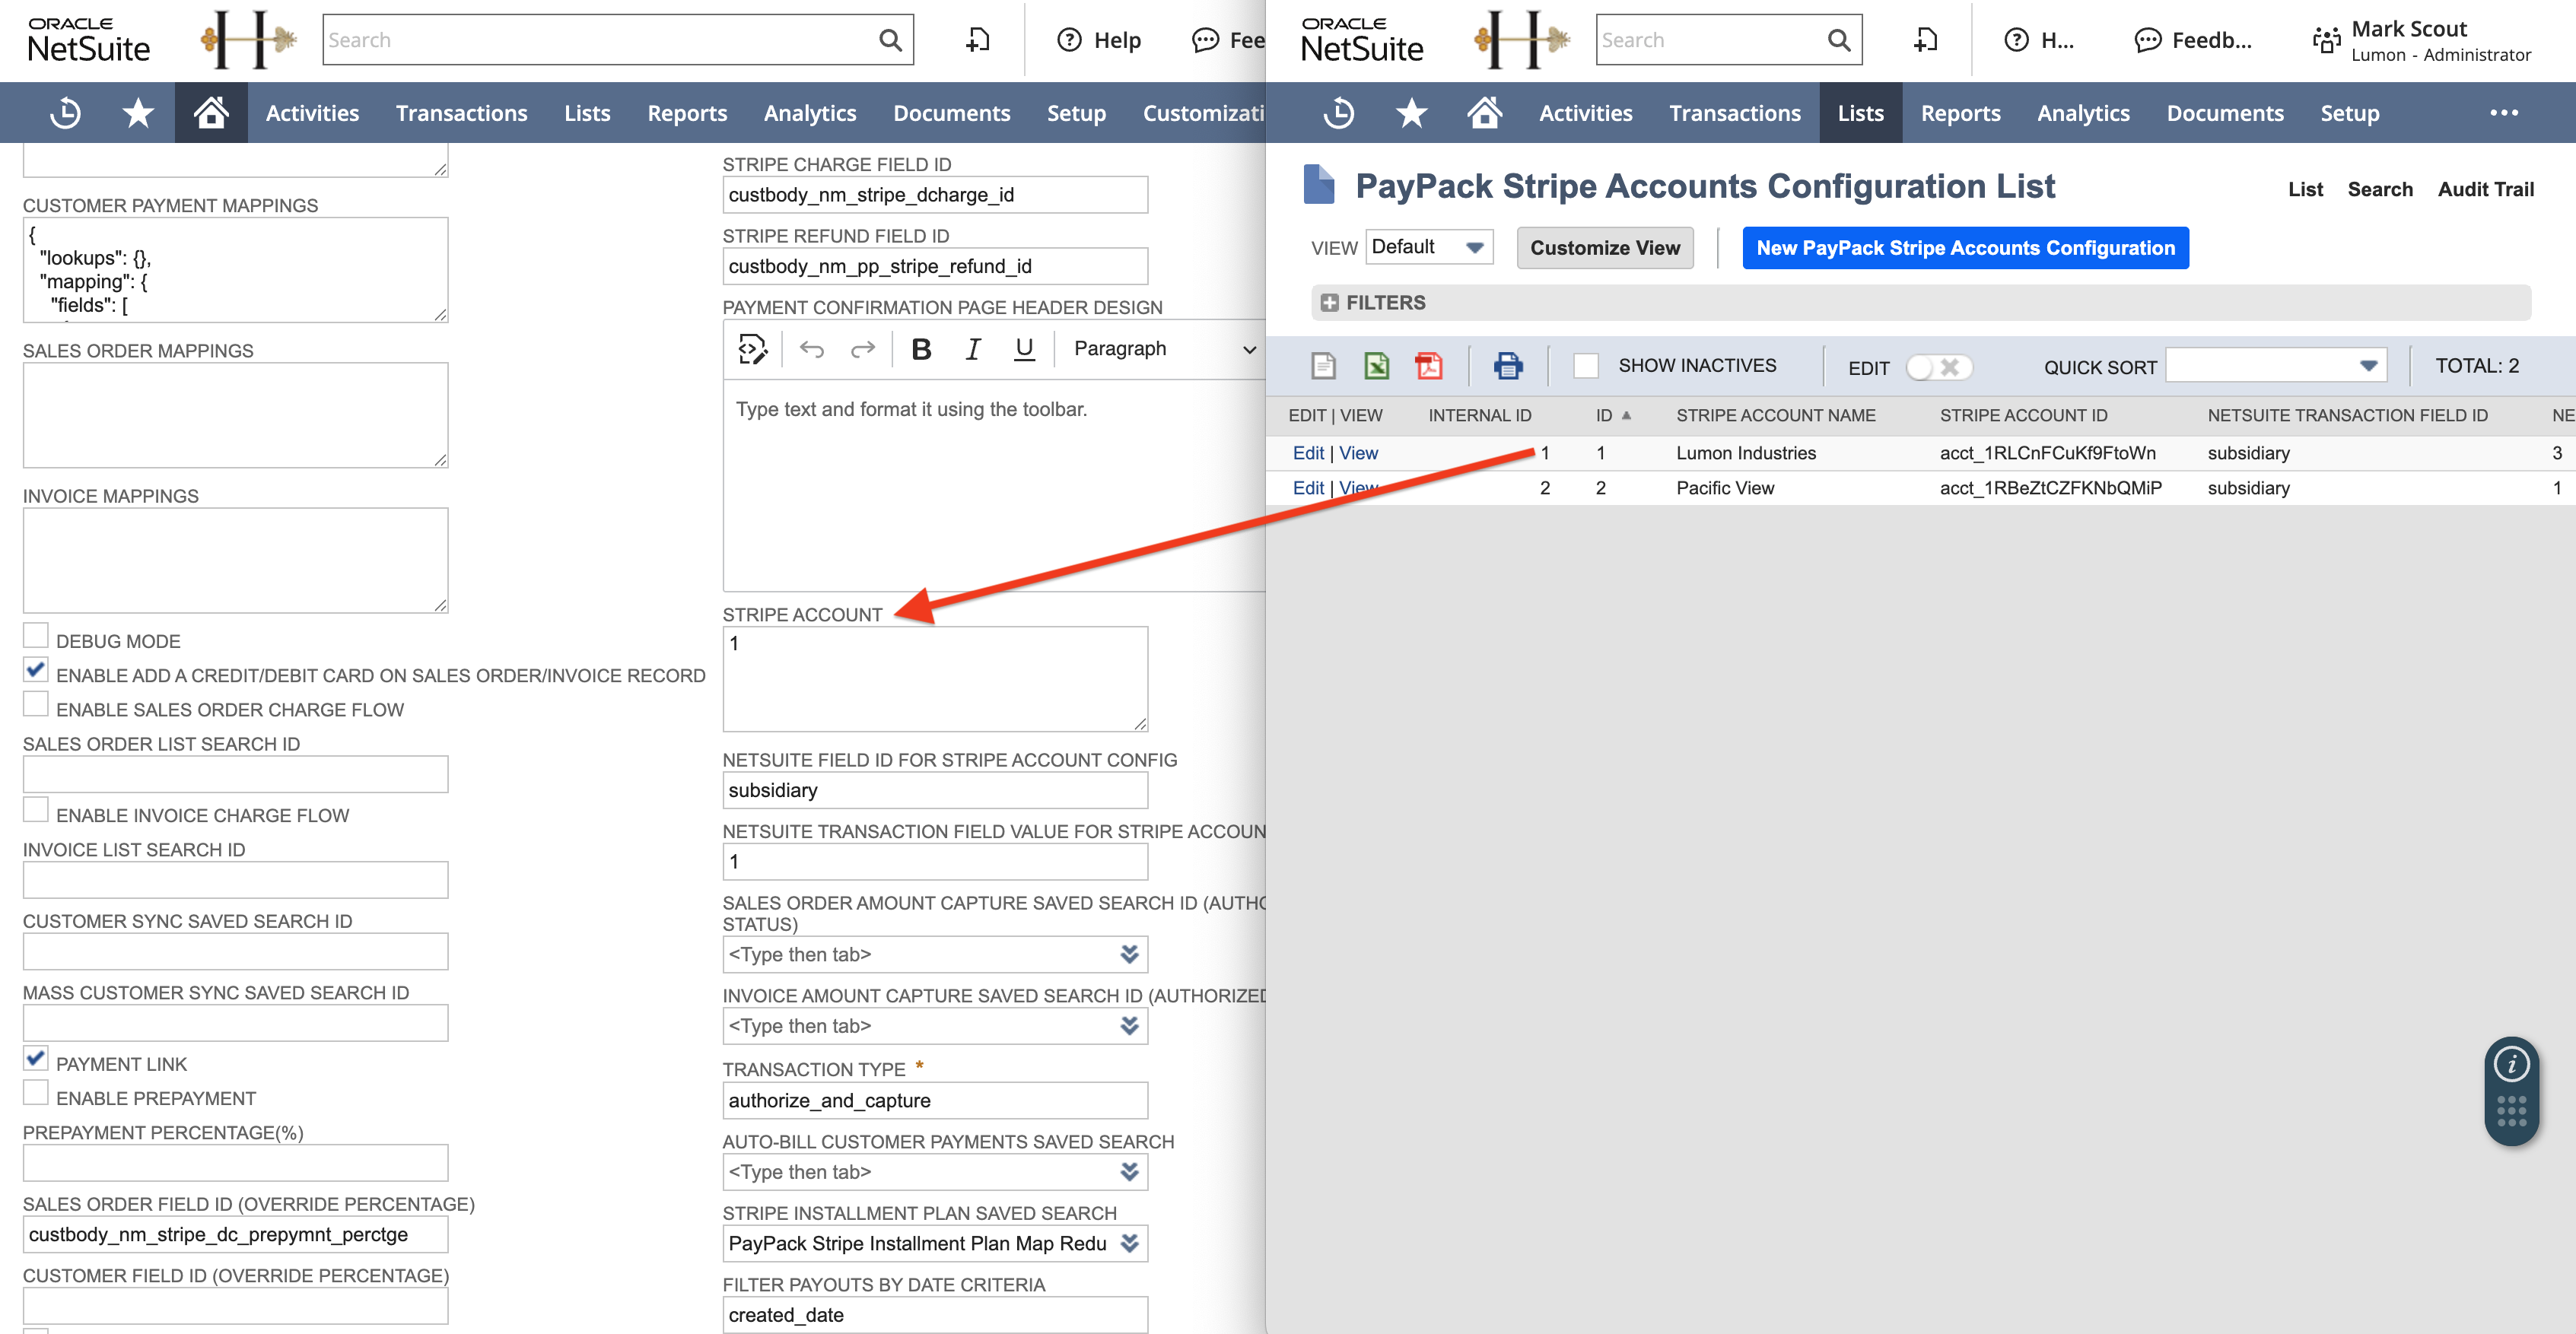
Click New PayPack Stripe Accounts Configuration.
Enter the Stripe Account Name, Stripe Account ID, and the unique identifiers (NetSuite Transaction/Entity Field IDs) that will link your data to this account. When using subsidiary, the field value is the NetSuite Subsidiary Internal ID.
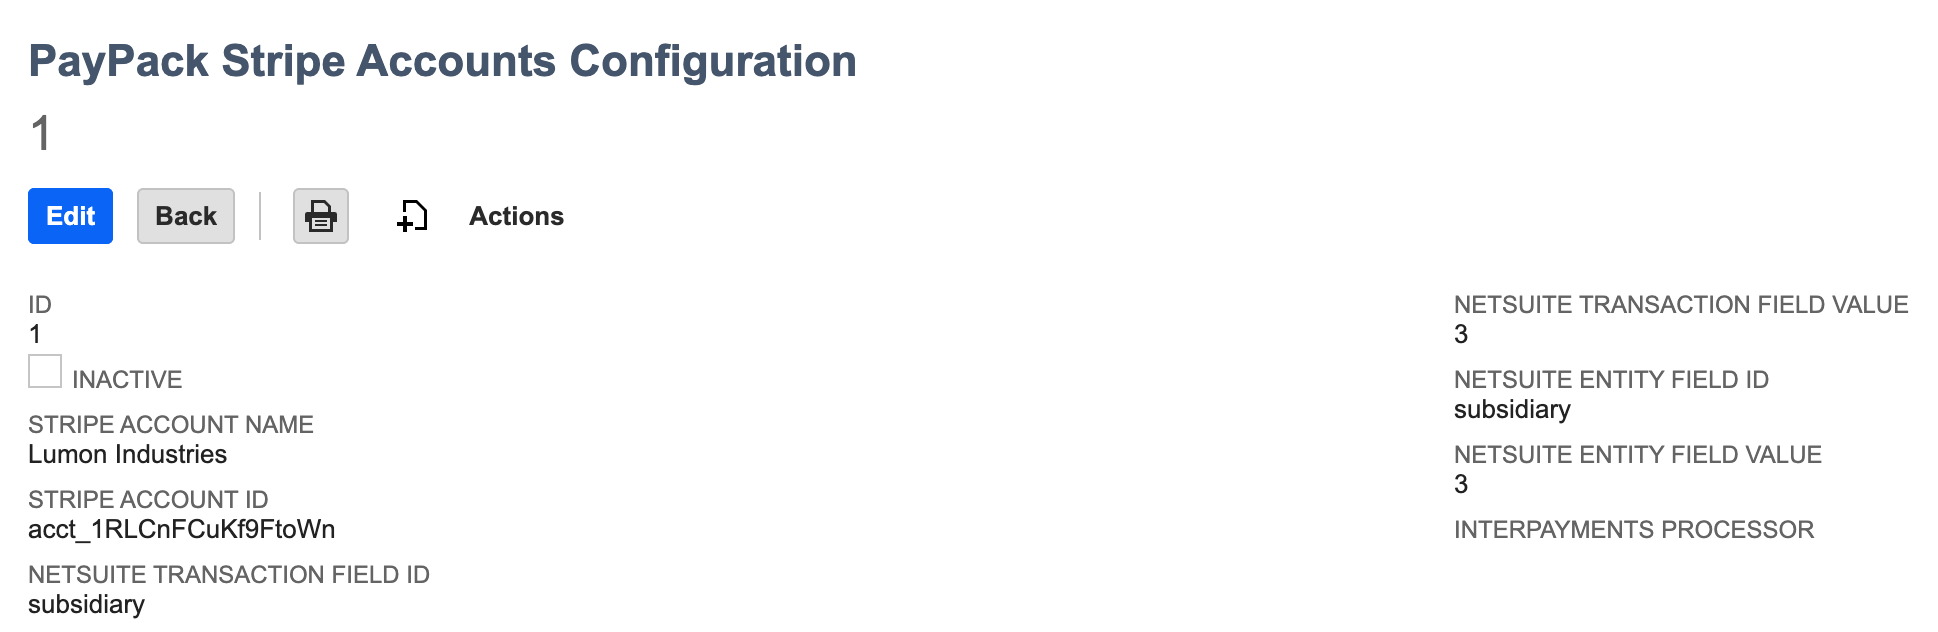
Tip: If you are using multiple subsidiaries, set the multi-stripe account identifier field to Subsidiary. Custom transaction and entity fields are also acceptable.

Create PayPack Configuration Records:
Search for PayPack Configuration in the global search bar.
If you completed the initial PayPack configuration and hit save, there will be an existing PayPack Configuration.

Edit the existing PayPack Configuration and populate the Internal ID from the corresponding PayPack Stripe Accounts Configuration.
Under each PayPack Configuration, populate the below fields to the appropriate PayPack Stripe Accounts Configuration.
NetSuite Field ID for Stripe Account Config
Example value: subsidiary, department, class, location
NetSuite Transaction Field Value for Stripe Account Config
Example value: 1 (PayPack Stripe Accounts Configuration Internal ID)
NetSuite Entity Field Id for Stripe Account Config
Example value: subsidiary, department, class, location
NetSuite Entity FieldId Value for Stripe Account Config
Example value: 1 (PayPack Stripe Accounts Configuration Internal ID)
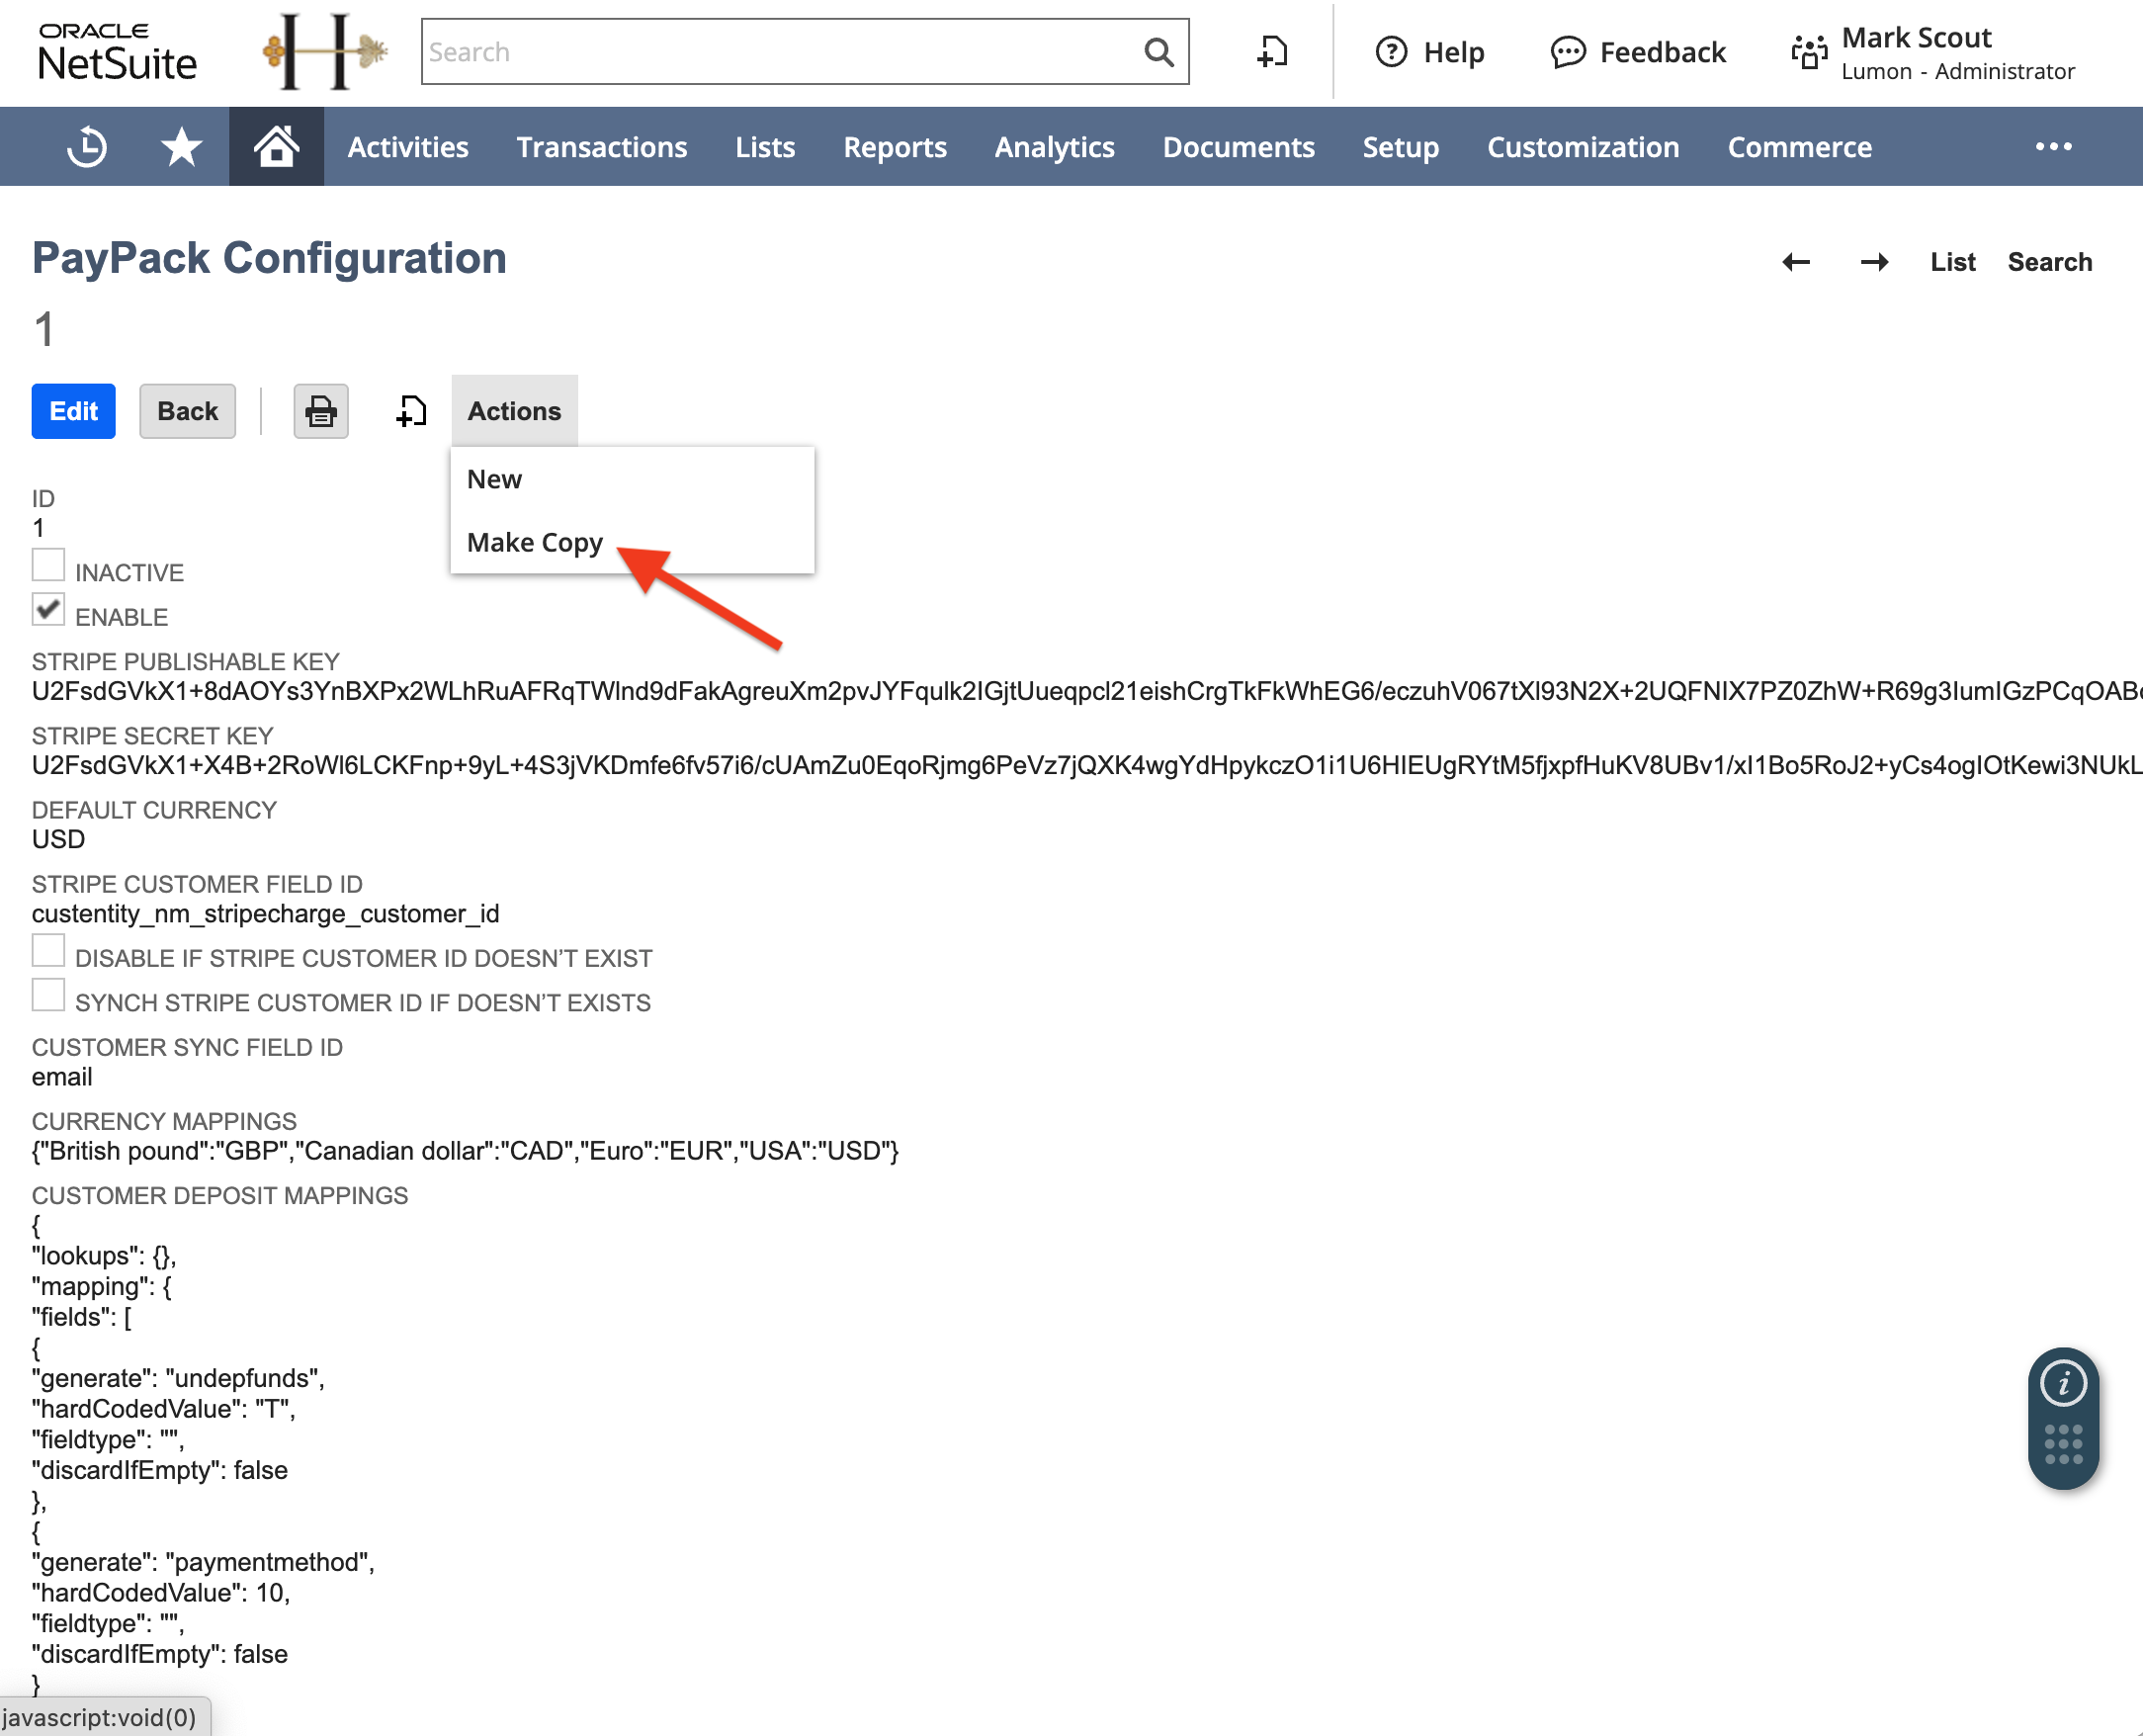
For each additional Stripe account, create a new configuration or copy the existing one.
Important: Ensure that each PayPack Configuration field is mapped correctly by navigating to PayPack → Setup → Configuration and validating.

Customer Sync Schedules
Follow these steps to configure the PayPack customer sync schedules for each PayPack configuration:
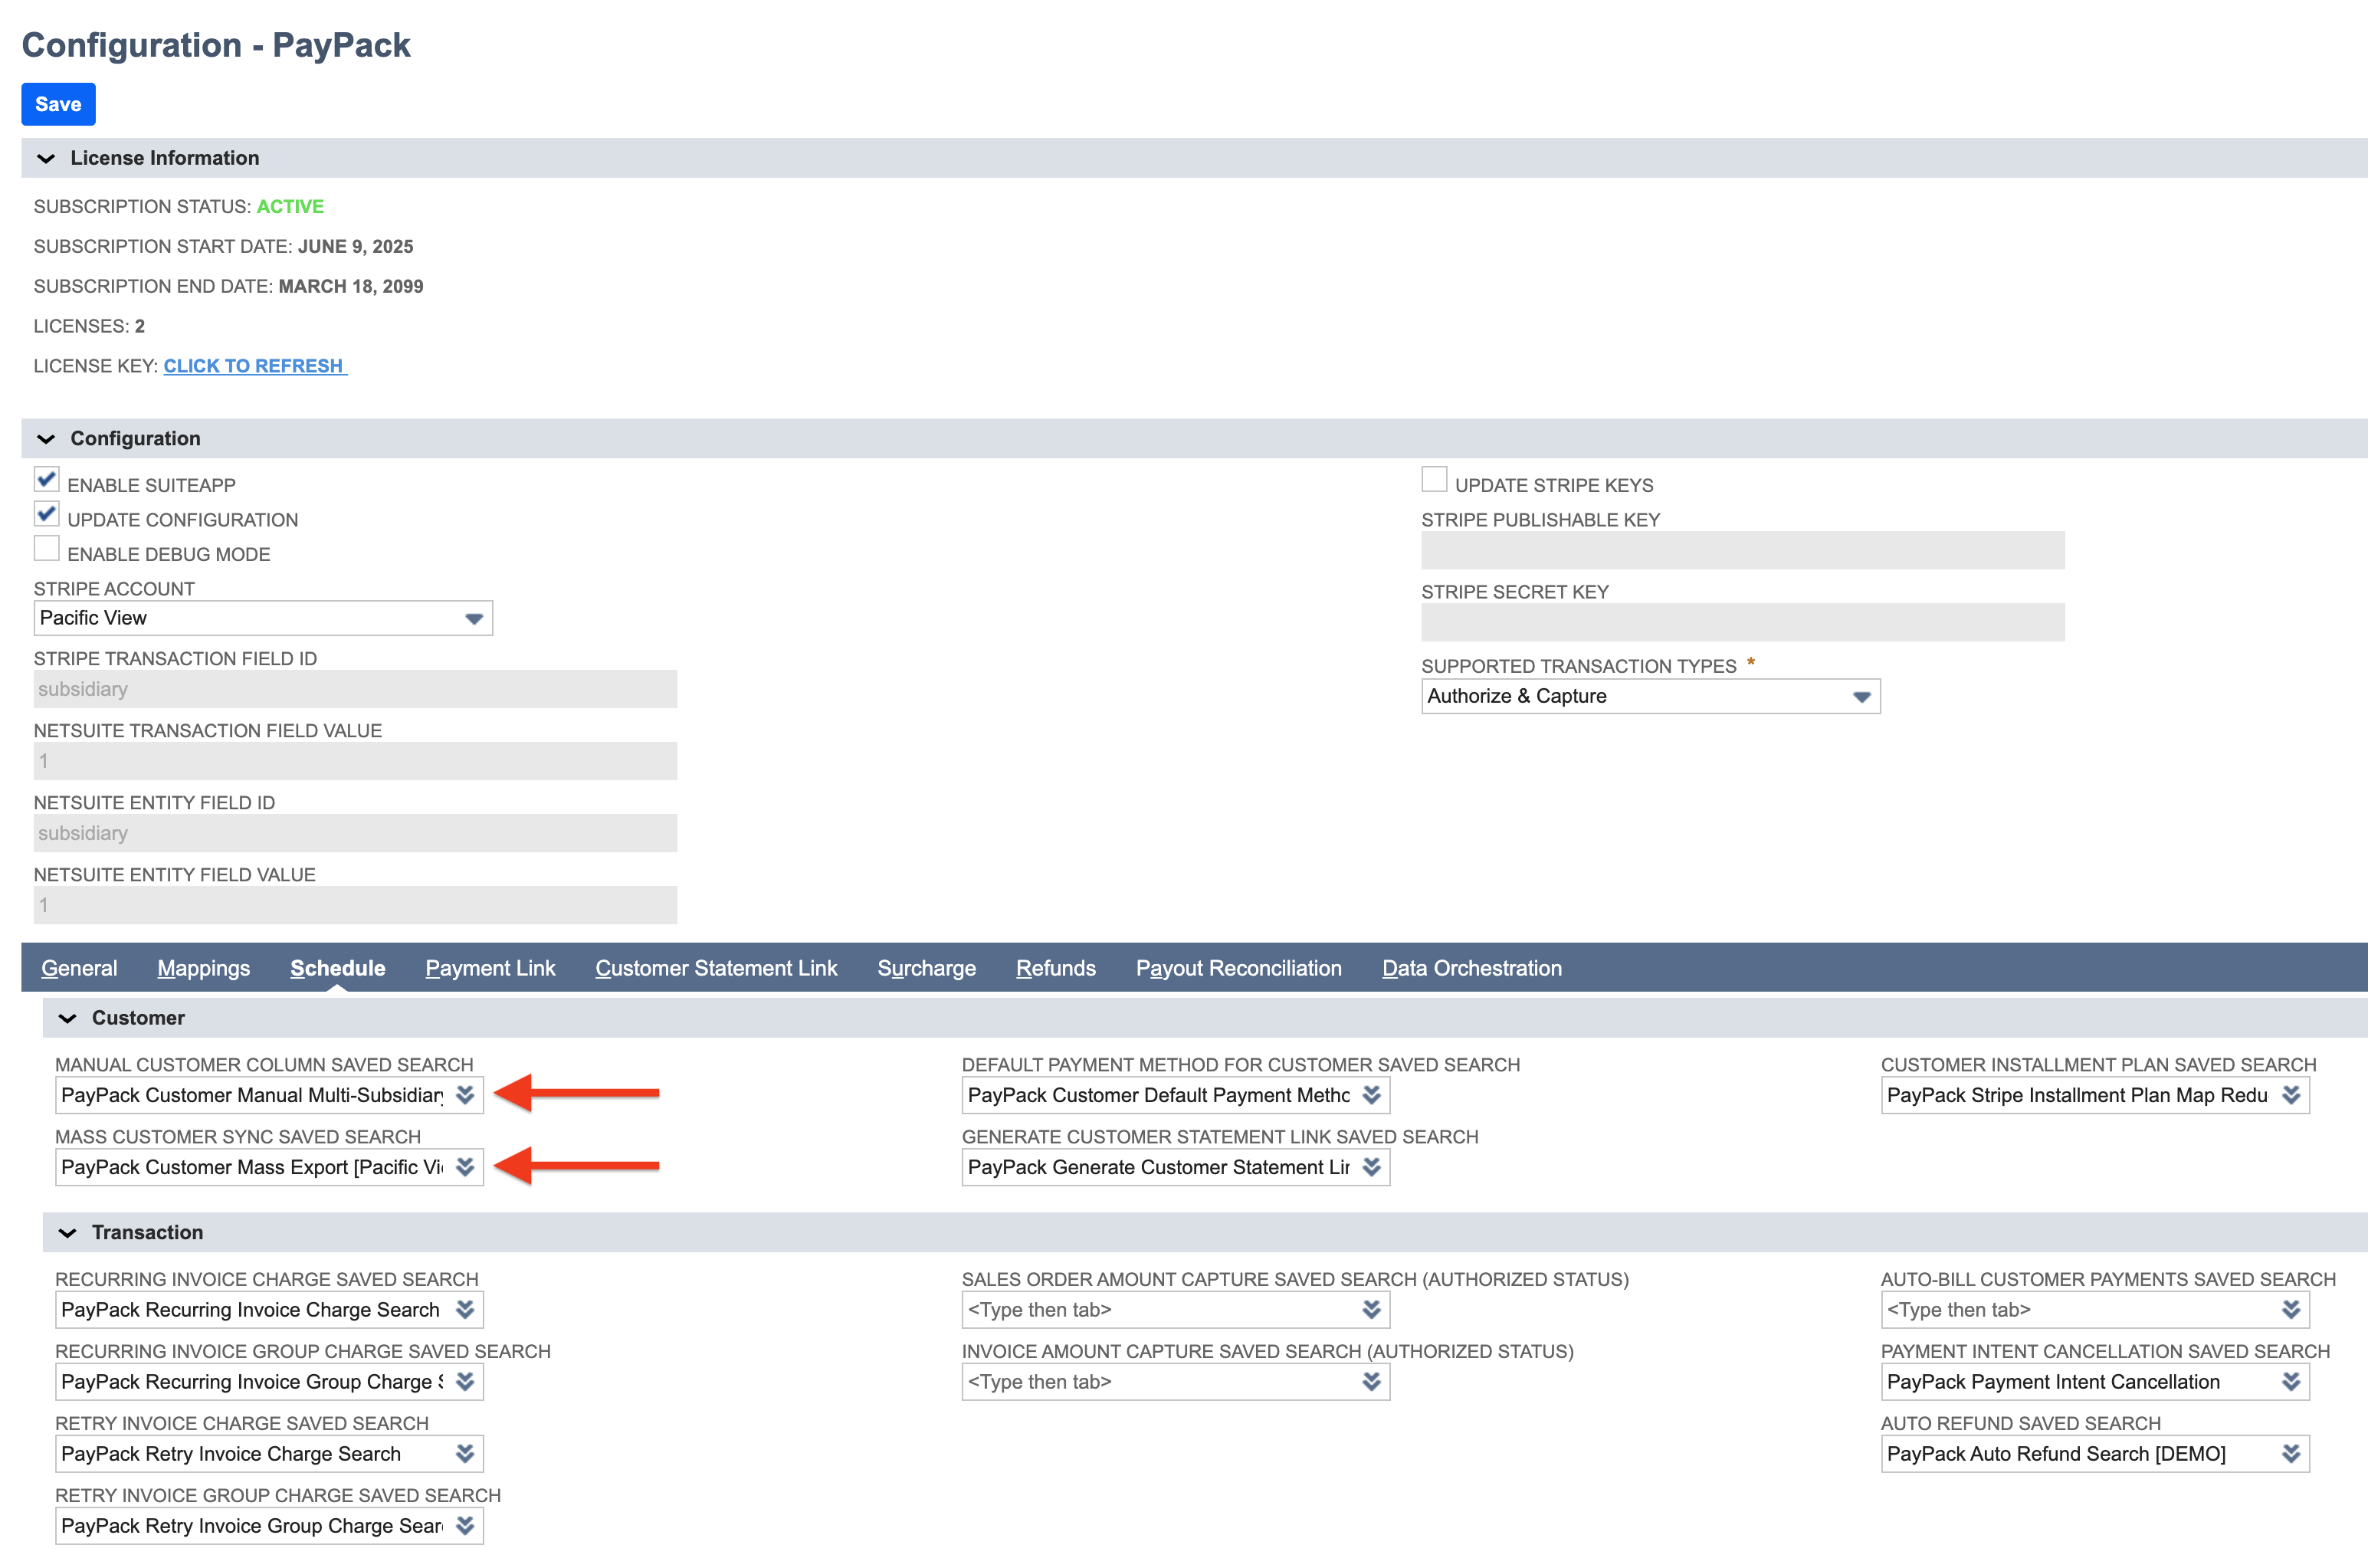
Navigate to PayPack → Setup → Configuration.
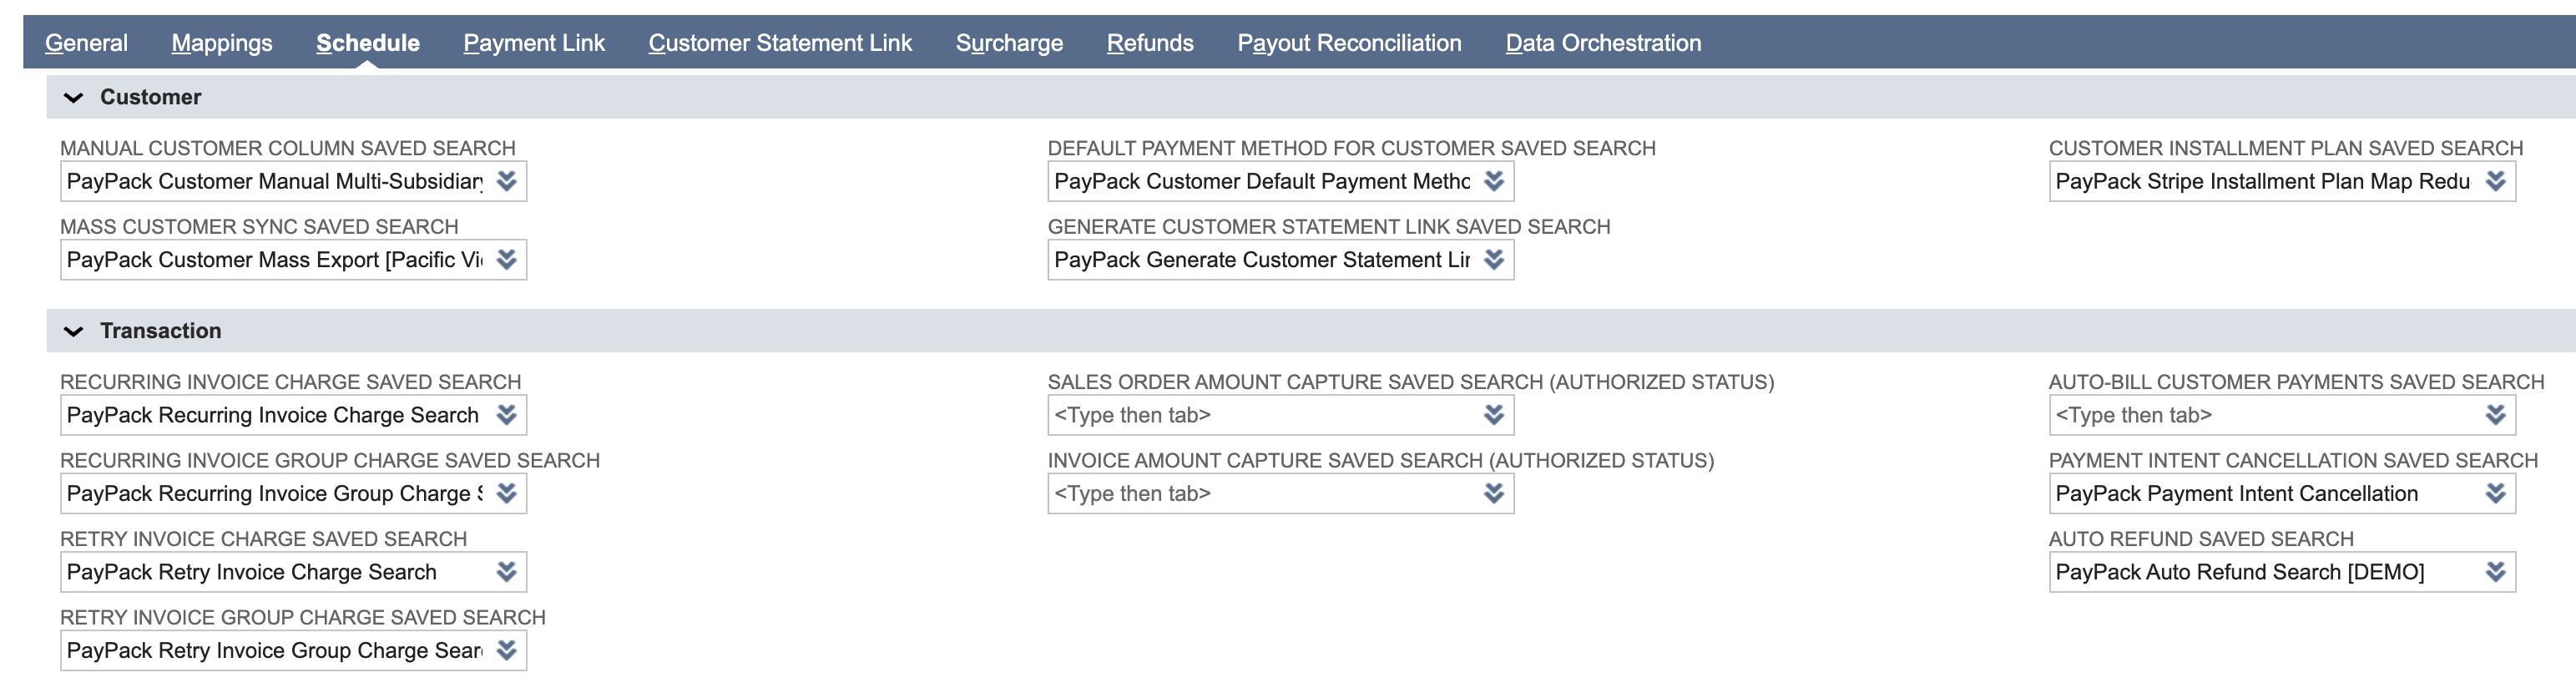
Customer Sync: Use the saved search templates
PayPack Customer Manual Multi-Subsidiary ExportandPayPack Customer Mass Export. See the customer sync help article for reference.Copy this search for each subsidiary, modify the criteria to filter by that specific subsidiary, and update the saved search per PayPack Configuration.
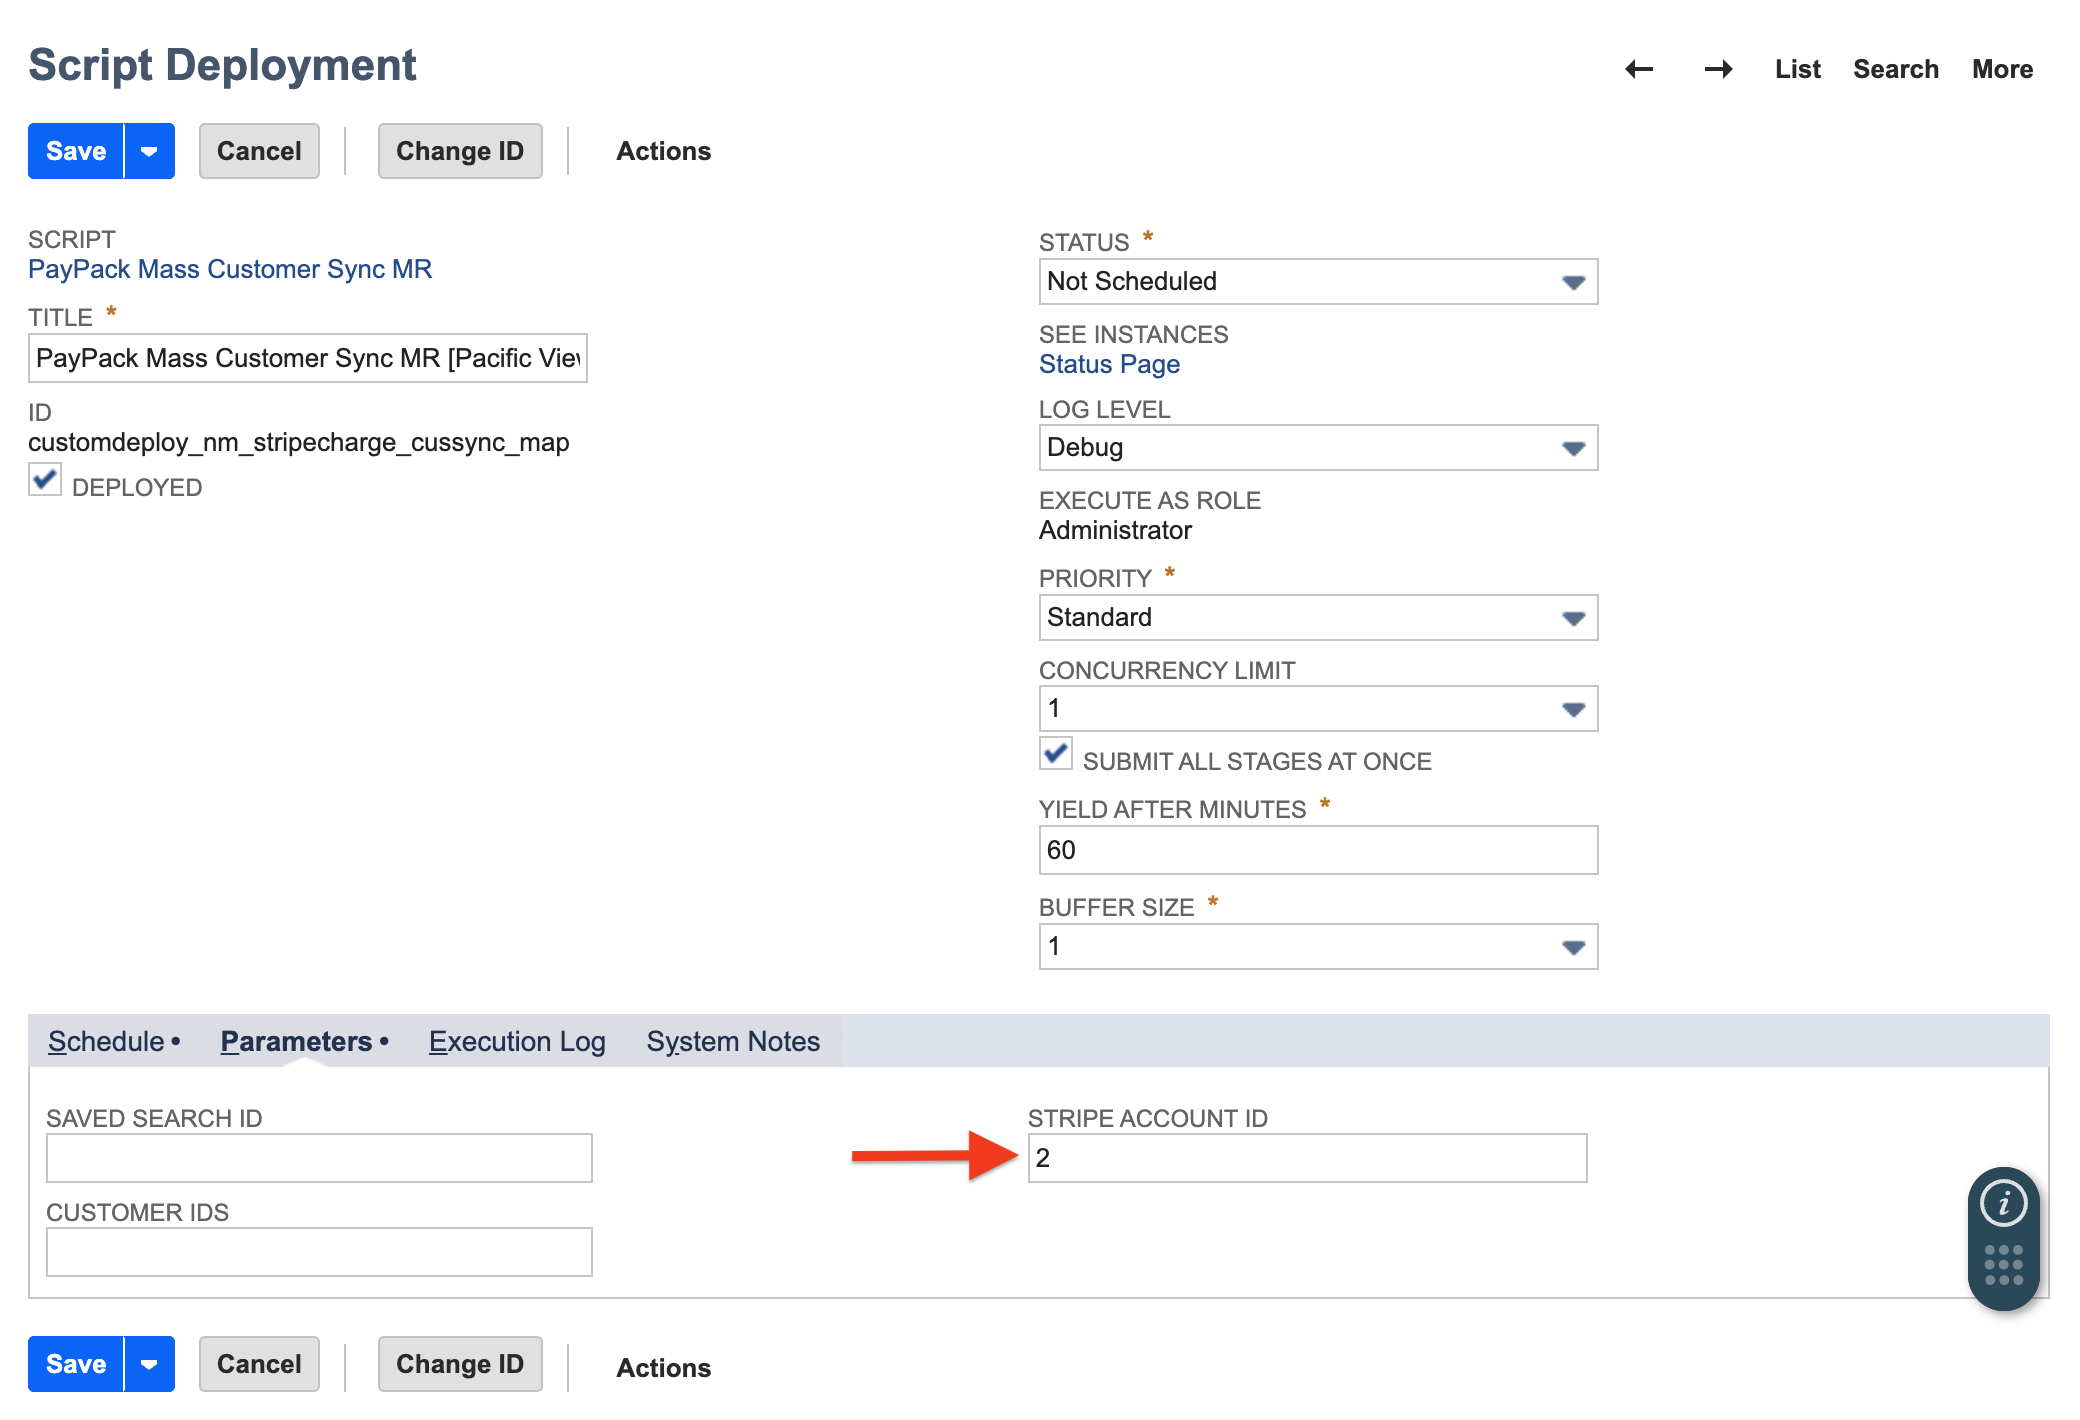
Deploy separate instances of the Map/Reduce script, PayPack Mass Customer Sync MR, for each Stripe account.
Enter the internal ID of the relevant Stripe Account record in the Stripe Account Identifier parameter.
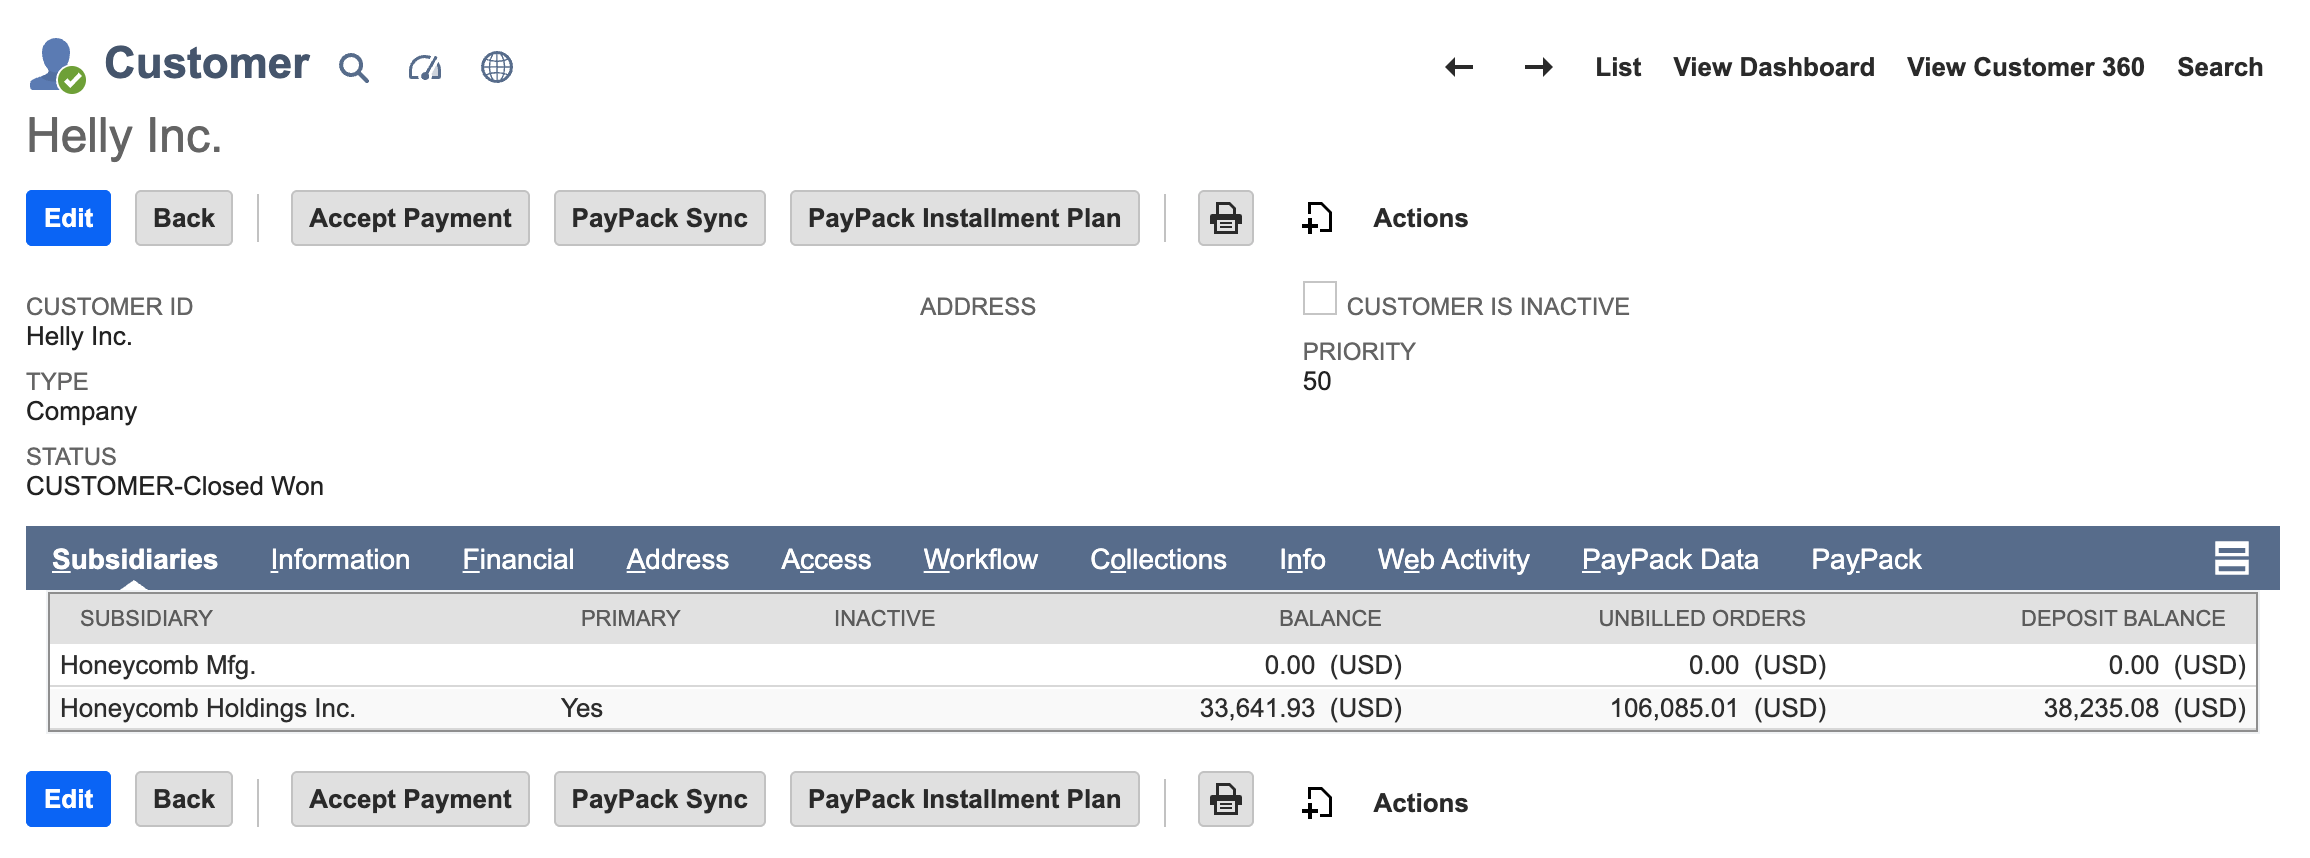
In the example NetSuite Customer, multi-subsidiary feature is enabled and the Customer belongs to 2 subsidiaries.
When the NetSuite Customer is successfully synced to both Stripe accounts, new custom records will be created under PayPack Stripe Multi Subsidiary Customer.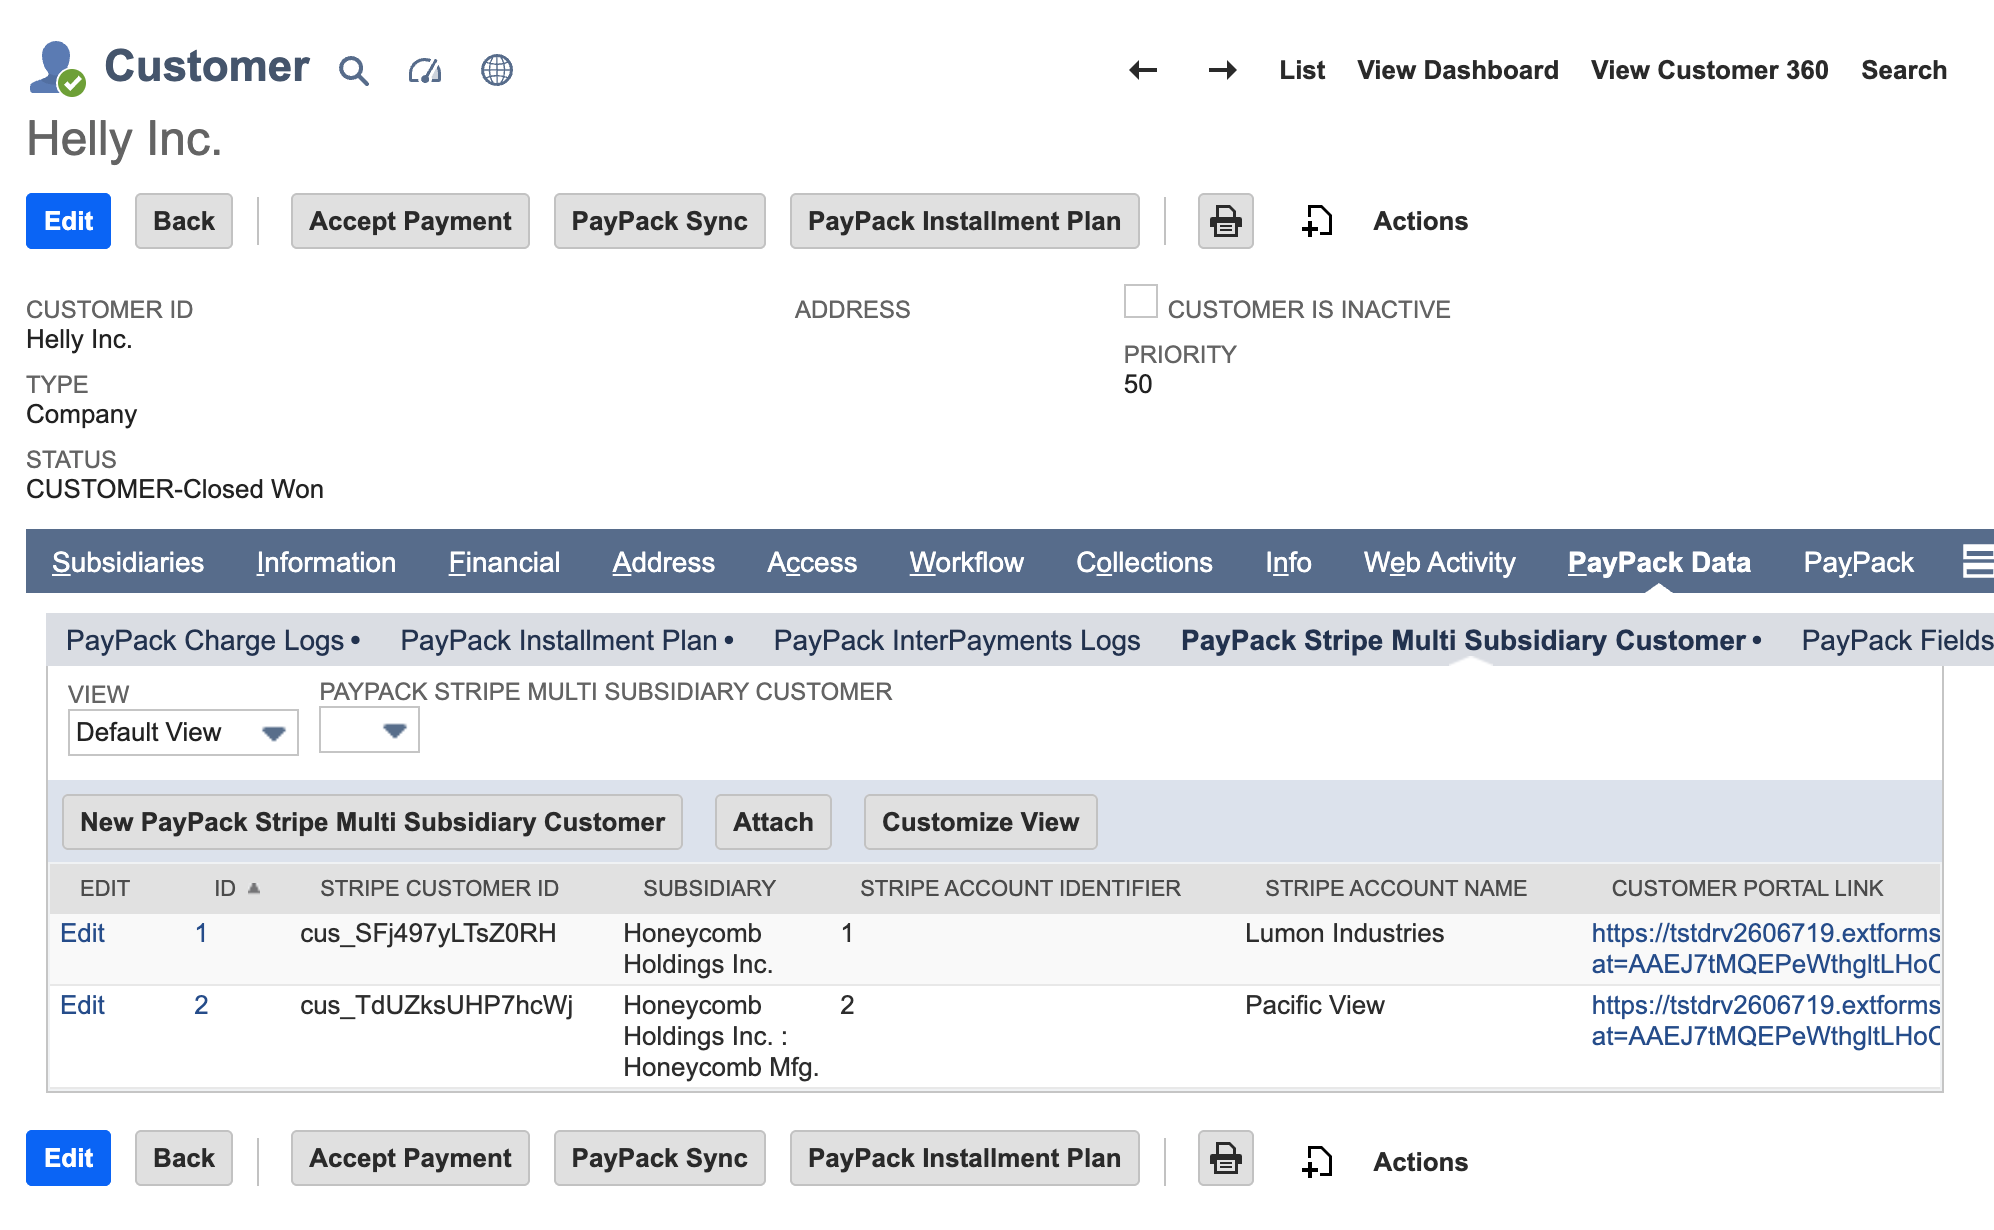
Saved Search Schedules
When using multi-account configuration, a script will need to be deployed for each PayPack configuration. Wherever a saved search is populated in the schedule tab, multiple script deployments will be required to run for each Stripe account.
Example scripts that need multiple script deployments:
Payment Intent Cancellation (PayPack Payment Intent Cancel MR):
Copy the saved search PayPack Payment Intent Cancellation for each account.
Update the saved searches in the Schedule tab of the respective PayPack Configuration records.
Create separate script deployments for each account using the Stripe Account Identifier. See the payment intent cancellation help article for reference.
Payout Reconciliation (PayPack Payout Process MR):
Enable Payout Reconciliation in each PayPack Configuration page.
Follow the payout reconciliation help article to set up multi-account configurations.
User Experience in NetSuite
Once configured, users will see the following enhancements:
Add/Charge Card: On the Customer record under the PayPack tab, dropdowns will display available Stripe customers in the format:
Subsidiary Name - Stripe Account Name - Stripe Customer ID.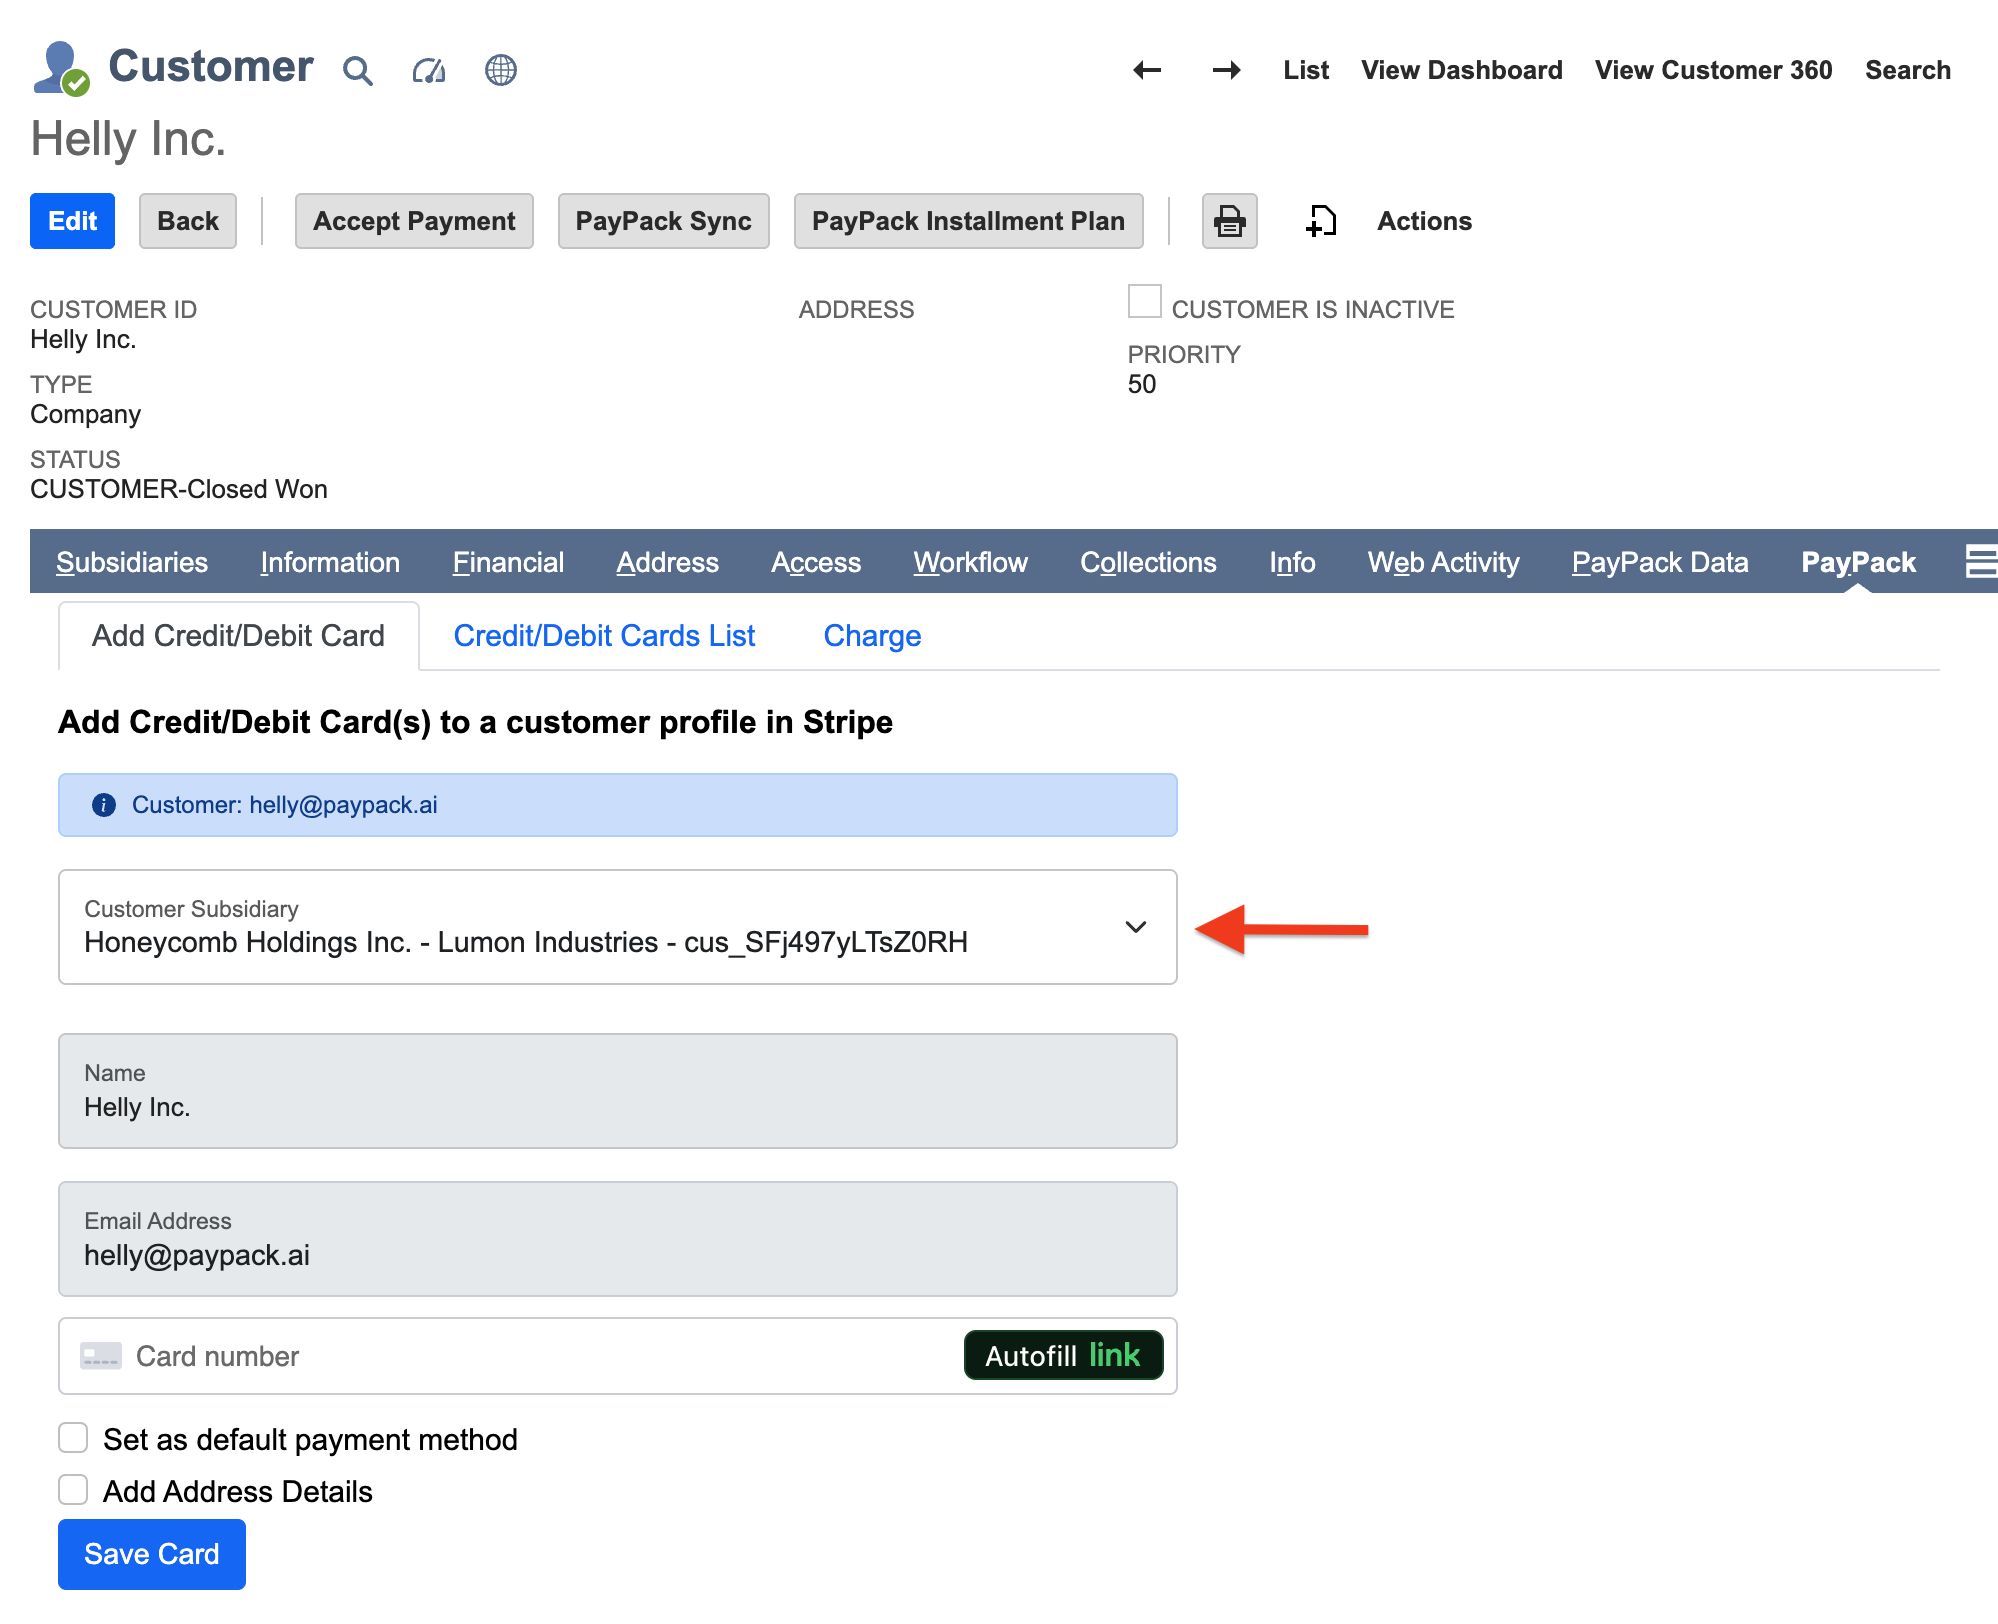
Configuration Access: Each Stripe account has a distinct configuration page, allowing for tailored settings for surcharges, customer handling, and payout reconciliation.